

Summarize this article with:
Forget standing over a hot stove assembling individual tacos for a hungry crowd. Learning how to make taco casserole transforms your favorite Mexican flavors into one satisfying dish that feeds everyone.
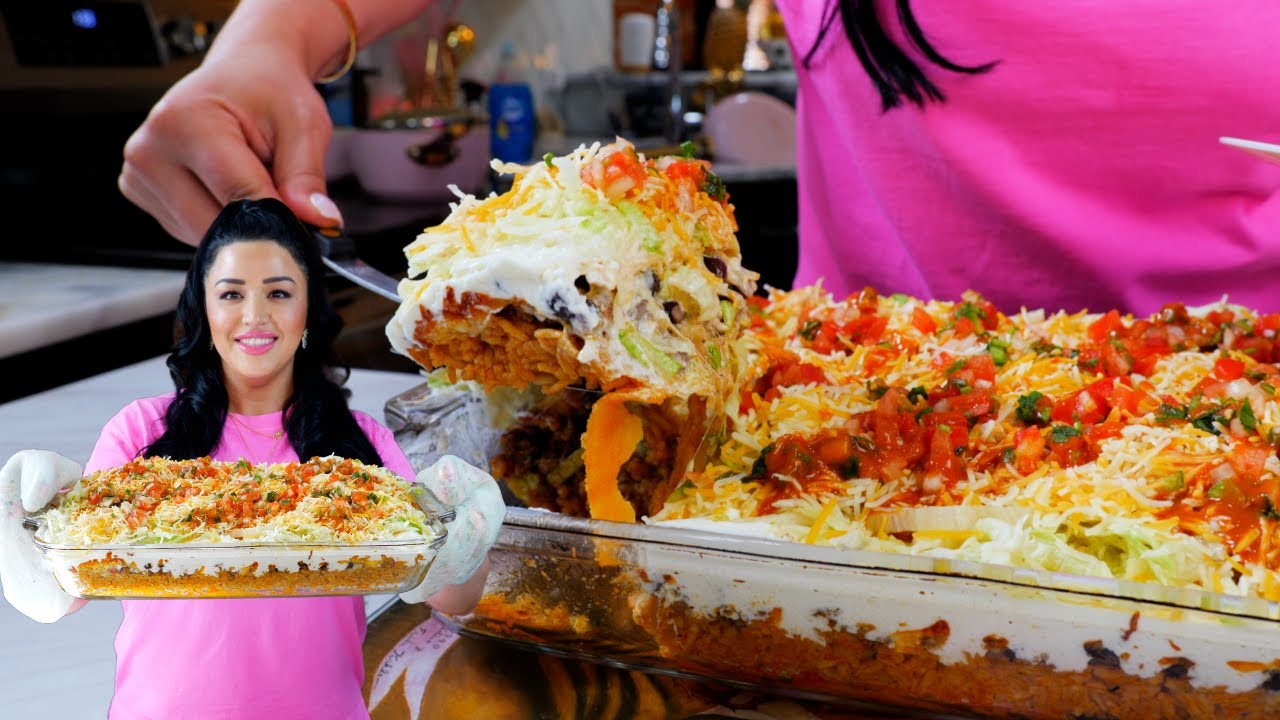
This layered taco bake combines seasoned ground beef, melted cheese, and crunchy tortilla chips in perfect harmony. No more soggy taco shells or messy assembly lines during dinner.
After making this easy taco casserole recipe hundreds of times for family gatherings and potluck events, I’ve perfected every detail. From choosing the right ground beef to preventing soggy bottoms, you’ll master this crowd-pleasing recipe.
This guide covers ingredient selection, step-by-step assembly, customization options for different heat levels, and troubleshooting common problems.
Whether you’re feeding kids who love cheesy comfort food or adults craving authentic Mexican flavors, this weeknight meal delivers every time.
Choosing the Right Ingredients

Protein Options That Actually Taste Good
Ground beef with 80/20 fat ratio delivers the best flavor and moisture. Lean ground beef dries out during the hour-long bake.
Ground turkey works but needs extra seasoning. Add paprika and garlic powder to compensate for milder taste.
Black beans create hearty vegetarian versions. Drain and rinse canned beans thoroughly to prevent mushy textures.
Ground Beef Quality Matters
Fresh ground beef tastes noticeably better than previously frozen. The texture stays firmer during cooking too.
Buy from butcher counters when possible. Pre-packaged ground beef often sits longer on shelves.
Chuck roast ground fresh gives superior flavor compared to generic ground beef blends.
Starch Base Decisions
Tortilla chips provide the classic crunch everyone expects. Tostitos Scoops work perfectly for their sturdy structure.
Fritos corn chips add sweetness that kids love. They hold up better under heavy cheese layers.
Corn tortillas torn into pieces create softer textures. Some families prefer this over crunchy chip bases.
Flour vs Corn Tortilla Considerations
Flour tortillas absorb more liquid during baking. This creates softer, more unified textures.
Corn tortillas maintain better structure and add authentic Mexican flavors. They don’t get soggy as quickly.
Mix both types for texture variety. Layer corn on bottom, flour in middle sections.
Cheese Selection Strategy
Monterey Jack melts smoothly without separating. It’s forgiving for beginning cooks.
Sharp cheddar adds bold flavor but can turn grainy if overheated. Use it sparingly mixed with milder cheeses.
Mexican cheese blends from Sargento or Kraft save time. They’re formulated to melt evenly together.
Processed vs Natural Cheese Options
Velveeta creates ultra-creamy sauces that never separate. Some people find it too artificial tasting.
Natural cheese blocks grated fresh deliver superior flavors. They take slightly more prep time but taste cleaner.
Avoid pre-shredded cheese when possible. Anti-caking agents prevent smooth melting.
Seasoning and Spice Considerations
McCormick taco seasoning packets provide consistent results. Each packet seasons one pound of meat perfectly.
Homemade blends let you control salt levels. Mix chili powder, cumin, paprika, and oregano for basic versions.
Old El Paso packets tend toward saltier flavors. Taste your meat before adding extra salt.
Heat Level Adjustments
Mild versions skip jalapeños and use sweet paprika instead of hot chili powder. Kids appreciate gentler spice levels.
Medium heat comes from diced green chiles. Ortega brand offers perfect amounts in small cans.
Hot versions need fresh jalapeños or serrano peppers. Remove seeds for moderate heat, keep them for serious spice.
Fresh vs Dried Herb Choices
Fresh cilantro brightens finished dishes but wilts during baking. Add it after cooking as garnish.
Dried oregano and cumin handle heat better. They distribute more evenly through meat mixtures too.
Fresh garlic beats powdered versions every time. Mince it fine to prevent burning during browning.
Essential Equipment and Preparation

Choosing the Right Baking Dish
Glass dishes like Pyrex heat evenly and let you monitor browning. They’re dishwasher safe too.
Metal pans heat faster but can create hot spots. Dark-colored pans brown bottoms more quickly.
9×13 inch size feeds 6-8 people generously. 8×8 dishes work for smaller families or side dish portions.
Size Considerations for Serving Numbers
Standard 9×13 dishes need 2-inch depth minimum. Shallow pans overflow with proper ingredient amounts.
Two smaller dishes often work better than one oversized pan. They bake more evenly and serve easier.
Individual ramekins create perfect portion control. Kids love having their own personal casseroles.
Depth Requirements for Layering
Three-inch depth handles generous layering without spillovers. Most ingredients need room to expand during heating.
Shallow dishes force you to reduce ingredients. This compromises the hearty comfort food appeal.
Check your oven clearance before buying extra-deep dishes. Some don’t fit under broiler elements.
Glass vs Metal Pan Differences
Glass conducts heat slowly but retains it longer. Food stays warm for extended serving periods.
Metal pans heat quickly but cool fast too. They’re better for rushed weeknight dinners.
Ceramic dishes split the difference. They look prettier for entertaining but chip more easily.
Prep Tools That Make Life Easier
Large mixing bowls accommodate all ingredients without spillage. Stainless steel cleans easier than plastic.
Wooden spoons won’t scratch non-stick pans during meat browning. They stay cool in your hand too.
Sharp knives make onion dicing faster. Dull blades crush vegetables instead of cutting cleanly.
Mixing Bowls and Utensils
Set of three mixing bowls handles different prep stages. Keep raw meat separate from other ingredients.
Silicone spatulas scrape bowls completely clean. They’re heat-resistant for stirring hot mixtures.
Measuring cups with pour spouts prevent spills. Glass versions show liquid levels clearly.
Cutting and Chopping Needs
Large cutting boards provide workspace for multiple vegetables. Separate boards prevent cross-contamination.
Chef’s knife handles most cutting tasks. Keep it sharp for safety and efficiency.
Box graters work fine for cheese, but food processors save time with large amounts.
Timing Your Prep Work
Brown meat first while other ingredients reach room temperature. Hot skillets need immediate attention.
Prep vegetables during meat cooking. Use that active time efficiently.
Assemble everything before starting. Once you begin layering, work moves quickly.
Make-Ahead Components
Seasoned ground beef keeps 2-3 days refrigerated. Cool completely before storing.
Grated cheese stays fresh overnight in sealed containers. Room temperature cheese melts better.
Pre-chopped vegetables last 24 hours maximum. Cut surfaces dry out and lose flavor quickly.
Day-of Assembly Schedule
Start 2 hours before serving time. This allows for prep, baking, and resting periods.
Brown meat 90 minutes before dinner. Assembly takes 15 minutes, baking needs 45-60 minutes.
Rest finished casserole 10 minutes before cutting. This prevents liquid from running everywhere.
Ingredient Prep Order
Room temperature ingredients blend smoother. Pull cheese and dairy from fridge 30 minutes early.
Dice vegetables last to maintain freshness. They lose moisture sitting at room temperature.
Season meat immediately after browning while it’s still hot. Spices absorb better into warm proteins.
Step-by-Step Cooking Process
Preparing Your Protein Base
Heat a large skillet over medium-high heat. No oil needed if using 80/20 ground beef.
Add ground beef and break it apart with a wooden spoon. Don’t stir constantly – let it brown properly.
Cook for 6-8 minutes until no pink remains. The meat should sizzle steadily without burning.
Browning Meat Properly
Break meat into bite-sized chunks rather than tiny crumbles. Larger pieces create better texture in the finished dish.
Let one side brown before stirring. This develops flavor through the Maillard reaction.
Season with salt and pepper during cooking. Hot meat absorbs seasonings better than cold.
Draining Excess Fat
Tilt the pan and push meat to one side. Spoon out excess grease, leaving about 2 tablespoons.
Too little fat makes dry casserole. Some fat keeps everything moist during baking.
Paper towels work for quick cleanup. Blot the meat gently without pressing hard.
Adding Seasonings and Liquids
Sprinkle taco seasoning packet over hot meat. Stir to coat evenly.
Add water according to packet directions. Usually 2/3 cup per pound of meat.
Simmer 3-4 minutes until liquid reduces slightly. The mixture should look saucy but not soupy.
Achieving the Right Consistency
The meat mixture should coat a spoon but not drip heavily. Think thick chili consistency.
Too dry? Add more water gradually. Too wet? Simmer uncovered longer.
Taste and adjust salt levels now. This is your last chance before assembly.
Building the Perfect Layers
Preheat oven to 350°F. Grease your 9×13 baking dish with butter or cooking spray.
Layer crushed tortilla chips on the bottom. Cover completely but don’t pack down.
Spread half the seasoned meat evenly over chips. No gaps or thin spots.
Bottom Layer Foundation
Corn chips provide the classic base that everyone expects. Fritos work beautifully here.
Press lightly to create stable foundation. Loose chips shift during baking.
Save some chips for topping if desired. The contrast adds visual appeal.
Protein Distribution Techniques
Spread meat to all corners of the dish. Uneven distribution creates dry spots.
Use a spoon to gently level without compacting. Air pockets help with even heating.
Leave 1/2 inch border around edges. This prevents overflow during bubbling.
Cheese Placement Strategy
Sprinkle Mexican cheese blend over meat layer. Use about 1 cup for middle layer.
Cover completely but don’t pile thick. Cheese needs to melt and spread evenly.
Save remaining cheese for final topping. The top layer creates that golden finish.
Top Layer Finishing Touches
Add final meat layer if making double-decker version. Otherwise, proceed to final cheese.
Top with remaining tortilla chips for extra crunch. Crush them slightly first.
Final cheese layer should be generous. This creates the bubbly, golden top everyone loves.
Baking Temperature and Timing
Bake at 350°F for 25-30 minutes until cheese melts and edges bubble. Don’t go higher or bottoms burn.
Cover with foil if top browns too quickly. Remove foil for last 5 minutes.
Rotate dish halfway through for even browning. Some ovens have hot spots.
Covered vs Uncovered Baking
Start covered to heat through evenly. Uncovered final 10 minutes creates golden top.
Foil prevents cheese from burning during long bake times. Tent loosely to avoid sticking.
Remove foil carefully. Steam escapes quickly and burns fingers.
Visual Cues for Doneness
Edges should bubble vigorously when done. Center might bubble less but should be hot.
Cheese turns golden brown, not dark. Black spots indicate overcooking.
Insert knife in center. Should come out steaming hot with no cold spots.
Resting Time Before Serving
Let casserole rest 10-15 minutes before cutting. This prevents liquid from running everywhere.
Cover with clean kitchen towel during resting. Keeps top from forming skin.
Internal temperature should reach 165°F for food safety. Check with instant-read thermometer.
Customization Options for Different Tastes
Heat Level Adjustments
Mild versions skip hot peppers entirely. Use sweet paprika instead of chili powder.
Medium heat adds diced green chiles. Ortega brand offers perfect amounts in small cans.
Hot versions need fresh jalapeños or serrano peppers. Mince fine and distribute evenly.
Mild Versions for Kids
Replace hot taco seasoning with cumin and garlic powder. Kids appreciate gentler flavors.
Use mild cheddar instead of pepper jack. Sharp cheeses can overwhelm young palates.
Add corn kernels for sweetness. Kids love the pop of color and natural sugar.
Medium Spice Alternatives
Diced poblano peppers add flavor without overwhelming heat. Roast them first for smoky taste.
Half regular taco seasoning, half mild works perfectly. You control the exact heat level.
Fresh cilantro brightens medium-heat versions. Add after baking as fresh garnish.
Hot and Spicy Variations
Fresh jalapeños or serranos deliver serious heat. Keep seeds for maximum fire.
Add cayenne pepper to meat mixture. Start with 1/4 teaspoon and build up.
Hot sauce mixed into meat creates even heat distribution. Tabasco works great for this.
Adding Fresh Peppers
Remove seeds and membranes for moderate heat levels. Keep them for serious spice lovers.
Dice peppers uniformly small. Large chunks create uneven heat distribution.
Sauté peppers with onions before adding to meat. This mellows harsh edges.
Dietary Modifications
Ground turkey substitution needs extra seasonings. Add smoked paprika for deeper flavor.
Lean ground beef works but tends toward dryness. Add extra liquid during cooking.
Plant-based ground meat alternatives need stronger seasonings. Double the taco seasoning amount.
Low-Carb Alternatives
Replace tortilla chips with cauliflower rice. Season it well to prevent bland flavors.
Zucchini slices work as bottom layer. Pat dry thoroughly to prevent soggy casserole.
Shirataki noodles provide pasta-like texture. Rinse thoroughly before using.
Gluten-Free Adaptations
Corn tortilla chips are naturally gluten-free. Check labels to be certain.
Make homemade taco seasoning to avoid gluten-containing fillers. Most packets contain wheat.
Use corn tortillas instead of flour versions. They hold up better anyway.
Dairy-Free Cheese Options
Nutritional yeast creates cheesy flavor without dairy. Use 1/4 cup mixed with cashew cream.
Dairy-free cheese shreds melt differently. Follow package directions for best results.
Coconut cream adds richness without cheese. Reduce other liquids accordingly.
Vegetarian and Vegan Versions
Black beans and pinto beans replace meat perfectly. Drain and rinse canned versions.
Lentils work but need pre-cooking. Brown lentils hold shape better than red.
Crumbled firm tofu needs heavy seasoning. Press out water first for better texture.
Regional Style Variations
Tex-Mex approach uses yellow cheese and beef exclusively. Keep it simple and hearty.
California style adds avocado and fresh tomatoes. These go on after baking.
Midwest versions often include corn and sometimes pasta. It’s comfort food territory.
California-Style Additions
Fresh avocado slices on top after baking. Lime juice prevents browning and adds tang.
Pico de gallo as fresh topping. Make it while casserole bakes for best flavor.
Fresh lettuce provides cool contrast. Shred it fine and add just before serving.
Midwest Comfort Food Tweaks
Egg noodles mixed in create heartier textures. Cook them separately first.
Cream of mushroom soup makes it creamier. Use one can mixed into meat.
Frozen corn kernels add sweetness kids love. No need to thaw before adding.
Southwestern Influences
Green chiles and lime juice create authentic southwestern flavors. Use Hatch chiles when available.
Cumin becomes the dominant spice. Use more than typical taco seasoning calls for.
Mexican crema or sour cream on top. Thin it slightly for easier drizzling.
Toppings and Serving Suggestions

Fresh Toppings That Add Brightness
Shredded lettuce provides cool contrast against hot, cheesy layers. Iceberg stays crisper than romaine.
Diced tomatoes need proper draining. Salt them lightly and let sit 10 minutes before serving.
Red onion adds sharp bite that cuts through rich flavors. Slice thin for best texture.
Lettuce and Greens
Crisp lettuce works better than soft varieties. Butter lettuce wilts instantly on hot casserole.
Shred lettuce just before serving. Pre-cut greens turn brown and lose crunch quickly.
Cabbage slaw adds different texture. Mix with lime juice for Mexican street food vibes.
Tomato Preparation
Fresh tomatoes beat canned for topping purposes. Choose firm, ripe varieties that won’t get mushy.
Remove seeds to prevent watery mess. Cut tomatoes in half and scoop out gel centers.
Cherry tomatoes work great halved. They’re naturally sweeter than large slicing tomatoes.
Onion Options
White onions provide sharpest flavor. Yellow onions taste milder after sitting on hot food.
Soak sliced onions in cold water 15 minutes. This removes harsh bite while keeping crunch.
Green onions work as milder alternative. Use both white and green parts for color contrast.
Cilantro and Herb Choices

Fresh cilantro brightens every bite. Wash thoroughly and chop just before serving.
Mexican oregano tastes different from regular oregano. It’s more floral and citrusy.
Fresh lime juice over cilantro prevents browning. Squeeze it right before serving.
Creamy and Rich Additions
Sour cream cooling effect balances spicy heat levels perfectly. Use full-fat versions for best taste.
Mexican crema offers richer flavor than regular sour cream. Thin it slightly for easier drizzling.
Plain Greek yogurt provides tangy alternative with extra protein. Choose whole milk varieties.
Sour Cream Applications
Room temperature sour cream spreads easier than cold. Pull from fridge 30 minutes early.
Mix with lime juice and cumin for enhanced flavor. This creates simple Mexican crema substitute.
Dollop on individual servings rather than spreading over entire dish. People can control their portions.
Guacamole Pairings
Fresh guacamole trumps store-bought every time. Make it while casserole bakes.
Ripe avocados mash smoothly with fork. Leave some small chunks for texture variation.
Add lime juice immediately to prevent browning. Plastic wrap pressed directly on surface helps too.
Sauce Drizzles
Hot sauce adds customizable heat. Provide multiple varieties for different preferences.
Lime crema creates restaurant-quality finish. Mix sour cream, lime juice, and pinch of salt.
Enchilada sauce drizzled over adds authentic Mexican flavors. Warm it slightly first.
Cheese Finishing Touches
Queso fresco crumbles add authentic Mexican touch. Its mild flavor won’t compete with casserole.
Cotija cheese provides salty punch similar to parmesan. Grate fresh for best results.
Fresh mozzarella torn into pieces melts slightly on hot casserole. Use it sparingly.
Side Dish Pairings

Mexican rice complements without competing. Keep seasonings simple to let casserole shine.
Refried beans create hearty combination. Choose quality brands like Old El Paso or make fresh.
Black beans seasoned with cumin work as lighter alternative. Drain and rinse canned versions.
Rice and Bean Combinations
Spanish rice recipe pairs naturally with taco flavors. Use chicken broth instead of water for richness.
Cilantro lime rice brightens the plate. Add fresh herbs after cooking for best color.
Pinto beans work as traditional choice. Season with garlic and onion powder.
Salad Options
Simple green salad with lime vinaigrette cuts through rich casserole. Keep dressing light.
Salad that goes with Mexican food provides cooling contrast. Choose crisp vegetables that won’t wilt.
Corn and black bean salad adds Southwestern flair. Dress with lime juice and olive oil.
Bread Alternatives
Warm corn tortillas let people make impromptu tacos. Heat them on dry skillet briefly.
Cornbread complements without overwhelming. Choose slightly sweet versions for best balance.
Flour tortillas work for wrapping leftovers. Soft taco shells provide similar function.
Beverage Suggestions
Ice-cold beer cuts through rich, cheesy flavors perfectly. Light lagers work best.
Agua frescas provide non-alcoholic refreshment. Watermelon or cucumber varieties cool spicy heat.
Iced tea with lime offers Southern comfort food pairing. Sweet tea works for kids.
Storage and Reheating Methods

Proper Storage Techniques
Cool casserole completely before refrigerating. Hot food raises fridge temperature dangerously.
Cover tightly with plastic wrap or foil. Air exposure dries out cheese and creates off flavors.
Store up to 4 days maximum. Ground beef doesn’t last as long as other leftovers.
Refrigerator Storage Best Practices
Cut into serving portions before storing. This makes reheating faster and more even.
Label containers with date made. Taco casserole looks similar to other Mexican leftovers.
Store toppings separately from casserole. Fresh ingredients stay crisp longer this way.
Freezing Considerations
Wrap twice for freezer storage. Plastic wrap first, then aluminum foil prevents freezer burn.
Freeze up to 3 months for best quality. Beyond that, textures start breaking down.
Thaw overnight in refrigerator. Never thaw at room temperature due to food safety concerns.
Portion Control for Leftovers
Individual portions reheat more evenly than large pieces. Cut while casserole is cool.
Freezer containers work better than bags. Square containers stack efficiently and prevent crushing.
Leave space in containers for expansion. Frozen food takes up more room than fresh.
Reheating Without Losing Quality
Oven reheating preserves texture better than microwave. Cover with foil to prevent drying.
350°F for 20-25 minutes heats through completely. Check center with knife for doneness.
Add splash of water if casserole looks dry. Steam helps restore moisture during heating.
Oven Reheating Methods
Preheat oven fully before inserting cold casserole. Gradual heating prevents cracking dishes.
Cover tightly with foil for first 15 minutes. Remove cover for last 5-10 minutes to crisp top.
Individual portions heat in 10-15 minutes. Larger pieces need 25-30 minutes minimum.
Microwave Techniques
Pierce plastic wrap to vent steam. Trapped steam makes soggy textures.
50% power works better than full power. Slower heating prevents hot spots and cold centers.
Stir halfway through if possible. This distributes heat more evenly throughout.
Adding Moisture Back
Sprinkle water lightly over surface before reheating. About 1 tablespoon per serving works.
Damp paper towel over dish creates steam. Remove paper towel before final heating minutes.
Extra shredded cheese on top refreshes appearance. Melted cheese looks fresher than reheated.
Refreshing Toppings
Never reheat fresh toppings with casserole. They turn soggy and lose appeal.
Prepare fresh lettuce and tomatoes for reheated portions. This maintains original eating experience.
Sour cream and guacamole should always be fresh. Reheated dairy products taste off.
Troubleshooting Common Problems
Texture Issues and Solutions
Soggy bottom layers happen when chips absorb too much liquid. Use less water in taco seasoning mix.
Pre-bake tortilla chips for 5 minutes before assembly. This creates moisture barrier that holds up better.
Pat ground beef dry after seasoning. Excess grease makes everything mushy.
Soggy Bottom Prevention
Layer chips thicker on bottom for better absorption. Single layers get overwhelmed quickly.
Choose sturdy corn chips over thin varieties. Tostitos Scoops work better than regular tortilla chips.
Drain diced tomatoes thoroughly before adding. Salt them first to draw out water.
Dry Casserole Fixes
Add extra liquid during meat cooking. Start with 1/4 cup water or beef broth.
Cover dish tightly during first 20 minutes of baking. Steam keeps everything moist.
Mix sour cream into meat layer before assembly. This adds richness without changing flavor.
Uneven Cooking Problems
Rotate dish halfway through baking to compensate for oven hot spots. Most ovens heat unevenly.
Cut ingredients uniform sizes for consistent cooking times. Large chunks heat slower than small pieces.
Let ingredients reach room temperature before assembly. Cold spots stay cold longer.
Burnt Top Solutions
Lower oven temperature to 325°F and extend cooking time. High heat burns cheese before centers heat.
Cover with foil if browning too quickly. Remove during last 10 minutes for golden finish.
Move oven rack down one position. Top heating elements can be too aggressive.
Flavor Problems and Adjustments
Taste meat mixture before assembly. This is your last chance to fix seasoning issues.
Under-seasoned casserole needs salt more than spices. Add it gradually to avoid oversalting.
Bland flavors often need acid. Lime juice or diced tomatoes brighten everything.
Bland Seasoning Fixes
Double the taco seasoning if using lean ground turkey. It needs more flavor than beef.
Add cumin and chili powder separately. Sometimes packet seasonings aren’t strong enough.
Fresh garlic beats powder every time. Mince it fine and cook with the meat.
Too Salty Corrections
Add diced potatoes to absorb excess salt. Remove them before serving if desired.
Dairy products neutralize salt. Extra sour cream or cheese helps balance flavors.
Increase other ingredients proportionally. More meat and vegetables dilute saltiness.
Heat Level Adjustments After Cooking
Sour cream and lime juice cool down overly spicy casseroles. Serve them on the side.
Wine that goes with chili can help balance heat for adult diners. Choose light, fruity varieties.
Honey mixed into sour cream creates sweet cooling effect. Kids especially love this combination.
Missing Flavor Components
Umami depth comes from tomato paste or Worcestershire sauce. Add 1 tablespoon to meat mixture.
Fresh herbs added after baking brighten flat flavors. Cilantro works best for Mexican dishes.
Lime zest in cheese mixture adds brightness without extra liquid. Use microplane for fine grating.
Common Assembly Mistakes
Overpacking layers prevents even heating. Loose assembly works better than compressed.
Skipping edge coverage leaves dry spots. Spread ingredients to corners of dish.
Cold ingredients straight from fridge shock hot meat. Let everything reach room temperature first.
Cheese Melting Issues
Pre-shredded cheese often won’t melt smoothly due to anti-caking agents. Grate fresh blocks instead.
Processed cheese like Velveeta melts more consistently. Mix with natural cheese for best results.
High heat makes cheese rubbery. Keep oven at 350°F maximum for proper melting.
Timing and Temperature Problems
Undercooked centers need longer baking time, not higher temperature. Check with knife for doneness.
Overcooked edges while center stays cold means oven runs hot. Use oven thermometer to verify temperature.
Resting time prevents liquid from running when cut. Wait 10-15 minutes before serving.
Equipment-Related Issues
Glass dishes heat slower than metal pans. Add 10-15 minutes to baking time.
Wrong pan size affects cooking times. Too large spreads ingredients thin; too small creates thick layers.
Shallow dishes overflow during bubbling. Use pans with 2-3 inch sides minimum.
Ingredient Substitution Problems
Ground turkey dries out faster than beef. Add extra liquid and fat during cooking.
Dairy-free cheese alternatives melt differently. Follow package directions for best results.
Gluten-free seasonings may taste different. Check labels and adjust amounts accordingly.
FAQ on How To Make Taco Casserole
Can I make taco casserole ahead of time?
Yes, assemble the casserole up to 24 hours before baking. Cover tightly and refrigerate. Add 10-15 minutes to baking time if starting from cold. For best results, bring to room temperature 30 minutes before cooking.
What’s the best meat for taco casserole?
Ground beef with 80/20 fat ratio works best. The fat keeps the casserole moist during baking. Ground turkey needs extra seasoning and liquid. Lean beef tends to dry out, so add extra moisture if using.
How do I prevent soggy bottom layers?
Use sturdy corn tortilla chips like Tostitos Scoops. Pre-bake chips for 5 minutes before assembly. Drain excess grease from seasoned ground beef, leaving just 2 tablespoons. Pat diced tomatoes dry before adding.
Can I freeze taco casserole?
Wrap twice in plastic wrap, then foil. Freezes up to 3 months. Thaw overnight in refrigerator before baking. Add 15-20 minutes to cooking time. Assembled but unbaked casseroles freeze better than cooked ones.
What cheese works best for melting?
Mexican cheese blend or combination of cheddar and Monterey Jack melts smoothly. Avoid pre-shredded cheese when possible – anti-caking agents prevent smooth melting. Grate fresh blocks for best results and even coverage.
How long does taco casserole last in the fridge?
Store covered for up to 4 days maximum. Ground beef doesn’t last as long as other leftovers. Cut into portions before storing for easier reheating. Store fresh toppings separately to maintain crispness.
Can I make it without tortilla chips?
Yes, use corn tortillas torn into pieces or cooked rice as base layer. Pasta works for Midwest-style versions. Cauliflower rice creates low-carb alternative. Each substitute changes texture but maintains Mexican flavors.
What if my casserole turns out too dry?
Add extra liquid during meat cooking – water, beef broth, or diced tomatoes work. Cover dish during first 20 minutes of baking. Mix sour cream into meat layer before assembly for extra richness.
How do I know when it’s done baking?
Edges should bubble vigorously and cheese turns golden brown. Insert knife in center – should come out steaming hot. Internal temperature should reach 165°F. Let rest 10-15 minutes before cutting.
Can I make vegetarian taco casserole?
Replace ground beef with black beans and pinto beans. Crumbled firm tofu works but needs heavy seasoning. Lentils require pre-cooking. Season vegetarian proteins more heavily than meat versions for best flavor.
Conclusion
Mastering how to make taco casserole transforms busy weeknight dinners into something special. This one-dish meal combines all your favorite Mexican flavors without the assembly line chaos of traditional tacos.
The beauty lies in its flexibility. Adjust heat levels for different family members, swap ground turkey for beef, or create vegetarian versions with black beans. Meal prep enthusiasts love how it freezes beautifully and reheats perfectly.
From potluck gatherings to Sunday family dinners, this hearty comfort food pleases crowds every time. The layered structure ensures every bite delivers melted cheese, seasoned meat, and that satisfying crunch from tortilla chips.
Perfect your technique with quality ingredients, proper layering, and patient baking. Soon you’ll have a go-to recipe that rivals any restaurant version. Your family will request this Mexican casserole repeatedly, and you’ll confidently deliver delicious results every time.


