

Summarize this article with:
The smell of simmering hominy and chile-stained broth fills Mexican kitchens during celebrations, cold evenings, and lazy Sundays. Learning how to make pozole connects you to a pre-Columbian tradition that’s survived centuries.
This isn’t complicated cooking. It’s patient cooking.
You’ll master three regional styles, understand which cuts of pork shoulder work best, and discover why hominy preparation makes or breaks the entire dish. By the end, you’ll know exactly how to build deeply flavored broth, create authentic chile sauce, and serve pozole the way Mexican families have for generations.
The process takes time, but the steps are straightforward.
Understanding Pozole Fundamentals

What Pozole Actually Is
Pozole is a Mexican hominy stew with roots stretching back to pre-Columbian times. The dish centers around nixtamalized corn kernels that have been treated with cal (calcium hydroxide) until they puff up and soften.
Think of it as Mexico’s answer to comfort food. Rich, hearty, and meant for sharing.
The name comes from the Nahuatl word “pozolli,” which roughly translates to “foamy” or “bubbly.” That makes sense when you see the hominy bobbing around in the broth.
Three Main Regional Varieties and Their Distinct Characteristics
Pozole rojo gets its deep red color from dried guajillo and ancho chiles. It’s the most common version you’ll find, especially in Jalisco and surrounding areas.
The chile sauce gives it a slightly smoky, mildly spicy character that pairs well with pork shoulder.
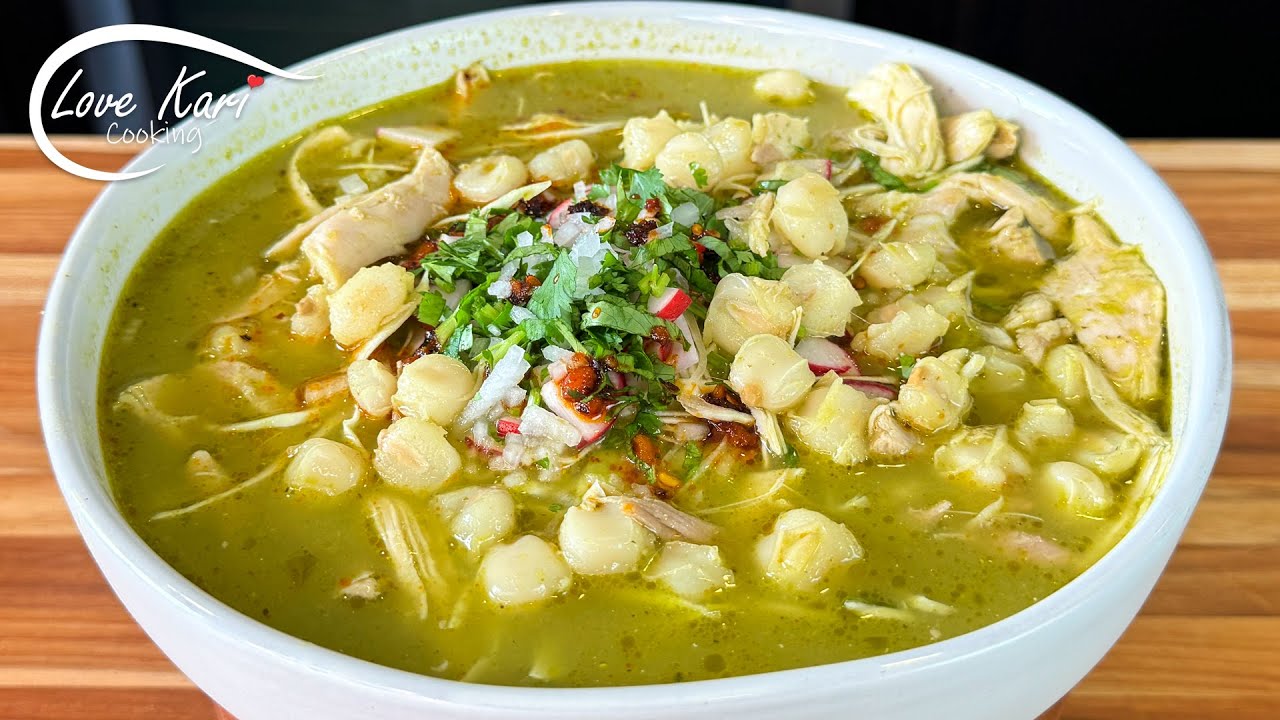
Pozole verde takes a completely different approach with fresh ingredients. Tomatillos, pepitas (pumpkin seeds), and a handful of fresh herbs create that signature green color.
This version tends to be brighter and more herbaceous. Some people prefer it with chicken instead of pork.
Pozole blanco is the simplest of the three. No chile sauce, no green ingredients, just pure broth seasoned with aromatics.
Guerrero-style white pozole lets the hominy and meat shine without any color interference. It’s less common but deeply traditional.
Common Misconceptions About Pozole vs. Other Mexican Soups
Look, pozole isn’t just another soup. The hominy is what sets it apart from every other Mexican stew out there.
Some people confuse it with menudo (which uses tripe instead of hominy). Others think it’s similar to what Thai cuisine offers, but the flavor profiles couldn’t be more different.
The cooking time alone separates pozole from quicker soups. This isn’t a 30-minute meal.
Core Ingredients That Define Pozole

Hominy Selection
The hominy corn forms the backbone of this dish. You can buy it canned or dried, and honestly, both work.
Canned hominy saves you hours of prep time. Just drain, rinse, and add it to your pot.
Dried hominy requires overnight soaking and several hours of cooking before it reaches that signature tender-yet-firm texture. Worth it if you’ve got the time.
Meat Choices
Traditional recipes call for pork shoulder or pork butt. These cuts have enough fat to keep the broth rich and the meat tender after hours of simmering.
Chicken pozole has become popular for those who want a lighter version. You’ll need to adjust cooking times since chicken cooks faster than pork.
Vegetarian versions exist, though they require extra effort to build depth without meat stock. Mushrooms and beans can add protein and substance.
Chile Peppers That Create the Signature Flavor Profile
For red pozole, guajillo chiles provide the base. They’re mild, slightly sweet, and give you that classic red color.
Ancho chiles add depth and a hint of dried fruit flavor. California chiles work too if you can’t find the others.
Chile de árbol comes in later as a tableside option for people who want extra heat. Never cook it into the broth unless you want to blow everyone’s taste buds off.
Equipment You’ll Need
Stock Pot Size and Material Considerations
Get yourself a large stock pot. We’re talking at least 8 quarts, maybe 10 if you’re feeding a crowd.
Heavy-bottomed pots distribute heat more evenly and prevent scorching. Stainless steel or enameled cast iron both work well.
Aluminum pots heat up fast but can react with acidic ingredients. Not ideal here.
Blender or Food Processor for Chile Sauce
You’ll need something powerful enough to puree rehydrated chiles into a smooth sauce. A regular blender handles this fine.
Food processors work too, though they sometimes leave the sauce a bit chunkier. Not necessarily a bad thing.
Immersion blenders struggle with dried chile skins. Save yourself the frustration and use a countertop model.
Optional Tools That Make the Process Easier
A fine-mesh strainer helps if you want silky-smooth chile sauce. Some people skip this step and embrace the rustic texture.
A ladle with a skimming edge makes removing foam and impurities easier during the first hour of cooking. Regular spoons work too, just takes longer.
Tongs are handy for pulling out whole onions and bay leaves before serving.
Choosing Your Pozole Style
Pozole Rojo (Red Pozole)

Characteristic Dried Chiles Used
Guajillo chiles form the foundation of most red pozole recipes. They’re long, smooth-skinned, and moderately spicy.
Ancho chiles (dried poblanos) add sweetness and complexity. Their wrinkled, almost black appearance shouldn’t fool you. They’re quite mild.
Some cooks throw in one or two chiles de árbol for extra kick, but this isn’t traditional. Save the heat for the table.
Flavor Profile and Heat Level
Red pozole tastes earthy and slightly smoky with underlying sweetness from the chiles. The heat level stays moderate, maybe a 4 out of 10.
The long simmer mellows out any sharp edges from the chile sauce. What you’re left with is rounded, deep flavor that coats your tongue without burning it.
Mexican oregano and cumin often make appearances, though some purists skip the cumin entirely.
Regional Variations in Preparation
Jalisco claims pozole rojo as its own, often serving it on Thursdays as a tradition. Their version typically uses both pork shoulder and pork trotters for extra body.
Michoacán’s take includes more garlic and sometimes a splash of vinegar. The trotters are non-negotiable there.
Each family has their own ratio of guajillo to ancho chiles. There’s no single “correct” version.
Pozole Verde (Green Pozole)
Fresh Ingredients That Create the Green Color
Tomatillos provide the tangy base for green pozole. You’ll need about a pound for a standard batch.
Fresh poblano peppers add mild heat and vegetal flavor. Jalapeños work if you want it spicier.
Pepitas (hulled pumpkin seeds) get toasted and blended into the sauce for richness and body. This is what makes green pozole special.
Brightness and Herbaceous Notes
The fresh ingredients create a completely different experience from red pozole. It’s brighter, more acidic, almost zingy.
Cilantro and sometimes epazote get blended right into the sauce. The herbs stay green if you don’t overcook them.
This version pairs beautifully with chicken since the lighter meat doesn’t overpower the delicate herbal notes.
Tomatillo and Pepita Base Differences
Unlike red pozole where you rehydrate dried chiles, green pozole uses fresh ingredients that you roast or boil first. The tomatillos need their papery husks removed and rinsed before cooking.
Pepitas must be toasted until fragrant but not burned. They’ll add a nutty undertone that balances the tomatillo’s tartness.
The sauce stays chunkier than red pozole’s. Some texture is expected.
Pozole Blanco (White Pozole)

Simplicity and Purity of Flavor
White pozole strips everything down to basics. No chile sauce, no green sauce, just hominy, meat, and aromatic broth.
The broth becomes the star here. You’re tasting the pork, the garlic, the onion, and the hominy without any interference.
It’s surprisingly complex despite the minimal ingredient list. Good ingredients really matter in this version.
When to Choose White Over Colored Varieties
White pozole works best when you want to showcase really high-quality pork or when you’re serving people with different spice tolerances. Everyone can add their own heat at the table.
It’s also traditional for certain celebrations in Guerrero and parts of Michoacán. Some families only make white pozole for Christmas Eve.
Kids often prefer this version since there’s no heat built into the broth.
Guerrero-Style Preparation Specifics
Guerrero’s coastal influence shows up in their pozole blanco. They sometimes add fish or seafood alongside or instead of pork.
The broth tends to be clearer and lighter than other versions. Less fat, more focus on the natural flavors.
Tostadas and chicharrón (crispy pork rinds) appear more frequently as accompaniments in this style. The crunch contrasts nicely with the soft hominy.
Preparing the Hominy
Working with Dried Hominy
Overnight Soaking Requirements
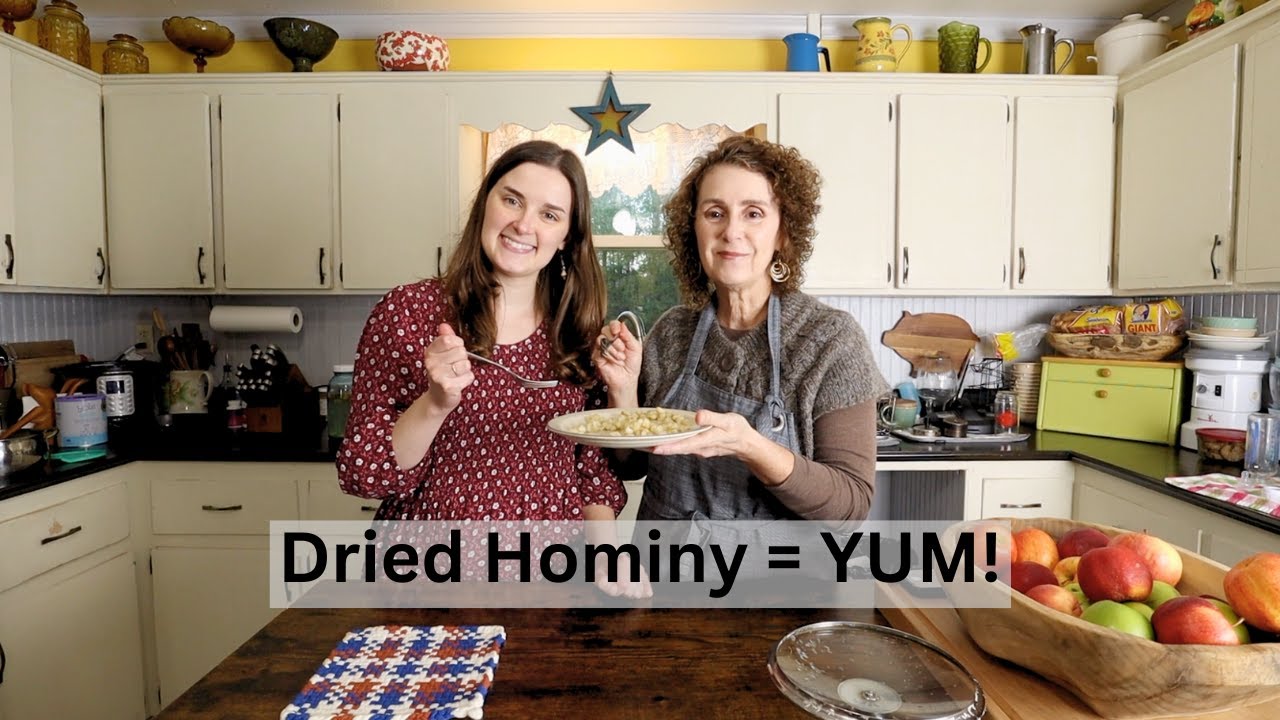
Dried hominy needs at least 8 hours soaking in cold water before you even think about cooking it. Some people go 12 hours.
The kernels will swell up noticeably. They should look plump and slightly softened, though still quite firm.
Change the water once or twice during soaking if you remember. Not critical, but it helps remove any residual processing chemicals.
Cooking Time Expectations
After soaking, dried hominy takes another 2 to 3 hours of simmering before it’s tender enough for pozole. Sometimes longer.
There’s no rushing this. Low heat, patience, and occasional checking.
The kernels should eventually burst slightly and develop that signature creamy interior while maintaining some chew. Think al dente pasta but with more substance.
Testing for Proper Tenderness
Bite into a kernel. The inside should be soft and almost creamy, while the outer skin still has a bit of structure.
If it’s chalky or hard in the center, keep cooking. Undercooked hominy ruins pozole.
Some kernels will split open completely, revealing the soft interior. That’s exactly what you want.
Using Canned Hominy
Rinsing and Draining Properly
Canned hominy sits in a starchy, slightly slimy liquid that you definitely don’t want in your pozole. Drain it completely.
Rinse the kernels under cold running water for at least 30 seconds. Get rid of all that canning liquid.
Pat them dry if you’re feeling particular, though this isn’t strictly necessary.
Timing Additions to the Pot
Add canned hominy during the last 30 to 45 minutes of cooking. It’s already tender, so it just needs time to absorb the broth flavors.
If you add it too early, the kernels can get mushy and fall apart. Nobody wants that texture.
Some cooks add half early and half late to get different textures throughout the pozole. Interesting approach.
Quality Differences Between Brands
Not all canned hominy is created equal. Juanita’s and Goya are solid, widely available options.
Look for kernels that are relatively uniform in size. Avoid cans with broken, mushy pieces visible through the liquid.
White hominy is standard, though you might find yellow hominy in some stores. Either works fine, the flavor difference is minimal.
Nixtamalized Corn from Scratch

Cal (Calcium Hydroxide) Process Overview
Making your own hominy from dried corn kernels involves cooking them with cal, also called slaked lime or pickling lime. This is traditional nixtamalization.
The alkaline solution breaks down the tough outer hull and makes the corn’s nutrients more available. It also gives hominy that distinctive flavor and aroma.
You’ll cook the corn with cal for about an hour, then let it sit overnight before rinsing off the hulls.
When Making Your Own Makes Sense
Honestly? Almost never, unless you’re committed to doing everything from scratch or can’t find hominy where you live.
The time investment is massive and the results aren’t noticeably better than good canned hominy for most people.
That said, some cooks swear by the flavor difference. If you’re that person, go for it.
Safety Considerations with Alkaline Solutions
Cal is caustic. Wear gloves when handling it and don’t breathe in the powder.
Never use food-grade calcium hydroxide for anything other than food. Industrial-grade versions contain impurities you don’t want to eat.
Rinse the corn thoroughly after the cal treatment. You want all that alkaline solution gone before the hominy goes into your pozole.
The corn needs to be rinsed multiple times until the water runs clear and doesn’t feel slippery anymore.
Selecting and Preparing the Meat

Traditional Pork Cuts
Pork Shoulder vs. Pork Butt Advantages
Pork shoulder and pork butt are actually the same general area of the pig, just different names in different regions. Both work perfectly for pozole.
Look for cuts with good marbling. That intramuscular fat keeps the meat moist during the long simmer and adds richness to the broth.
Boneless cuts are easier to work with, but bone-in adds more flavor. Your call based on how much effort you want to put into shredding later.
Plan on about 3 to 4 pounds of pork for a large batch serving 8 to 10 people.
Adding Pork Trotters for Body and Gelatin
Pork trotters (pig feet) transform the broth from thin and watery to rich and almost silky. The collagen breaks down during cooking and creates natural body.
You don’t need many. One or two trotters for a full pot does the job.
Some butchers sell them split, which makes them easier to fit in the pot. Ask if they’ll cut them for you.
The meat on the trotters is minimal, so these are purely for texture and flavor enrichment.
Trimming Fat (Leave Some for Flavor)
Don’t go crazy trimming every bit of fat off the pork shoulder. You need some of that fat for flavor and moisture.
Remove any really thick exterior fat caps that are more than half an inch thick. Beyond that, leave it alone.
The fat will render into the broth and you can skim excess later if needed. Better to have too much than too little.
Chicken Pozole Adaptations

Whole Chicken vs. Specific Cuts
A whole chicken gives you variety in the pot. Dark meat for richness, white meat for those who prefer it.
Bone-in, skin-on chicken thighs work great if you don’t want to deal with breaking down a whole bird. They stay moist and add plenty of flavor.
Chicken breast dries out easily in long cooking, so if you’re using it, add it later in the process or stick with thighs entirely.
Reduced Cooking Time Adjustments
Chicken cooks way faster than pork. A whole chicken needs about 45 minutes to an hour of simmering, not the 2 to 3 hours that pork requires.
Thighs can handle slightly longer cooking without turning to mush, but don’t push it past 90 minutes.
You’ll add the hominy and chicken at roughly the same time if using canned hominy.
Maintaining Moisture in White Meat
If you insist on using chicken breast, add it during the last 30 minutes of cooking. Not earlier.
Pull the breast meat out as soon as it reaches 165°F internally. Shred it and add it back just before serving.
Some cooks poach the breast separately in a bit of the pozole broth, then add the shredded meat at the end. More work, but it guarantees moist chicken.
Vegetarian and Mixed Versions

Building Depth Without Meat Stock
Vegetarian pozole requires extra effort to achieve the depth that meat naturally provides. You’ll need to layer flavors more carefully.
Start with vegetable stock instead of water. Mushroom broth works even better for that umami hit.
Toast your spices before adding them to the pot. Cumin, Mexican oregano, and whole peppercorns benefit from a quick dry toast.
Mushroom and Bean Protein Options
Portobello or shiitake mushrooms add meatiness and texture to vegetarian pozole. Slice them thick so they hold up during cooking.
Pinto or black beans can bulk up the protein content. Add them pre-cooked during the last 30 minutes.
Some people throw in chunks of firm tofu, though this isn’t traditional at all. It works if you season aggressively.
Achieving Satisfying Richness
A splash of neutral oil or a tablespoon of butter adds richness that vegetable stock lacks on its own. Don’t skip the fat entirely.
Mashed avocado stirred in at the end creates a creamy texture that mimics the collagen from meat. Just a tablespoon or two per serving.
Nutritional yeast gives a subtle savory depth without adding meat. Use it sparingly though, maybe a tablespoon for the whole pot.
Creating the Chile Sauce Base

Selecting and Preparing Dried Chiles
Guajillo, Ancho, and California Chile Characteristics
Guajillo chiles are smooth, shiny, and burgundy-colored. They bring mild to moderate heat with subtle berry notes.
Ancho chiles are wrinkled, dark, and wider than guajillos. They taste sweet, almost raisin-like, with very little heat.
California chiles look similar to guajillos but tend to be milder. They’re a decent substitute when you can’t find the real thing.
For a standard batch of red pozole, use about 6 guajillos and 3 anchos.
Toasting Technique (Don’t Burn Them)
Heat a dry skillet or comal over medium heat. Not high heat.
Press each chile flat against the hot surface for 5 to 10 seconds per side. You’ll smell them getting toasty.
Watch closely. Burned chiles taste bitter and will ruin your sauce.
The chiles should become fragrant and slightly more pliable. Any darkening should be minimal.
Rehydrating in Hot Water
Remove the stems and most of the seeds from your toasted chiles. Some seeds are fine, they add a bit of heat.
Place the chiles in a bowl and cover them with hot water just off the boil. Not boiling water directly on them, just very hot.
Let them sit for 15 to 20 minutes until they’re soft and pliable. They’ll plump up noticeably.
Save some of that soaking liquid. You’ll use it when blending.
Blending the Chile Mixture
Additional Aromatics (Garlic, Onion, Cumin)
Add 4 to 6 cloves of peeled garlic to your blender along with the rehydrated chiles. Raw garlic works fine here.
Half a white onion, roughly chopped, adds sweetness and depth. You can roast it first if you want extra complexity, but it’s not required.
A teaspoon of cumin seeds (toasted if possible) gives the sauce that earthy undertone most people expect in pozole rojo.
Some recipes include a piece of cinnamon stick or a couple of cloves. Optional but interesting.
Achieving Smooth Consistency
Add the drained chiles to your blender with the aromatics. Pour in enough of the soaking liquid to get things moving, maybe half a cup to start.
Blend on high for at least a minute. You want this as smooth as possible.
Add more soaking liquid gradually if the mixture is too thick to blend properly. The final sauce should be pourable but not watery.
Stop and scrape down the sides a few times to make sure everything gets pureed evenly.
Straining vs. Leaving Rustic Texture
Push the blended sauce through a fine-mesh strainer if you want silky-smooth results. Use the back of a ladle or spoon to press it through.
The bits left in the strainer are mostly chile skins and seeds. Toss them.
Or skip straining entirely for a more rustic, textured sauce. Both approaches are legitimate.
I usually strain it because the smooth sauce integrates better into the broth.
Blooming the Chile Sauce
Frying the Blended Sauce to Develop Flavor
Heat 2 tablespoons of neutral oil or lard in your stock pot over medium-high heat. Lard is traditional and adds more flavor.
Pour in the blended chile sauce all at once. It will sputter and steam, so stand back slightly.
The sauce needs to fry for 5 to 10 minutes, stirring frequently. This step is crucial for developing the flavors.
Recognizing When It’s Ready
The sauce will darken a shade or two as it cooks. It should smell deeply aromatic, not raw anymore.
It’ll thicken noticeably and reduce in volume by about a third. The oil will start to separate slightly around the edges.
When you drag a spoon through the sauce, it should hold the line for a second before flowing back together.
Color and Aroma Changes to Watch For
The color shifts from bright red to a deeper, more brick-red tone. This is the caramelization happening.
The aroma becomes richer and more complex, losing that sharp, raw chile smell. You’ll smell the cumin and garlic more prominently.
If it starts smelling burnt or turns very dark brown, you’ve gone too far. Start over rather than using burnt sauce.
Building the Broth

Initial Stock Development
Starting with Cold Water vs. Hot Water
Start with cold water when making broth from scratch with meat and bones. Cold water allows proteins to dissolve gradually, which you can then skim off.
Hot water seals the meat’s exterior too quickly and keeps some of those impurities trapped inside.
For a large batch, plan on about 4 quarts of water for 3 to 4 pounds of meat.
You’ll add your pork (or chicken) to the cold water before turning on the heat.
Whole Onion and Garlic Additions
Toss in a whole white onion, peeled but left intact. It’ll fall apart eventually, but starting whole makes it easier to fish out later.
Add 6 to 8 whole garlic cloves, peeled. Don’t bother chopping them.
A chunk of fresh ginger (about an inch) adds subtle warmth, though this isn’t traditional in every region.
Bay Leaves and Mexican Oregano Timing
Add 2 to 3 bay leaves right at the start. They need time to infuse their flavor.
Mexican oregano goes in during the last hour of cooking. Adding it too early makes the flavor muddy and dull.
Regular Mediterranean oregano isn’t a great substitute. The flavor profile is different.
Whole peppercorns (maybe a tablespoon) can go in with the bay leaves if you want more spice notes.
Skimming and Clarifying
Removing Impurities as They Rise
As the water heats up, you’ll see foam and scum rise to the surface. This is coagulated proteins and blood from the meat.
Start skimming after about 10 to 15 minutes once the water reaches a simmer. Use a ladle or skimming spoon.
Get as much of the gray foam as possible. It won’t hurt you if you leave it, but it makes the broth cloudier and can taste slightly bitter.
How Much Skimming Is Actually Necessary
Skim thoroughly during the first 30 minutes. After that, the impurities mostly stop rising.
You don’t need to obsess over every tiny bit. Just get the bulk of it.
Some cloudiness in the broth is normal and expected in pozole. This isn’t a delicate consommé.
Broth Clarity Goals (Or Lack Thereof)
Honestly, pozole broth is supposed to be relatively cloudy from the hominy starch and the rich meat. Crystal-clear broth isn’t the goal here.
What you want is a broth free of gray scum and excessive grease. Beyond that, some murkiness is fine.
The chile sauce will color it red anyway if you’re making pozole rojo.
Seasoning Throughout the Process

Salt Additions in Stages
Add your first salt after skimming the initial impurities, maybe a tablespoon or so for a large pot. This helps draw out moisture from the meat.
Taste the broth after an hour and add more salt gradually. It’s easier to add salt than to fix an over-salted pot.
Your final salting happens just before serving, once the hominy has absorbed some of the broth.
Remember that the toppings (especially cheese and crumbled chicharrón) add saltiness too.
Tasting and Adjusting as You Go
Taste the broth every 30 minutes or so after the first hour. You’re checking for salt balance and overall flavor development.
The broth should taste rich and meaty with aromatic undertones from the onion and garlic. Not bland, not overwhelming.
If it tastes weak, keep simmering to concentrate the flavors. Add a bit more salt or a splash of the chile soaking liquid for depth.
Final Seasoning Before Serving
Right before ladling the pozole into bowls, do a final taste. This is your last chance to adjust.
Add salt if needed. A squeeze of fresh lime juice brightens everything up, though this is optional.
Some cooks add a pinch of MSG at this stage. Not traditional, but it works.
The pozole should taste well-seasoned but not salty, rich but not heavy. Balance is everything here.
Cooking Timeline and Technique

First Hour of Cooking
Bringing Meat to Proper Simmer
Place your pork or chicken in the pot with cold water and bring everything up to a gentle simmer over medium heat. Don’t rush it by cranking the heat to high.
A proper simmer shows small bubbles breaking the surface occasionally, not a rolling boil. Big, aggressive bubbles make the meat tough.
This initial heating takes about 20 to 30 minutes depending on how much liquid you’re working with.
Temperature Control (Low and Slow Wins)
Once you hit a simmer, reduce the heat to low. The surface should barely move, with just a few lazy bubbles here and there.
Low and slow is the only way to get tender meat and rich broth. High heat makes everything stringy and dry.
If you’re using a gas stove, the flame should be small. Electric stoves need to be set somewhere between low and medium-low.
Check the pot every 15 minutes during the first hour to make sure it’s not boiling too hard or cooling down completely.
What Should Be Happening in the Pot
During the first hour, proteins and impurities rise to the surface as gray foam. Skim these off regularly.
The meat will start releasing its juices into the water, creating the foundation of your broth. You’ll smell it getting meatier.
The onion and garlic soften and begin breaking down. Bay leaves release their subtle flavor.
By the end of hour one, your broth should smell good but won’t taste fully developed yet. That takes more time.
Mid-Cook Adjustments
Adding Hominy at the Right Moment
If you’re using canned hominy, add it after the meat has been simmering for about 90 minutes. It just needs to heat through and absorb flavors.
Dried hominy that you pre-cooked goes in at the same time. It’s already tender, so it’s just finishing in the broth.
Raw dried hominy needs to go in much earlier, possibly at the very beginning with the meat. Check the package instructions.
Incorporating Chile Sauce
For red pozole, add your bloomed chile sauce after the meat has been cooking for about an hour. Stir it in thoroughly.
The sauce will darken the broth immediately and the kitchen will smell incredible. This is when pozole starts smelling like pozole.
Let everything simmer together for at least another hour so the flavors marry properly.
Liquid Level Monitoring
The liquid will reduce as it simmers. That’s normal and actually helps concentrate the flavors.
If it drops too much and the hominy or meat starts peeking above the surface, add hot water or stock. Never add cold water to a simmering pot.
You want enough broth to serve everyone generously but not so much that the pozole tastes diluted.
Final Cooking Phase
Meat Tenderness Tests
After 2 to 3 hours for pork or about an hour for chicken, pull out a piece of meat and test it. It should shred easily with two forks.
If the meat resists or feels chewy, keep cooking. Pork shoulder can sometimes take 3.5 to 4 hours depending on the cut size.
The meat is ready when it falls apart with minimal effort. Not mushy, just very tender.
Hominy Texture Goals (They Should Burst Slightly)
Properly cooked hominy kernels will have split slightly, revealing their soft, creamy interior. The exterior should still have some structure though.
Bite into one. The inside should be tender without being mushy. Think of cooked beans that still hold their shape.
Undercooked hominy tastes chalky and hard. Overcooked hominy turns to mush and disintegrates into the broth.
Get that middle ground where the kernels are soft but intact.
Resting Period Before Serving
Turn off the heat and let the pozole sit for 15 to 20 minutes before serving. This isn’t required but it helps.
The resting period allows the hominy to absorb more broth and all the flavors to settle. The broth also thickens slightly as it cools a bit.
Some cooks make pozole a day ahead and reheat it before serving. The overnight rest actually improves the flavor.
Traditional Garnishes and Toppings
Required Fresh Elements
Shredded Cabbage or Lettuce

Finely shredded green cabbage is the most traditional topping. It adds crunch and freshness that contrasts beautifully with the rich broth.
Iceberg lettuce works too, though it wilts faster in the hot broth. Some people prefer romaine for more structure.
Shred it as thin as possible. Thick chunks don’t integrate well and feel awkward to eat.
Fill a small bowl with the shredded cabbage and let people add as much as they want.
Sliced Radishes (The Crunch Factor)
Thinly sliced radishes are non-negotiable in authentic pozole service. They provide a peppery bite and satisfying crunch.
Use a mandoline or a very sharp knife to get them paper-thin. Thick radish slices are too aggressive.
Red radishes are standard, though you can use watermelon radishes or breakfast radishes if you find them.
The radishes should be ice-cold. Some people soak them in ice water for extra crispness.
Fresh Lime Wedges
Fresh lime wedges are set out so everyone can squeeze as much or as little as they want over their bowl.
The acidity from the lime brightens the entire dish. It cuts through the richness and makes everything taste more vibrant.
One lime wedge per person minimum, but put out plenty. People tend to use more than you’d expect.
Dried Oregano and Chile Options
Crushing Dried Oregano Tableside
Mexican oregano gets set out dried, not fresh. People crush it between their palms directly over their bowl.
This releases the essential oils right before eating, maximizing the aroma and flavor. Pre-crushed oregano loses potency.
Put out a small bowl of whole dried oregano leaves with a note that people should crush it themselves.
If you can’t find Mexican oregano, just skip it. Regular oregano isn’t close enough to substitute.
Chile de Árbol or Piquín for Heat
Set out small dried chiles for people who want extra heat beyond what’s in the broth. Chile de árbol is most common.
Some people crush the dried chiles, others rehydrate them in a bit of hot water first. Both methods work.
Piquín chiles are smaller and more intensely spicy. Use these if you really want to challenge your guests.
Not everyone wants more spice, so these should always be optional toppings, never cooked into the pozole itself.
Serving These Separately
All the dried garnishes go into small bowls on the table. Never pre-mix them into the pozole.
The whole point of pozole service is customization. Each person builds their bowl exactly how they like it.
Label the bowls if you’re serving people unfamiliar with pozole. A pile of dried red flakes might confuse someone.
Additional Topping Choices
Diced White Onion
Finely diced white onion adds sharp, fresh flavor that balances the rich broth. Yellow onion works but isn’t traditional.
Dice it small, about a quarter-inch pieces. Big chunks are overwhelming.
Rinse the diced onion briefly under cold water if you want to mellow the sharpness slightly. Not required though.
Sliced Avocado
Sliced or diced avocado adds creamy richness and helps cool down spicy pozole. It’s optional but popular.
Toss the avocado pieces with a little lime juice to prevent browning if you’re setting them out early.
Some people prefer whole avocado slices, others want it diced. Have it ready however you prefer.
Tostadas or Chicharrón on the Side
Crispy tostadas served alongside pozole let people break off pieces and dip them in the broth or pile toppings on them.
Chicharrón (fried pork rinds) can be crumbled over the top for extra crunch and porky flavor. This is more common in certain regions.
Both add textural contrast that makes eating pozole more interesting. The crunch against the soft hominy works really well.
Serving and Presentation
Proper Bowl Selection

Wide, Shallow Bowls Work Best
Choose wide, shallow bowls instead of narrow, deep ones. Wide bowls let people see all the ingredients and make it easier to add toppings.
The bowl needs to be big though. Pozole is generous, and people typically want seconds.
Ceramic or heavy pottery bowls are traditional and retain heat well. Thin bowls let the pozole cool too quickly.
Keeping Pozole Hot During Service
Serve pozole immediately after ladling it into bowls. It should be steaming hot when it hits the table.
If you’re serving a crowd and need to keep the pot warm, use the lowest heat setting on your stove. Stir occasionally to prevent settling.
Some people transfer pozole to a slow cooker set on warm for serving at parties. This works fine for maintaining temperature.
Family-Style vs. Individual Plating
Family-style service means putting the pot on the table (or nearby) with a ladle so people can serve themselves. More casual and communal.
Individual plating means you ladle pozole into bowls in the kitchen and bring them out. This gives you more control over portions.
Either way works. Family-style feels more authentic for a dinner party or gathering.
Ladling Technique
Ensuring Even Distribution of Hominy and Meat
Stir the pot gently before each ladle. The hominy and meat settle to the bottom during cooking.
Your first scoop should include a good mix of broth, hominy, and shredded meat. Don’t just skim broth off the top.
Dig the ladle down into the pot to catch the heavier ingredients that sink.
Broth-to-Solid Ratio Per Serving
A proper serving has plenty of broth but isn’t swimming in liquid with only a few kernels of hominy floating around.
Aim for roughly half liquid, half solids. Maybe slightly more broth, but not much.
The pozole should look substantial in the bowl, not like thin soup with garnishes.
Second Helpings Expectations
Expect people to want seconds. Pozole is that kind of dish.
Keep the toppings table stocked because people will use more garnishes on their second bowl. They’ll be braver with the spice once they know what they’re dealing with.
Accompanying Beverages

Traditional Drink Pairings
Mexican hot chocolate pairs surprisingly well with pozole, especially during cooler weather. The richness complements the spice.
Agua fresca, particularly jamaica (hibiscus) or horchata, provides a refreshing contrast to the heavy, rich stew.
Simple agua mineral (sparkling mineral water) with lime is common and helps cleanse the palate between bites.
Beer Selections That Complement Pozole
Light Mexican lagers like Corona, Modelo, or Pacifico are traditional choices. They don’t compete with the pozole’s complex flavors.
Darker beers like Negra Modelo or Bohemia work if you want something with more body. Just avoid anything too hoppy or bitter.
Beer and pozole is a classic combination in Mexico. Most people prefer beer over wine with this dish.
Non-Alcoholic Options
Besides the agua frescas mentioned earlier, Mexican sodas like Jarritos work well. The orange and lime flavors are particularly good.
Fresh limeade or lemonade provides acidity that complements the rich broth.
Plain iced tea works too, though it’s not traditional. Green tea is better than black tea here.
Storage and Reheating

Cooling and Refrigeration
Food Safety Temperature Guidelines
Cool pozole down to room temperature within 2 hours of finishing cooking. Bacteria multiply rapidly in the danger zone between 40°F and 140°F.
Don’t leave pozole sitting out on the counter all afternoon. Get it into the fridge.
If you have a large pot, divide it into smaller containers to speed up cooling. Big batches take forever to cool down and can stay in the danger zone too long.
Container Selection for Storage
Use airtight containers to prevent the pozole from absorbing other fridge odors. Glass or plastic both work fine.
Leave some headspace at the top. The broth expands slightly as it cools, and hominy absorbs liquid over time.
Shallow containers cool faster than deep ones. This matters for food safety.
Label containers with the date. Pozole keeps for 3 to 4 days in the refrigerator.
Separation of Broth and Solids (Optional)
Some people store the broth separately from the meat and hominy. This makes reheating easier and prevents the hominy from getting too soft.
It’s extra work though, and not necessary unless you’re particular about texture.
If you do separate them, keep everything in airtight containers and recombine when reheating.
Freezing for Long-Term Storage
What Freezes Well and What Doesn’t
The broth and meat freeze perfectly. No issues there.
Hominy gets slightly mushier after freezing but it’s not terrible. The texture changes are minor and most people don’t notice.
Fresh garnishes obviously don’t freeze. Those you add after reheating.
Potatoes would turn mealy and gross if you froze them, but there aren’t potatoes in traditional pozole anyway.
Portion Size Considerations
Freeze pozole in meal-sized portions rather than one giant block. You can’t easily thaw just what you need from a huge frozen mass.
Quart-sized freezer bags work well. Fill them about three-quarters full, squeeze out air, and lay them flat in the freezer.
Once frozen solid, you can stack the flat bags to save space.
Individual portions in small containers also work if you live alone or want single servings.
Maximum Storage Duration
Frozen pozole stays good for 2 to 3 months. Beyond that, it’s still safe to eat but the quality declines.
Freezer burn becomes an issue after 3 months even in airtight containers. The broth develops ice crystals and the texture suffers.
Date your containers clearly so you know how long they’ve been frozen.
Reheating Without Losing Quality
Stovetop vs. Microwave Methods

Stovetop reheating gives the best results. Transfer pozole to a pot and heat over medium-low, stirring occasionally.
Add a splash of water or stock if it’s too thick. The hominy absorbs liquid during storage.
Microwave works for single portions. Use a microwave-safe bowl, cover it loosely, and heat in 2-minute intervals, stirring between.
The microwave can make the hominy unevenly hot with cold spots, so stir thoroughly.
Adding Fresh Garnishes After Reheating
Never reheat pozole with the garnishes already in it. That’s a texture disaster waiting to happen.
Cabbage turns slimy, radishes lose their crunch, and lime juice becomes bitter when heated.
Heat the pozole by itself, then set out fresh toppings just like you would for a new batch.
Reviving Flavors That May Have Dulled
Pozole often tastes a bit flat after storage. The flavors meld together and lose some brightness.
Add a squeeze of fresh lime juice while reheating. This wakes everything up.
A pinch of salt usually helps too. Taste before adding though, since the salt concentration increases as the broth reduces.
Some people add a spoonful of the chile sauce if they have extra to boost the flavor.
Troubleshooting Common Issues
Broth Problems
Too Thin or Watery
Watery pozole happens when you add too much liquid or don’t simmer long enough to reduce it. Let it simmer uncovered to concentrate the flavors.
The hominy releases starch as it cooks, which naturally thickens the broth. If you added the hominy late, that starch hasn’t had time to work yet.
A slurry of masa harina (corn flour) mixed with water can thicken thin broth in a pinch. Start with a tablespoon mixed into a quarter cup of water.
Some cooks mash a few hominy kernels against the side of the pot to release more starch into the broth.
Lacking Depth of Flavor
Bland pozole usually means underseasoning or not cooking long enough. The flavors need time to develop.
Add more salt gradually until the pozole tastes balanced. Salt is often the issue when broth tastes flat.
If the meat flavor is weak, you might not have used enough meat or bones. Pork trotters help a lot with this.
Bloom some additional spices (cumin, Mexican oregano) in a dry pan and add them to the pot. Let it simmer another 20 minutes.
Overly Greasy Surface
Fat rising to the surface is normal, especially with pork shoulder. Some fat is good for flavor and mouthfeel.
If there’s too much, skim it off with a ladle or use a fat separator if you have one.
Refrigerating pozole overnight makes the fat solidify on top, which you can then lift off easily before reheating.
Don’t remove all the fat. A thin layer is traditional and adds richness.
Hominy Texture Issues
Undercooked and Hard
Hard hominy needs more cooking time. There’s no shortcut here.
If you’re an hour past when you expected it to be done and it’s still hard, your hominy might have been old. Dried goods lose moisture over time and take longer to cook.
Keep simmering and check every 15 minutes. Eventually it’ll soften.
Make sure there’s enough liquid in the pot. Hominy can’t cook properly if it’s not submerged.
Overcooked and Mushy
Mushy hominy happens when it cooks too long or at too high a temperature. Aggressive boiling breaks down the kernels.
There’s no fixing this once it happens. The texture is ruined.
Next time, add canned hominy later in the cooking process or watch your dried hominy more carefully as it approaches doneness.
Gentle simmering prevents this problem.
Uneven Cooking Throughout
Some kernels are tender while others are still hard when the hominy comes from different batches or brands mixed together.
Stir the pot more frequently to ensure even heat distribution. Hominy at the bottom cooks faster than kernels floating at the top.
Old hominy mixed with fresh hominy will cook unevenly no matter what you do. Use hominy from the same package or at least the same age.
Meat Concerns
Tough or Chewy Meat
Tough meat means it didn’t cook long enough. Pork shoulder needs at least 2.5 hours, sometimes more.
High heat makes meat seize up and get chewy. Keep the simmer gentle.
If your meat is tough after 3 hours, it might be a lean cut without enough connective tissue. You need some fat and collagen for tender results.
Just keep cooking. Tough meat will eventually break down with enough time.
Dry Chicken Breast
Chicken breast dries out easily in long cooking. It’s lean and overcooks quickly.
Next time, use thighs or add the breast during the last 30 minutes only.
If your chicken is already dry, shred it and make sure each serving gets plenty of broth. The liquid helps mask the dryness.
Overpowering Gamey Flavors
Sometimes pork or chicken develops strong, unpleasant flavors during cooking. This usually comes from not skimming the initial foam properly.
That gray scum contains blood and proteins that taste bitter and gamey if left in the broth.
If your finished pozole tastes gamey, there’s not much you can do except add more acid (lime juice) to balance it.
Use fresher meat next time and skim thoroughly during the first 30 minutes.
Variations and Creative Adaptations
Regional Mexican Styles

Jalisco-Style Differences
Jalisco pozole typically uses both pork shoulder and pork trotters. The trotters are non-negotiable there.
They serve it with generous amounts of tostadas on the side for dipping. The crunch factor is important in Jalisco.
The chile sauce tends to be on the redder side with more guajillo than ancho. It’s also slightly spicier than other regional versions.
Thursday is traditional pozole day in Jalisco. Many restaurants only serve it once a week.
Guerrero Coastal Influences
Guerrero’s pozole blanco is the most famous from that region. No chile sauce, just pure aromatic broth.
Coastal areas sometimes add shrimp or fish to the pozole, which is unusual elsewhere. The seafood version is lighter and brinier.
They’re generous with the lime there. Expect lots of citrus to balance the richness.
Guerrero pozole often comes with more chicharrón and less cabbage than other regions.
Michoacán Preparations
Michoacán favors red pozole with plenty of garlic. Their chile sauce is garlicky and robust.
They sometimes add a splash of vinegar to the broth for extra tang. Not much, just a tablespoon or two for the whole pot.
The hominy tends to be cooked longer in Michoacán, almost to the point where it’s starting to break down. It’s a texture preference.
Modern Shortcuts
Instant Pot and Pressure Cooker Methods
An Instant Pot cuts cooking time dramatically. Pork shoulder that normally takes 3 hours is done in about 45 minutes at high pressure.
Add your meat, aromatics, and enough liquid to cover. Cook on high pressure for 45 minutes, then natural release for 15 minutes.
Add canned hominy after pressure cooking is done. Switch to sauté mode and let it simmer for 15 to 20 minutes to absorb flavors.
The broth won’t be quite as developed as traditional long-simmered pozole, but it’s close enough for a weeknight meal.
Slow Cooker Adaptations
Slow cookers work great for pozole since it’s all about low and slow cooking anyway. This is actually perfect for this dish.
Brown your meat first on the stovetop for better flavor, then transfer everything to the slow cooker.
Cook on low for 6 to 8 hours. Add canned hominy during the last hour.
The slow cooker method gives you very tender meat with minimal effort. Just set it and forget it.
Time-Saving Ingredient Swaps
Use rotisserie chicken instead of cooking raw chicken from scratch. Shred the meat and add it during the last 30 minutes.
Pre-minced garlic from a jar saves time, though fresh tastes better. If you’re in a hurry, jarred garlic is fine.
Store-bought chile powder can substitute for dried chiles if you’re desperate. Mix it with water to make a paste. It won’t taste quite the same.
Canned hominy instead of dried saves hours. This is the most worthwhile shortcut.
Dietary Modifications
Lower-Fat Versions
Use pork tenderloin instead of pork shoulder for much less fat. You’ll sacrifice some richness though.
Skinless chicken breast or thighs work for lower-fat options. Just watch the cooking time carefully.
Skim aggressively during cooking and chill the finished pozole overnight so you can remove the solidified fat layer.
The pozole will taste lighter but still good. Just make sure you season it well since fat carries a lot of flavor.
Gluten-Free Considerations
Traditional pozole is naturally gluten-free. Hominy is corn, which contains no gluten.
Just make sure any store-bought broth or stock you use is certified gluten-free. Some brands add wheat-based thickeners.
The garnishes are all naturally gluten-free too. Tostadas are corn-based.
Double-check any spice blends for hidden gluten fillers.
Spice Level Adjustments for Sensitive Palates
Make pozole blanco if you’re serving people who can’t handle any spice. The white version has zero heat built in.
For red or green pozole, reduce the amount of chile sauce you add. You can always put extra on the table for those who want it.
Serve mild pozole with all the spicy toppings on the side. This lets everyone customize their heat level.
Remove all seeds from your chiles before blending. The seeds contain most of the capsaicin.
FAQ on How To Make Pozole
Can I use canned hominy instead of dried?
Yes, canned hominy saves hours of prep time and works perfectly for pozole. Just drain and rinse it thoroughly before adding to the pot during the last 30 to 45 minutes of cooking. The texture is nearly identical to properly cooked dried hominy.
How long does it take to make pozole from scratch?
Traditional pozole takes 3 to 4 hours total. This includes 2 to 3 hours simmering the pork shoulder, plus time for preparing the chile sauce and final cooking with hominy. Pressure cookers reduce this to about 90 minutes.
What’s the difference between pozole rojo, verde, and blanco?
Pozole rojo uses red chile sauce (guajillo and ancho), verde uses green ingredients (tomatillos, pepitas, fresh herbs), and blanco has no colored sauce at all. Each regional style offers distinct flavor profiles while sharing the same hominy and meat base.
Can I make pozole with chicken instead of pork?
Chicken works well for lighter pozole. Use bone-in thighs for best results and reduce cooking time to 45 to 60 minutes. Chicken breast dries out easily, so add it during the last 30 minutes only or stick with dark meat throughout.
What are the essential toppings for pozole?
Shredded cabbage, sliced radishes, and lime wedges are non-negotiable. Diced white onion, dried Mexican oregano, and chile de árbol for heat are traditional additions. Avocado, tostadas, and chicharrón are optional but popular choices.
How do I make pozole spicier?
Keep the broth mild and let people add heat at the table with crushed dried chiles de árbol or piquín. You can also increase the amount of chile sauce in red pozole or add jalapeños to green pozole during blending.
Can I freeze leftover pozole?
Pozole freezes well for 2 to 3 months. Store in airtight containers or freezer bags, leaving some headspace. The hominy texture changes slightly but remains acceptable. Always add fresh garnishes after reheating, never before freezing.
Why is my pozole broth too watery?
Thin broth means too much liquid or insufficient simmering time. Let it cook uncovered to reduce and concentrate flavors. The hominy releases starch naturally, which thickens the broth. Add a masa harina slurry if you need quick thickening.
What cut of pork is best for pozole?
Pork shoulder or pork butt provides the best balance of meat and fat for tender, flavorful pozole. These cuts have enough marbling to stay moist during long cooking. Adding pork trotters increases the broth’s body and richness significantly.
How do I know when the hominy is properly cooked?
Properly cooked hominy kernels split slightly, revealing soft, creamy interiors while maintaining some exterior structure. Bite into one to test. It should be tender without chalkiness or mushiness. This texture typically takes 2 to 3 hours for dried hominy.
Conclusion
Learning how to make pozole gives you access to one of Mexico’s most beloved comfort foods. The process rewards patience more than skill.
Your choice between pozole rojo, verde, or blanco depends entirely on preference. Red offers earthy depth, green brings brightness, and white showcases pure flavors.
The meat selection matters. Pork shoulder creates rich broth, while chicken lightens things up. Trotters add body that transforms the entire dish.
Hominy preparation can’t be rushed. Whether using canned or dried, proper texture makes the difference between mediocre and exceptional pozole.
Fresh garnishes complete the experience. Shredded cabbage, sliced radishes, lime wedges, and Mexican oregano let everyone customize their bowl exactly how they want it.
The beauty of pozole is its flexibility. Master the fundamentals, then adjust seasonings, spice levels, and toppings to match your taste.
Start with a simple version this weekend. You’ll understand why Mexican families have made this stew for generations.


