

Summarize this article with:
The Kirkland Signature Oven Browned Turkey Breast sits in Costco’s deli section, vacuum-sealed and ready to go.
It’s fully cooked. You can slice it cold for sandwiches or heat it for a proper turkey dinner.
Most packages run about 3 to 4 pounds. That’s enough for 10 to 12 generous servings, depending on how you slice it.
This article covers three cooking methods: oven, air fryer, and slow cooker. Cooking times range from 40 minutes in the air fryer to 4 hours in a crockpot.
You’ll need a meat thermometer for best results. That’s really the only special equipment.
Product Details
Product: Kirkland Signature Oven Browned Turkey Breast
Type: Fully cooked, pre-seasoned
Package Size: 3-4 lbs average (10-24 servings depending on portion size)
Price: $4.79 per pound at Costco (Updated December 2024)
Storage: Refrigerated, not frozen
Calories per Serving: 60 (per 2 oz serving)
Main Ingredients: Turkey breast, turkey broth, sea salt, sugar
Item Number: 47500
Cooking Methods Comparison
| Method | Time | Equipment | Result | Best For |
| Oven | 1 hour | Roasting pan, foil | Juicy, even heating | Holiday dinners, family meals |
| Air Fryer | 40 min | 5-qt air fryer | Slightly crispy exterior | Quick weeknight meals |
| Slow Cooker | 3–4 hours (low) | 6-qt crockpot | Extra tender, makes gravy | Hands-off, meal prep |
Recommended Method: Oven for the most consistent results and traditional turkey dinner experience.
Method 1: Oven (Recommended)
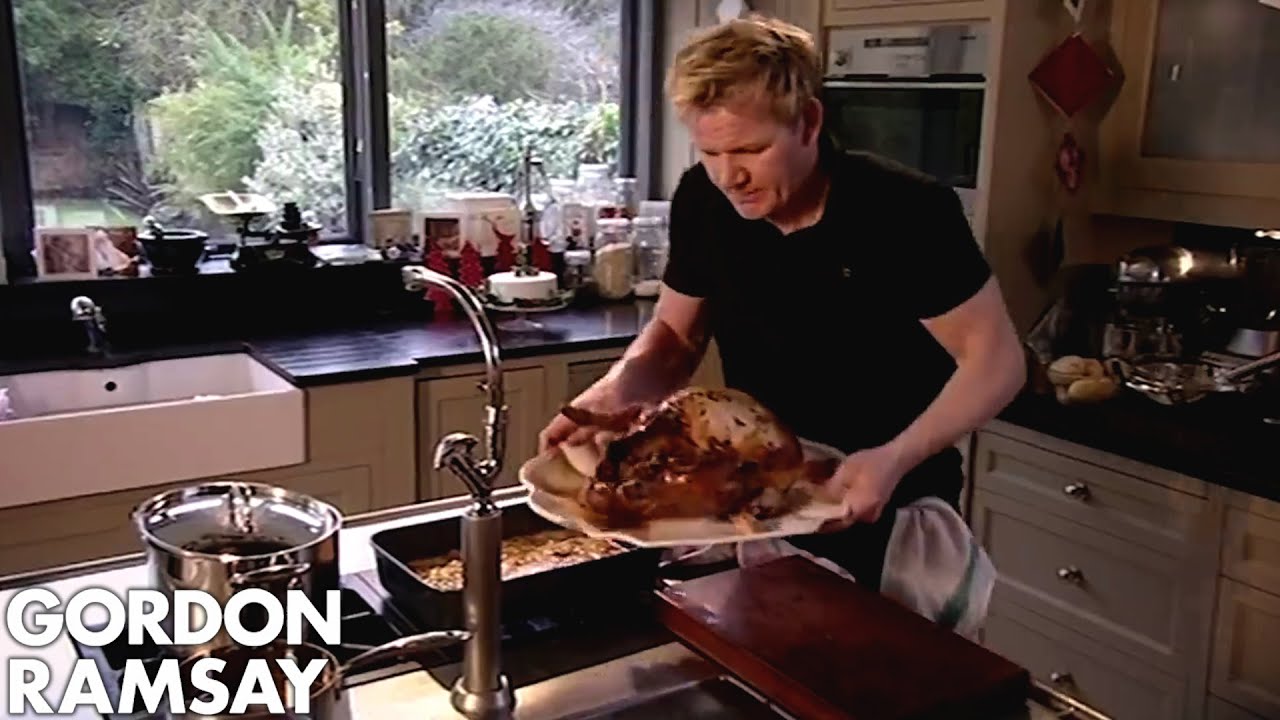
The oven method takes about an hour at 350 degrees F. You’ll get evenly heated, juicy white meat turkey that works for any occasion.
This is how most people heat their Kirkland turkey breast. It’s simple and pretty much foolproof.
Step 1: How Do You Prepare the Turkey Breast?
Remove the turkey from the vacuum-sealed plastic wrapper. Place it in a shallow roasting pan.
Instructions:
- Take the turkey out of the fridge 20 minutes before cooking (optional, but helps with even heating)
- Remove all packaging materials
- Place the breast in a shallow pan with sides at least 2 inches high
- Add 1/2 cup of water to the bottom of the pan
Equipment: Roasting pan, aluminum foil, meat thermometer
Step 2: What Temperature and Time Do You Use?
Preheat your oven to 350 degrees F. The turkey needs about an hour, but always check with a thermometer.
Instructions:
- Preheat oven to 350 degrees F
- Cover the pan tightly with aluminum foil
- Place in the center rack of your oven
- Cook for approximately 1 hour
Temperature: 350 degrees F
Time: 45-60 minutes for a 3-4 lb breast
Step 3: When Do You Check the Turkey?
Check the internal temperature at the 45-minute mark. The turkey is already cooked, so you’re just reheating it.
Instructions:
- At 45 minutes, carefully remove the foil
- Insert a meat thermometer into the thickest part
- If under 140 degrees F, continue cooking in 10-minute intervals
Checkpoint: At 45-minute mark
Step 4: How Do You Know When It’s Done?
The turkey is ready when it hits 140 degrees F internal temperature. Let it rest before slicing.
Instructions:
- Remove from oven when internal temperature reaches 140 degrees F
- Let the turkey rest for 10 minutes before carving
- Slice against the grain for the most tender pieces
Target Temperature: 140 degrees F (since the turkey is precooked)
Visual Indicator: Steam rising, juices running clear
Method 2: Air Fryer
The air fryer heats this turkey breast in about 40 minutes at 325 degrees F. It gives you a slightly crispy exterior while keeping the inside juicy.
Make sure your turkey breast fits in the basket first. A 4-pound breast fits in a 5-quart air fryer, but just barely.
Step 1: How Do You Prepare the Turkey Breast?
Remove the turkey from packaging and make sure it fits in your air fryer basket.
Instructions:
- Remove turkey from vacuum-sealed package
- Pat dry with paper towels
- Test fit in air fryer basket before preheating
Equipment: Air fryer (5-quart or larger), meat thermometer
Step 2: What Temperature and Time Do You Use?
Set your air fryer to 325 degrees F. This lower temperature prevents the outside from drying out while the inside heats through.
Instructions:
- Preheat air fryer to 325 degrees F
- Place turkey breast in the basket
- Cook for 40 minutes total
Temperature: 325 degrees F
Time: 40 minutes for a 3-4 lb breast
Step 3: When Do You Check or Rotate?
Check halfway through and give it a turn if your air fryer doesn’t rotate automatically.
Instructions:
- At the 20-minute mark, open the basket
- Rotate the turkey 180 degrees for even heating
- If the top looks dry, spray lightly with cooking oil
Checkpoint: At 20-minute mark
Step 4: How Do You Know When It’s Done?
Check the internal temperature. The turkey should be at 140 degrees F throughout.
Instructions:
- Insert thermometer into the thickest part
- Confirm temperature reaches 140 degrees F
- Let rest for 5-10 minutes before slicing
Target Temperature: 140 degrees F
Visual Indicator: Light browning on exterior, steam when cut
Method 3: Slow Cooker
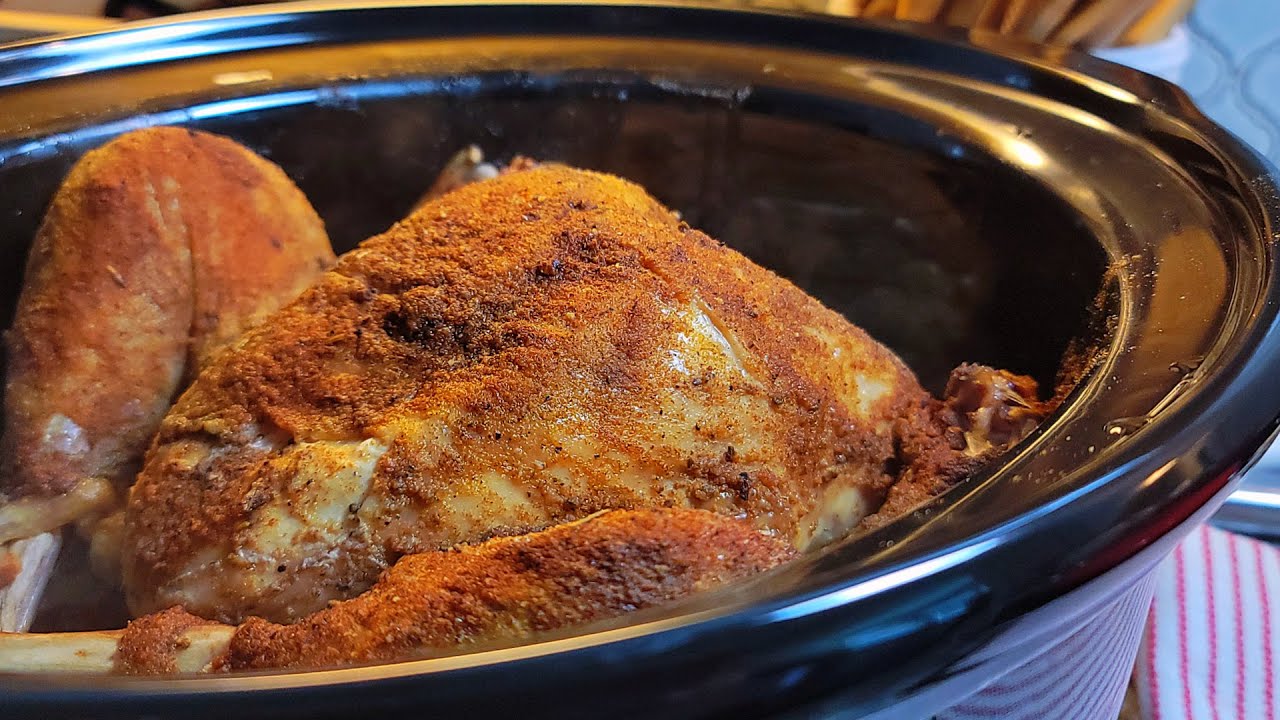
The slow cooker method takes 3-4 hours on low. The turkey comes out extra tender, and you get juices for gravy.
This is the best method if you want to set it and forget it. The crockpot is forgiving, so even an extra 30 minutes won’t ruin it.
Step 1: How Do You Prepare the Turkey Breast?
Place the turkey in the slow cooker with some liquid and seasonings.
Instructions:
- Remove turkey from packaging
- Place in a 6-quart or larger slow cooker
- Add 1/2 cup of chicken stock or water to the bottom
- Optional: Add 2 tablespoons of butter on top
Equipment: 6-8 quart slow cooker, meat thermometer
Step 2: What Temperature and Time Do You Use?
Cook on low heat. This keeps the turkey breast from drying out.
Instructions:
- Cover with the lid
- Set to LOW heat
- Cook for 3-4 hours
Temperature: LOW setting
Time: 3-4 hours on low
Step 3: When Do You Check the Turkey?
Resist the urge to open the lid too often. Each time you do, you add 15-20 minutes to the cooking time.
Instructions:
- Check at the 3-hour mark for the first time
- Use a meat thermometer to test internal temperature
- If not at 140 degrees F, continue cooking in 30-minute intervals
Checkpoint: At 3-hour mark
Step 4: How Do You Know When It’s Done?
The turkey should reach 140 degrees F internally and be steaming hot throughout.
Instructions:
- Confirm internal temperature is 140 degrees F
- Transfer to a cutting board
- Let rest 10 minutes before slicing
- Save the drippings for turkey gravy
Target Temperature: 140 degrees F
Visual Indicator: Turkey is fork-tender, juices pooled in slow cooker
Safety and Quality Indicators
Food Safety:
- Internal Temperature: 140 degrees F minimum (since the product is already fully cooked)
- Steam Check: Product should steam when cut open
- Storage: Keep refrigerated at all times before cooking
Quality Indicators (Done Properly):
- Color: Light golden brown on exterior
- Texture: Tender and moist, not rubbery
- Temperature: Hot throughout
- Appearance: Juices run clear, steam visible when sliced
Signs of Overcooking:
- Dry, stringy texture
- Meat pulling away and shredding easily
- No visible moisture when sliced
Serving Suggestions
Portion Size: 4 oz per person for main course (2 oz for sandwiches)
Serving Ideas:
- Classic Thanksgiving dinner with Costco mashed potatoes and cranberry sauce
- Turkey sandwiches on crusty bread with Swiss cheese
- Sliced cold on a charcuterie board
- Cubed for turkey salad or pasta dishes
Pairing Recommendations:
- Stuffing and gravy made from the drippings
- Roasted Costco frozen vegetables
- Dinner rolls and butter
- Costco jasmine rice for a weeknight meal
Storage and Reheating
Leftover Storage:
- Refrigerate within 2 hours of cooking
- Store in an airtight container
- Consume within 3-4 days
- Freeze for up to 3 months (slice first for easier thawing)
Reheating Instructions:
- Microwave: 1-2 minutes per serving at 50% power (cover with damp paper towel)
- Oven: 15-20 minutes at 325 degrees F covered with foil
- Target Temperature: 140 degrees F
Troubleshooting Common Issues
Issue: Turkey is dry
Cause: Overcooked past 140 degrees F or reheated too long
Solution: Add a splash of chicken broth when reheating, cover with foil to trap moisture
Issue: Uneven heating
Cause: Turkey wasn’t at room temperature before cooking, or too close to oven walls
Solution: Let turkey sit out 20 minutes before cooking, position in center of oven or air fryer
Issue: Rubbery texture
Cause: Microwaved at full power or heated too quickly
Solution: Use oven or air fryer instead, microwave only at 50% power if needed
Product Variations and Related Items
Similar Costco Products:
- Kirkland ham – larger, serves more people, needs similar heating method
- Costco turkey burgers – ground turkey patties, different preparation entirely
- Costco ground turkey – raw product, needs full cooking to 165 degrees F
Related Holiday Proteins:
- Costco ham – spiral sliced option for larger gatherings
- Costco standing rib roast – premium option for Christmas dinner
Cooking Time Adjustments:
If your turkey breast is smaller (around 2.5 lbs), reduce oven time to 45 minutes. Larger breasts (4+ lbs) may need 75 minutes. Always use a meat thermometer rather than relying on time alone.
Which Method Should You Choose?
Choose the Oven when:
- You want the most traditional turkey dinner experience
- Cooking for 4+ people
- You have an hour to spare
Choose the Air Fryer when:
- Speed matters (40 minutes versus 60)
- You want a slightly crispy exterior
- Your turkey fits in the basket
Choose the Slow Cooker when:
- You want hands-off cooking
- Making gravy from the drippings is important to you
- You’re cooking other dishes and need oven space
Time Comparison: Air Fryer (40 min) < Oven (60 min) < Slow Cooker (3-4 hours)
Texture Ranking: Slow Cooker (most tender) > Oven (balanced) > Air Fryer (slight exterior crispness)
Quick Tips From Experience
The packaging has slicing instructions on the back. Slice the “long way” (top to bottom) for entree portions. Slice the “short way” (left to right) for sandwich meat.
Don’t bother with the microwave. Took me forever to figure out why the texture kept coming out weird. The microwave heats unevenly and makes the meat rubbery in spots.
Save those drippings. Whether you use the oven or slow cooker, the liquid at the bottom makes excellent gravy. Just thicken with a little flour or cornstarch.
The turkey keeps well. Unopened, you’ve got about 3 weeks in the fridge (check the sell-by date). Once opened, use it within 7 days.
FAQ on How To Cook Costco Turkey Breast
Is Costco Turkey Breast Already Cooked?
Yes. The Kirkland Signature turkey breast is fully cooked and ready to eat straight from the package.
You can slice it cold for sandwiches or heat it for a warm turkey dinner. No raw meat handling required.
What Temperature Do You Cook Costco Turkey Breast?
Preheat your oven to 350 degrees F for the best results.
For air fryer cooking, use 325 degrees F. The slow cooker works on the LOW setting. Since it’s precooked, you’re just reheating it.
How Long Does It Take To Heat in the Oven?
About one hour for a 3-4 pound turkey breast at 350 degrees F.
Cover the roasting pan with aluminum foil. Add half a cup of water to keep the white meat moist during heating.
Can You Cook Costco Turkey Breast in an Air Fryer?
Absolutely. Set your air fryer to 325 degrees F and cook for 40 minutes.
Make sure your turkey fits in the basket first. A 4-pound breast needs at least a 5-quart air fryer.
What Internal Temperature Should the Turkey Reach?
Heat the turkey to 140 degrees F internal temperature. Use a meat thermometer to check the thickest part.
Since Kirkland turkey is precooked, you don’t need to hit 165 degrees F like raw poultry.
Can You Freeze Costco Turkey Breast?
Yes. Slice or portion the turkey before freezing for easier thawing later.
Vacuum seal or use freezer bags. Frozen turkey breast stays good for up to one year when stored properly.
How Do You Slice Costco Turkey Breast Correctly?
The package has arrows showing two slicing directions. Cut “long way” for entree portions.
Cut “short way” for sandwich meat. Slicing against the grain gives you the most tender pieces.
How Many Servings Does One Package Provide?
A 3-pound turkey breast yields about 10-12 servings at 4 ounces each.
For sandwiches using 2-ounce portions, you’ll get closer to 24 servings. Plan accordingly for your holiday dinner.
Can You Heat Costco Turkey Breast in a Slow Cooker?
Yes. The crockpot method takes 3-4 hours on low heat.
Add half a cup of chicken broth to the bottom. The drippings make excellent turkey gravy when you’re done.
How Long Does Leftover Turkey Last in the Fridge?
Store cooked turkey in an airtight container. It stays fresh for 3-4 days refrigerated.
Unopened packages last about 3 weeks (check the sell-by date). Once opened, use within 7 days.
Conclusion
Now you know how to cook Costco turkey breast three different ways. Pick the method that fits your schedule.
The oven delivers classic results for Thanksgiving or Christmas dinner. The air fryer saves time on busy weeknights. The slow cooker lets you walk away and come back to a tender, juicy turkey breast ready to carve.
Always use a meat thermometer to check doneness. Heat to 140 degrees F and let it rest before slicing.
Save those leftovers for turkey sandwiches, salads, or homemade turkey soup throughout the week.


