

Summarize this article with:
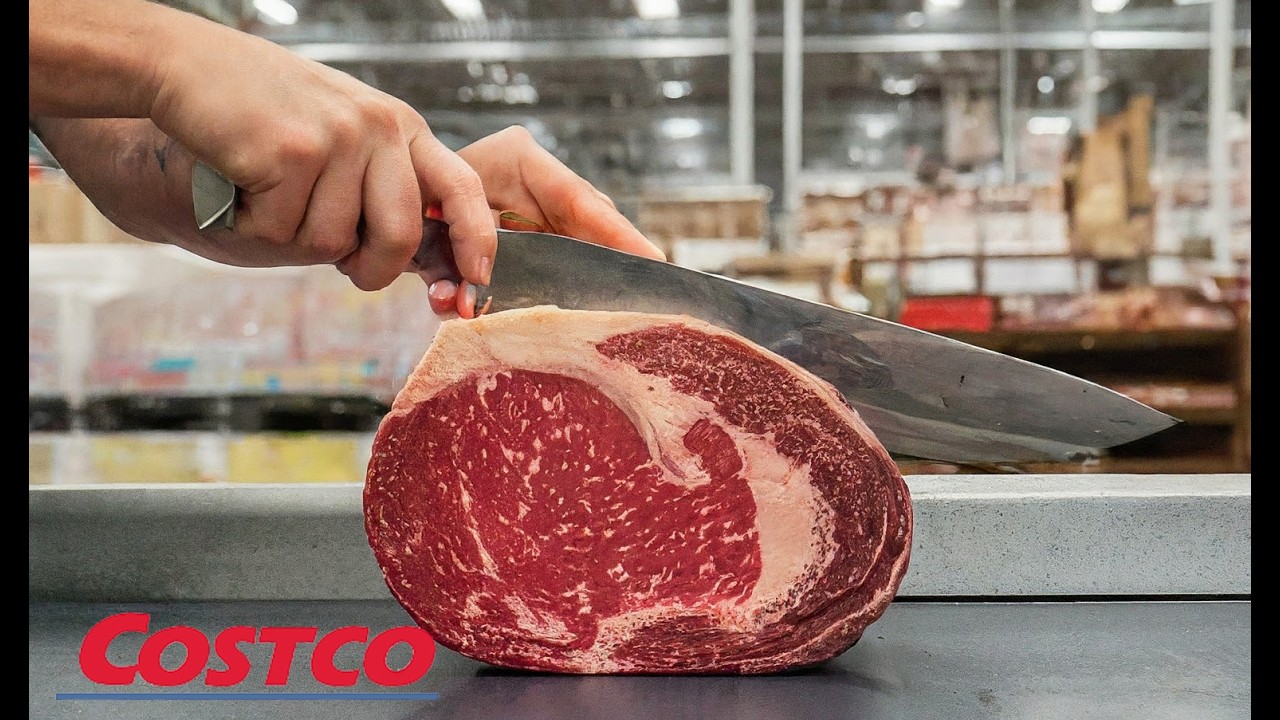
Costco’s Kirkland Signature Standing Rib Roast is a bone-in beef roast sold in the meat department, available in both seasoned and unseasoned varieties.
The pre-seasoned version comes rubbed with roasted garlic, olive oil, and spices. It arrives in an aluminum tray, ready for the oven.
Most people cook this for holiday dinners, Christmas, Easter, or Thanksgiving. A 10 lb roast feeds about 10 guests (1 pound per person).
This guide covers three cooking methods: the Costco package method, traditional high-heat sear, and the reverse sear technique. Total cooking time ranges from 2.5 to 4+ hours depending on roast size and method.
You’ll need a roasting pan, wire rack, and a reliable meat thermometer. The thermometer is non-negotiable here.
Product Details
Product: Kirkland Signature USDA Choice Seasoned Standing Rib Roast Bone-In
Type: Fresh, pre-seasoned, oven-ready
Package Size: 7-13 lbs (7-13 servings at 1 lb per person)
Price: $16.59/lb for seasoned, $12.99-$15.99/lb for unseasoned Choice, $17.89-$22.99/lb for Prime (Updated December 2024)
Storage: Refrigerate at 40F or below
Calories per Serving: Approximately 300-400 per 4 oz cooked portion
Main Ingredients (Seasoned): Rib of beef, garlic, spices, dehydrated garlic, maltodextrin, salt, olive oil
Item Number: 36237 (seasoned version)
Cooking Methods Comparison
| Method | Time | Equipment | Result | Best For |
| Costco Package Method | 3–4+ hours | Roasting pan, thermometer | Even cooking, tender meat | Pre-seasoned roasts, hands-off cooking |
| Traditional Sear | 2.5–3.5 hours | Roasting pan, rack, thermometer | Nice crust, classic technique | Unseasoned roasts, faster cooking |
| Reverse Sear | 3.5–4.5 hours | Wire rack, sheet pan, thermometer | Edge-to-edge medium rare | Best results, special occasions |
Recommended Method: Reverse sear for the most consistent edge-to-edge doneness and a beautiful browned crust.
Method 1: Costco Package Instructions
This is the method printed on the Costco seasoned standing rib roast package. Simple, straightforward. Takes about 4 hours for a 10 lb roast.
Step 1: How Do You Prepare the Roast?
Remove the roast from refrigeration 60-90 minutes before cooking. Let it come closer to room temperature for more even cooking.
Instructions:
- Remove plastic wrap from aluminum container
- Discard foam tray
- Keep roast in the aluminum pan it came with
Equipment: Aluminum tray (included), oven-safe meat thermometer
Step 2: What Temperature and Time Do You Use?
Start hot, then go low. The initial blast at 500F creates a seared exterior. Then the low temperature slowly brings the roast to your target doneness.
Instructions:
- Preheat oven to 500F
- Place roast on center rack
- Roast at 500F for 15-20 minutes
- Reduce temperature to 200F
- Continue cooking 20-30 minutes per pound
Temperature: 500F initial, then 200F
Time: 20-30 minutes per pound after initial sear (3-4+ hours total for 10 lb roast)
Step 3: When Do You Check the Internal Temperature?
Insert your thermometer into the center of the roast, avoiding the bone. The bone conducts heat differently and will give you a false reading.
Instructions:
- Check temperature starting at the 3-hour mark for a 10 lb roast
- Monitor every 15-20 minutes as you approach target temp
Checkpoint: Begin checking at approximately 75% of estimated total cooking time
Step 4: How Do You Know When It’s Done?
Pull the roast when it hits your target internal temperature. The temp will rise 5-10 degrees during resting.
Instructions:
- Remove when thermometer reads target temperature (see chart below)
- Let rest 15-20 minutes before carving
- Cut twine if tied, remove bones, slice against the grain
Target Temperatures (pull temp):
- Rare: 120-125F
- Medium Rare: 125-130F
- Medium: 135-140F
- Medium Well: 145-150F
Visual Indicator: Browned exterior with rendered fat cap
Method 2: Traditional High-Heat Sear
Classic approach. Sear first at high temperature, then finish low and slow at 325F. Works great for unseasoned roasts where you want to build your own flavor profile with kosher salt, black pepper, and fresh herbs like rosemary and thyme.
Step 1: How Do You Prepare the Roast?
Season your roast generously. Salt pulls moisture to the surface, which then gets reabsorbed along with the seasoning.
Instructions:
- Pat roast dry with paper towels
- Coat with olive oil
- Season liberally with kosher salt and cracked black pepper
- Add minced garlic and herbs if desired
- Let sit at room temperature 1-2 hours
Equipment: Roasting pan with wire rack, instant-read thermometer, butcher’s twine (optional)
Step 2: What Temperature and Time Do You Use?
The high initial heat creates the Maillard reaction, that beautiful brown crust. Then lower heat cooks the interior gently.
Instructions:
- Preheat oven to 450F
- Place roast fat cap up on rack in roasting pan
- Roast 20 minutes at 450F
- Reduce to 325F
- Cook approximately 15-20 minutes per pound
Temperature: 450F initial, then 325F
Time: 15-20 minutes per pound after initial sear
Step 3: When Do You Check?
Start checking internal temperature about 30 minutes before your estimated finish time. Ovens vary, roast shapes vary. The thermometer tells you what’s really happening.
Instructions:
- Insert probe thermometer into thickest part of meat
- Avoid touching bone
- Monitor temperature throughout cooking
Checkpoint: Check at 75% of estimated time, then every 15 minutes
Step 4: How Do You Know When It’s Done?
Same temperature targets as Method 1. Pull 5 degrees below your desired final temp.
Instructions:
- Remove at 120F for medium rare (will rise to 125-130F)
- Tent loosely with foil
- Rest 15-20 minutes
- Carve and serve
Target Temperature: 120-125F for medium rare (pull temp)
Visual Indicator: Deep golden brown crust, fat rendered and crispy
Method 3: Reverse Sear (Recommended)
This is the method serious home cooks use. You cook low and slow first, rest, then blast with high heat at the end. The result? Perfect edge-to-edge pink with no gray band. Crispy exterior.
Takes longer but the results are worth it. This method also gives you flexibility; you can hold the roast during the rest period while waiting for guests.
Step 1: How Do You Prepare the Roast?
Dry brining is the secret weapon here. Salt the roast 24-48 hours ahead and let it sit uncovered in the fridge. The surface dries out (better crust) and the salt penetrates deep into the meat.
Instructions:
- Season with 2 teaspoons kosher salt per bone, pressed into meat
- Place on wire rack over sheet pan
- Refrigerate uncovered 24-48 hours
- Remove from fridge 1-2 hours before cooking
- Add pepper and herbs just before roasting
Equipment: Wire rack, rimmed sheet pan, probe thermometer, butcher’s twine
Step 2: What Temperature and Time Do You Use?
Low temperature gives you a wide margin for error. The meat cooks evenly because heat has time to distribute throughout the roast.
Instructions:
- Preheat oven to 225-250F
- Place roast fat cap up on wire rack
- Insert probe thermometer into center
- Roast until internal temp reaches 115-120F
Temperature: 225-250F
Time: 3-4 hours for a 10 lb roast (approximately 25-30 minutes per pound)
Step 3: When Do You Rest and Sear?
The rest period is where the magic happens. Internal temperature equalizes. Juices redistribute. Then the final sear creates that irresistible crust.
Instructions:
- Remove roast at 115-120F
- Tent loosely with foil
- Rest 20-60 minutes
- While resting, preheat oven to 500-550F
Checkpoint: Rest minimum 20 minutes, up to 1 hour is fine
Step 4: How Do You Finish the Roast?
High heat for a short time. Watch it closely. Things happen fast at 500F.
Instructions:
- Remove foil from rested roast
- Return to 500-550F oven
- Sear 6-10 minutes until crust is deep golden brown
- Remove and slice immediately (no additional rest needed)
Target Temperature: Final internal temp should be 125-130F for medium rare
Visual Indicator: Dark golden brown, crispy fat cap, edges slightly charred
Safety and Quality Indicators
Food Safety
- Internal Temperature: USDA recommends minimum 145F with 3-minute rest for food safety
- Steam Check: Meat should be hot throughout when cut
- Thawing: If frozen, thaw in refrigerator 2-3 days before cooking, never at room temperature
Quality Indicators (Done Properly)
- Color: Pink to red center (for medium rare), brown crust exterior
- Texture: Tender, yields easily when sliced
- Temperature: 125-130F internal for medium rare
- Appearance: Rendered fat cap, juices run clear to slightly pink
Signs of Overcooking
- Gray color throughout (no pink center)
- Dry, stringy texture
- Excessive moisture loss, dry pan
- Internal temperature above 145F for medium rare lovers
Serving Suggestions
Portion Size: 1 lb per person bone-in (8-12 oz actual meat)
Serving Ideas:
- Slice against the grain into 1/2 inch portions with au jus on the side
- Pair with creamy horseradish sauce and whole grain mustard
- Serve with Costco mashed potatoes and roasted vegetables
Pairing Recommendations:
- Yorkshire pudding, roasted asparagus, or creamed spinach
- Full-bodied red wine (Cabernet Sauvignon pairs well)
- Costco garlic bread for soaking up the juices
Storage and Reheating
Leftover Storage
- Refrigerate within 2 hours of cooking
- Store in airtight container
- Consume within 3-4 days
- Freeze for up to 2 months (wrap tightly in plastic, then foil)
Reheating Instructions
- Oven (recommended): Wrap in foil, heat at 300F for 15-20 minutes until warmed through
- Stovetop: Slice thin, warm in au jus or beef broth over medium-low heat
- Target Temperature: 165F for food safety when reheating
Skip the microwave if you can. It tends to dry out the meat and make it rubbery. Low and slow reheating preserves the texture better.
Troubleshooting Common Issues
Issue: Gray band around the edge, only pink in center
Cause: Oven temperature too high, cooked too fast
Solution: Use the reverse sear method. Lower initial cooking temperature (225-250F) produces edge-to-edge even doneness.
Issue: Crust not crispy or browned
Cause: Surface moisture, oven not hot enough during sear phase
Solution: Pat roast completely dry. Ensure oven reaches 500F+ for final sear. Don’t cover during searing.
Issue: Roast is overcooked
Cause: Didn’t account for carryover cooking, no thermometer used
Solution: Always pull the roast 5-10 degrees below target temperature. Use a probe thermometer throughout cooking. Temperature continues rising during rest.
Issue: Meat is tough and chewy
Cause: Sliced with the grain, not enough resting time
Solution: Always slice against the grain. Rest minimum 15-20 minutes (up to 1 hour for reverse sear method).
Product Variations and Related Items
Similar Costco Products
- USDA Prime Standing Rib Roast – More marbling, richer flavor, higher price ($17.89-$22.99/lb)
- Boneless Ribeye Roast – Same cut without bones, easier to carve
- Costco short ribs – Different cut, requires braising
- Costco brisket – Budget-friendly alternative for smoking
Cooking Time Adjustments
Boneless roasts cook slightly faster (reduce time by about 10%). Larger roasts over 12 lbs may need additional time. Always rely on internal temperature rather than time estimates.
Complete Your Holiday Meal
Building a full spread? Consider adding Costco frozen vegetables as a side, or go all out with Costco ham for guests who prefer pork.
For dessert, Costco creme brulee or Costco apple pie rounds things out nicely.
FAQ on How To Cook Costco Standing Rib Roast
How long does it take to cook a Costco standing rib roast?
Plan for 20-30 minutes per pound at low temperature (200-250F).
A 10 lb roast takes approximately 3-4 hours. Always use a meat thermometer rather than relying solely on time estimates.
What internal temperature should I cook prime rib to?
For medium rare doneness, pull your roast at 120-125F.
The temperature rises 5-10 degrees during resting. Medium is 135F, medium well is 145F. USDA recommends 145F minimum for food safety.
Should I let the roast come to room temperature before cooking?
Yes. Remove your rib roast from refrigeration 1-2 hours before cooking.
This helps the meat cook more evenly. A cold roast straight from the fridge results in uneven cooking with overcooked edges.
What is the best cooking method for Costco prime rib?
The reverse sear method produces the best results.
Cook low and slow at 225-250F until 115-120F internal, rest 20-60 minutes, then sear at 500F for 6-10 minutes. Edge-to-edge pink every time.
How much standing rib roast do I need per person?
Plan for 1 pound per person for bone-in roasts.
A 3-bone roast (about 7-8 lbs) feeds 6-8 people comfortably. For lighter eaters or if serving multiple sides, you can reduce to 3/4 pound.
Do I need to season the Costco pre-seasoned rib roast?
No additional seasoning is required. The Kirkland Signature seasoned roast comes rubbed with roasted garlic, olive oil, and spices.
For unseasoned roasts, use kosher salt, black pepper, and fresh herbs generously.
How long should I rest prime rib before carving?
Rest minimum 15-20 minutes, up to 1 hour for larger roasts.
Resting allows juices to redistribute throughout the meat. Skip this step and you’ll lose those juices onto your cutting board instead.
What should I serve with standing rib roast?
Classic pairings include Yorkshire pudding, roasted potatoes, and creamy horseradish sauce.
Au jus made from pan drippings is traditional. A bold red wine like Cabernet Sauvignon complements the rich beef flavor.
Can I cook a frozen Costco rib roast?
No. Always thaw completely before cooking.
Thaw in the refrigerator for 2-3 days depending on size. Never thaw at room temperature. A partially frozen roast cooks unevenly and poses food safety risks.
How do I store and reheat leftover prime rib?
Refrigerate within 2 hours in an airtight container. Keeps 3-4 days.
Reheat wrapped in foil at 300F for 15-20 minutes. Avoid the microwave. Slice thin and warm in beef broth for best results.
Conclusion
Learning how to cook Costco standing rib roast comes down to three things: proper temperature control, a reliable thermometer, and patience.
Whether you choose the Costco package method or the reverse sear technique, hitting that perfect medium rare doneness is achievable.
The dry brine method builds flavor. Resting redistributes juices. A hot sear creates that beautiful crust.
Your Christmas dinner or special occasion meal deserves this kind of attention. Pick your USDA Choice or Prime cut, follow the cooking time per pound guidelines, and trust your thermometer.
The results speak for themselves.


