This frozen seafood product from Costco features butterflied shrimp coated in Japanese-style breadcrumbs. The panko coating produces a light, crispy texture when baked or air fried.
Most people grab a box for quick appetizers, easy weeknight dinners, or party platters. Each 2.5-pound package contains 40 to 50 pieces.
You can cook these three ways: conventional oven, convection oven, or air fryer. Times range from 10 to 18 minutes depending on your equipment.
Product Details
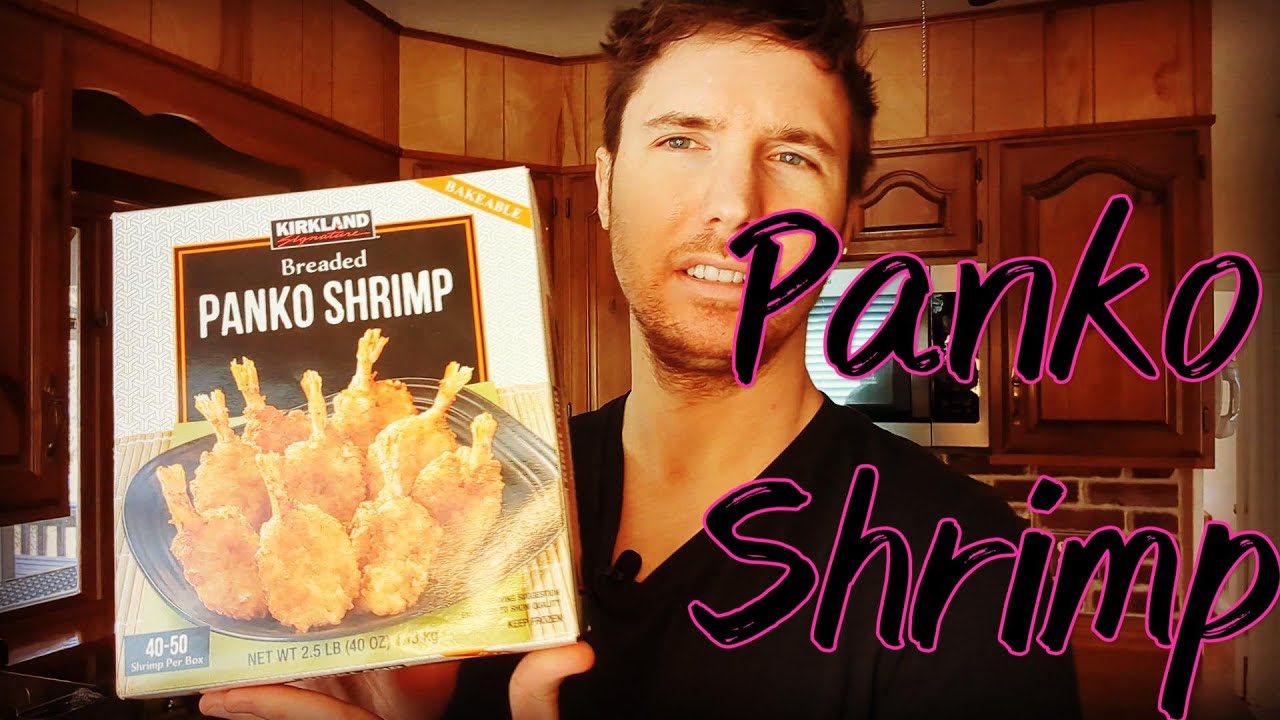
Product: Kirkland Signature Breaded Panko Shrimp
Type: Frozen breaded shrimp (requires cooking)
Package Size: 2.5 lbs / 40 oz (40-50 pieces)
Price: $19.99 at Costco ($15.99 on sale)
Storage: Keep frozen until ready to cook
Calories per Serving: 200-220 (3 shrimp)
Main Ingredients: Shrimp, wheat flour, soybean oil, garlic, onion, salt, paprika extract
Item Number: 1233570
Allergens: Shrimp, wheat, milk, soy
Cooking Methods Comparison
| Method | Time | Temperature | Result | Best For |
| Air Fryer | 10-12 min | 400°F | Crispiest coating | Small batches, quick meals |
| Conventional Oven | 16-18 min | 400°F | Even browning | Large batches, parties |
| Convection Oven | 15-17 min | 400°F | Consistent crunch | Full packages |
Recommended Method: Air fryer for fastest cooking time and crispiest results. No preheating required in most models.
Method 1: Air Fryer (Recommended)
The air fryer cuts cooking time nearly in half compared to oven methods. You get a golden brown exterior with that signature crunch in about 10 minutes.
Step 1: How Do You Prepare the Shrimp?
No thawing needed. Cook straight from frozen for best results.
Instructions:
- Remove shrimp from freezer packaging
- Lightly spray air fryer basket with cooking oil
- Arrange shrimp in a single layer with space between each piece
Equipment: Air fryer, cooking spray, tongs
Step 2: What Temperature and Time Do You Use?
Set your air fryer to 400F. Most batches finish in 10 to 12 minutes.
Instructions:
- Set air fryer to 400F
- Cook for 10 minutes total
- Check for golden brown color
Temperature: 400F
Time: 10-12 minutes
Step 3: When Do You Flip the Shrimp?
Flip or shake the basket halfway through cooking for even crisping on both sides.
Instructions:
- Pause at the 5-minute mark
- Shake basket or flip each shrimp with tongs
- Resume cooking
Checkpoint: At 5-minute mark
Step 4: How Do You Know When It’s Done?
Look for an even golden brown color across the entire coating. The shrimp should feel firm when pressed.
Instructions:
- Check internal temperature reaches 165F
- Coating appears golden brown and crispy
- Rest for 1-2 minutes before serving
Target Temperature: 165F internal
Visual Indicator: Golden brown coating, no pale spots
Method 2: Conventional Oven
The package calls this the preferred method. Works well for cooking the entire box at once or when preparing food for a crowd.
Step 1: How Do You Prepare the Shrimp?
Line a baking sheet with parchment paper or use a non-stick surface.
Instructions:
- Preheat oven to 400F
- Line baking sheet with parchment paper
- Arrange frozen shrimp in single layer (pieces should not touch)
Equipment: Baking sheet, parchment paper, oven mitts
Step 2: What Temperature and Time Do You Use?
Standard baking is 400F for 16 to 18 minutes. For extra crispiness, bump the temp to 425F.
Instructions:
- Place baking sheet on middle oven rack
- Bake for 16-18 minutes total
- For crispier coating, use 425F
Temperature: 400F (or 425F for extra crisp)
Time: 16-18 minutes
Step 3: When Do You Flip the Shrimp?
Turn each piece over at the 10-minute mark. This prevents soggy bottoms and ensures even browning.
Instructions:
- Remove baking sheet at 10 minutes
- Flip each shrimp using tongs or spatula
- Return to oven for remaining time
Checkpoint: At 10-minute mark
Step 4: How Do You Know When It’s Done?
The coating should be uniformly golden. Let the shrimp rest briefly on paper towels to absorb excess oil.
Instructions:
- Check for golden brown color on all sides
- Internal temperature should reach 165F
- Let stand 2 minutes, then place on paper towels
Target Temperature: 165F internal
Visual Indicator: Even golden brown coating, steaming when cut
Method 3: Convection Oven
Convection ovens circulate hot air for slightly faster and more even cooking. Times run about 2 minutes shorter than conventional.
Step 1: How Do You Prepare the Shrimp?
Same prep as conventional oven. The circulating air does most of the work.
Instructions:
- Preheat convection oven to 400F
- Line baking sheet with parchment
- Spread shrimp in single layer with gaps between pieces
Equipment: Baking sheet, parchment paper, oven mitts
Step 2: What Temperature and Time Do You Use?
Keep the same 400F setting but reduce time slightly.
Instructions:
- Set convection oven to 400F
- Bake for 15-17 minutes total
- Position on middle rack
Temperature: 400F
Time: 15-17 minutes
Step 3: When Do You Flip the Shrimp?
Flip earlier than conventional oven due to faster cooking.
Instructions:
- Remove at 6-minute mark
- Turn each shrimp over
- Return to oven
Checkpoint: At 6-minute mark
Step 4: How Do You Know When It’s Done?
Same visual cues as conventional. Golden color, crispy texture, 165F internal.
Instructions:
- Verify internal temperature of 165F
- Look for golden brown coating
- Let stand 2 minutes before serving
Target Temperature: 165F internal
Visual Indicator: Uniform golden color with crispy texture
Safety and Quality Indicators
Food Safety
- Internal Temperature: 165F minimum
- Steam Check: Shrimp should release steam when cut open
- Thawing: Never thaw before cooking (cook from frozen)
- Microwaving: Not recommended by manufacturer
Quality Indicators (Done Properly)
- Color: Even golden brown across entire surface
- Texture: Crispy coating, firm shrimp inside
- Temperature: Hot throughout, 165F minimum
- Appearance: No pale or soggy spots
Signs of Overcooking
- Dark brown or blackened edges
- Rubbery or tough shrimp texture
- Dried out, crumbly coating
Serving Suggestions
Portion Size: 3-4 shrimp per serving (roughly 12-16 servings per package)
Serving Ideas
- Appetizer platter with dipping sauces
- Shrimp tacos with slaw and lime
- Rice bowl with vegetables and teriyaki
- Salad topper for added protein
Best Dipping Sauces
- Sweet chili sauce
- Tartar sauce
- Cocktail sauce
- Spicy mayo or sriracha aioli
- Honey mustard
Pairing Ideas
These panko shrimp work well alongside Costco fried rice for a complete Asian-style meal.
For parties, serve them next to Costco egg rolls or potstickers on an appetizer spread.
Want a seafood feast? Add Costco coconut shrimp to the mix for variety.
Storage and Reheating
Leftover Storage
- Refrigerate within 2 hours of cooking
- Store in airtight container
- Consume within 2-3 days
Freezer Storage
- Unopened package: 13 months from purchase date
- Opened package: Transfer to freezer bag, use within 2-3 months
Reheating Instructions
- Air Fryer: 350F for 3-4 minutes
- Oven: 350F for 5-6 minutes
- Avoid: Microwaving (makes coating soggy)
- Target Temperature: 165F
Troubleshooting Common Issues
Issue: Coating is not crispy
Cause: Overcrowding in air fryer or on baking sheet
Solution: Leave space between each shrimp. Air needs to circulate around all sides.
Issue: Bottom is soggy
Cause: Forgot to flip halfway through cooking
Solution: Always flip at the midpoint. Use a wire rack on your baking sheet if available.
Issue: Shrimp is rubbery
Cause: Overcooked
Solution: Check doneness 2 minutes before suggested time ends. Carryover cooking continues after removal.
Issue: Bland flavor
Cause: The panko coating has mild seasoning by design
Solution: Always serve with dipping sauce. Sweet chili and cocktail sauce are popular choices.
Issue: Uneven browning
Cause: Shrimp pieces touching each other
Solution: Arrange in single layer with visible gaps. Cook in batches if needed.
Product Variations and Related Items
Similar Costco Seafood Products
- Kirkland Tempura Shrimp: Flour-based batter instead of panko, includes sauce packets
- Kirkland Coconut Shrimp: Sweeter coating with coconut flakes
- Aqua Star Panko Shrimp: 3 lb package, slightly different breading
For other frozen seafood options, check out how to prepare Costco scallops or Costco lobster tails.
If you want another breaded item, the preparation is similar for Costco chicken nuggets or mozzarella sticks.
Which Method Should You Choose?
Choose Air Fryer when:
- You want the crispiest texture possible
- Cooking 10-15 shrimp at a time
- You need food ready in under 15 minutes
- You prefer less hands-on cooking
Choose Conventional Oven when:
- Cooking for a party or large group
- Preparing the entire 2.5 lb box
- You need consistent results across many pieces
- No air fryer available
Choose Convection Oven when:
- You want oven convenience with faster timing
- Cooking full batches
- Your kitchen has a convection setting built in
Time Comparison
Air Fryer (10-12 min) < Convection (15-17 min) < Conventional (16-18 min)
Texture Ranking
Air Fryer (crispiest) > Convection (very crisp) > Conventional (crisp)
Nutrition Information
Serving Size: 3 shrimp (84g)
| Nutrient | Amount | | — | — | | Calories | 200-220 | | Total Fat | 11-12g | | Carbohydrates | 14g | | Protein | 11-13g | | Sodium | 200-230mg | | Sugar | 2g |
The macros split fairly evenly between fat, carbs, and protein. That’s unusual for breaded seafood and makes portion control easier.
FAQ on How To Cook Costco Panko Shrimp
What temperature do you cook Costco panko shrimp?
Set your oven or air fryer to 400F for best results.
This temperature creates a golden brown, crispy coating without burning the Japanese breadcrumbs. For extra crunch, some people bump it up to 425F in a conventional oven.
Can you cook Kirkland panko shrimp in an air fryer?
Yes. The air fryer actually produces the crispiest results.
Cook frozen breaded shrimp at 400F for 10 to 12 minutes. Flip halfway through. No preheating required in most models, which cuts total cooking time significantly.
How long do you bake Costco panko shrimp in the oven?
Bake for 16 to 18 minutes at 400F on the middle rack.
Turn the shrimp over at the 10-minute mark. Let them rest for 2 minutes after removing from the oven. Place on paper towels before serving.
Do you need to thaw Costco panko shrimp before cooking?
No. Cook them straight from frozen.
Thawing is unnecessary and can actually make the panko coating soggy. The shrimp heat through quickly once cooking starts. Frozen to crispy takes under 20 minutes.
Can you microwave Costco panko shrimp?
The manufacturer does not recommend microwaving.
Microwaves create steam that makes the breaded coating soft and rubbery. Stick with the oven or air fryer if you want that crunchy texture the panko breadcrumbs deliver.
What dipping sauces go with panko breaded shrimp?
Sweet chili sauce is the most popular choice.
Tartar sauce, cocktail sauce, and spicy mayo also work well. The panko coating has mild seasoning on purpose, so a flavorful dipping sauce really makes the difference.
How many calories are in Costco panko shrimp?
One serving (3 shrimp) contains 200 to 220 calories.
You also get 11 to 13 grams of protein, 14 grams of carbs, and about 11 grams of fat. Sodium runs around 200 to 230mg per serving.
How do you keep Costco panko shrimp crispy?
Arrange shrimp in a single layer with space between each piece.
Overcrowding traps steam and creates soggy spots. Flip halfway through cooking. Use a wire rack on your baking sheet if you have one available.
How do you reheat leftover panko shrimp?
Use an air fryer at 350F for 3 to 4 minutes.
An oven works too (350F, 5 to 6 minutes). Never microwave leftovers. The internal temperature should reach 165F before eating.
Is Costco Kirkland Signature panko shrimp gluten-free?
No. This product contains wheat flour in the breading.
The allergen list includes shrimp, wheat, milk, and soy. People with celiac disease or gluten sensitivity should avoid this frozen seafood product entirely.
Conclusion
Learning how to cook Costco panko shrimp takes about 15 minutes of actual effort. The air fryer delivers the crispiest results, while the conventional oven handles larger batches for party platters.
Always arrange pieces in a single layer on your baking sheet. Flip halfway through. Check that the internal temperature hits 165F with a food thermometer.
These frozen breaded shrimp work as a quick appetizer, kid-friendly meal, or easy seafood dinner. Grab a dipping sauce and you’re set.