

Summarize this article with:
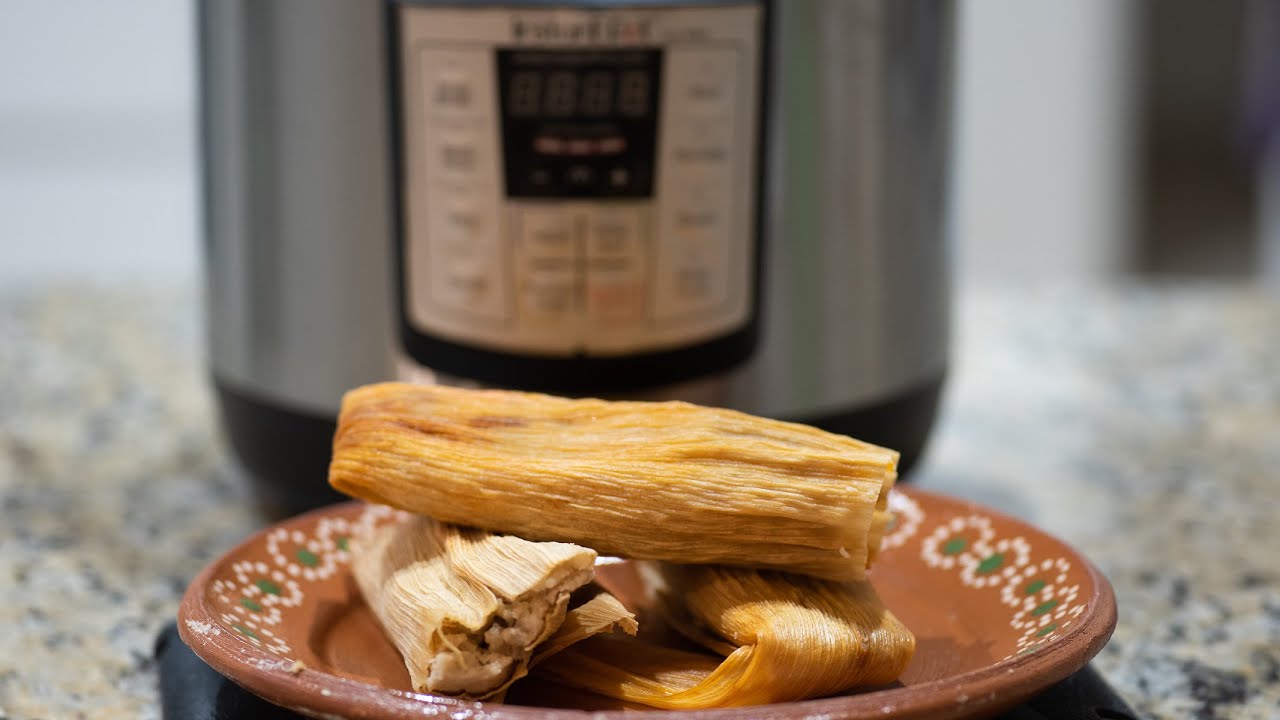
Making tamales traditionally takes hours of steaming, but your electric pressure cooker changes everything. Learning how to make tamales in an Instant Pot cuts cooking time in half while delivering that perfect, tender texture you’re craving.
The pressure cooking method works because it creates consistent steam circulation around each corn husk bundle. No more checking water levels or worrying about uneven heat distribution.
This guide walks you through every step, from preparing the masa harina mixture to achieving that fluffy consistency that makes homemade tamales irresistible.
You’ll discover the exact water ratios, timing adjustments, and steamer basket setup that guarantee success. Whether you’re making pork shoulder filling or experimenting with cheese and pepper combinations, these techniques work for any tamale variation.
By the end, you’ll confidently steam perfect tamales using just your Instant Pot and basic Mexican cooking techniques.
Essential Equipment and Ingredients

Instant Pot Setup Requirements
Your Instant Pot needs the right accessories for perfect tamales. The steamer basket or trivet keeps tamales elevated above the cooking liquid.
An 8-quart model handles larger batches better than 6-quart versions. You’ll appreciate the extra space when making family-sized portions.
Parchment paper prevents sticking if your steamer basket has wide gaps. It’s optional but helpful for smaller tamales.
Required Accessories
A sturdy trivet supports multiple layers of tamales. Look for one with handles for easy removal.
Kitchen tongs help arrange hot tamales safely. Silicone-tipped versions won’t damage delicate corn husks.
A large mixing bowl accommodates masa preparation. Stand mixers work great for achieving fluffy texture.
Masa and Filling Ingredients
Masa harina forms the foundation of great tamales. Maseca brand delivers consistent results every time.
Fresh masa from Mexican markets offers superior flavor if available. Call ahead since many shops only make it on weekends.
Lard creates the most authentic texture, though vegetable shortening works as a substitute. Don’t skip the fat entirely.
Fat Choices and Seasonings
Traditional recipes use lard for its rich flavor and perfect texture. Modern cooks often prefer vegetable shortening for dietary reasons.
Butter works in a pinch but changes the flavor profile significantly. Coconut oil solidifies too much during cooking.
Baking powder helps create lighter, fluffier masa. Salt balances flavors and shouldn’t be skipped.
Corn Husks and Preparation
Dried corn husks need proper soaking for flexibility. Soak them in warm water for at least 30 minutes.
Look for large, intact husks without tears. Mexican grocery stores typically stock the best quality options.
Paper towels or banana leaves work as alternatives. Each changes the final flavor slightly.
Preparing the Perfect Masa

Mixing Techniques for Fluffy Masa
Beat the fat first until light and airy. This step takes longer than you think but makes all the difference.
A stand mixer with paddle attachment saves arm strength. Hand mixing works but requires patience and persistence.
The masa should hold together when squeezed but not feel dense or heavy.
Proper Fat-to-Masa Ratios
Use one part fat to four parts masa harina for traditional texture. Adjust based on your family’s preferences.
Too much fat makes tamales greasy and heavy. Too little creates dry, crumbly results.
Test consistency by dropping a small ball of masa into water. It should float when properly prepared.
Liquid Integration
Chicken broth adds more flavor than plain water. Warm liquid incorporates more easily than cold.
Add liquid gradually while mixing to prevent lumps. The mixture should spread easily but not run off the spoon.
Season generously with salt and cumin. Masa tastes bland without proper seasoning.
Testing Masa Consistency
Properly mixed masa feels light and slightly sticky. It should spread smoothly across corn husks without tearing.
The float test confirms readiness – a small masa ball floats in warm water. If it sinks, beat the mixture longer.
Adjust texture with small amounts of broth or additional masa harina as needed.
Filling Preparation Strategies
Meat Fillings That Work Best

Pork shoulder shreds beautifully and stays moist during pressure cooking. Season it heavily before cooking.
Chicken thighs work better than breasts for tamale fillings. The extra fat prevents dryness.
Pre-cook all meats completely before using as filling. Raw meat won’t cook properly inside the masa.
Pre-Cooking Requirements
Slow-cooked meats in Mexican spices create the most flavorful fillings. Don’t rush this step.
Drain excess liquid from cooked meats before using. Wet fillings make soggy tamales.
Shred meat into bite-sized pieces for easy eating. Large chunks make tamales difficult to wrap properly.
Vegetarian Options
Refried beans mixed with cheese make classic vegetarian tamales. Season with cumin and chili powder.
Roasted vegetables like peppers and onions add great texture. Cook them until slightly caramelized.
Cheese and pepper combinations work perfectly in pressure cookers. Use Mexican cheeses for authentic flavor.
Sweet Filling Variations
Cinnamon and sugar with raisins creates traditional sweet tamales. Add a touch of vanilla extract.
Fresh fruit fillings need less liquid than savory options. Pineapple and strawberries work wonderfully.
Sweet tamales often use pink masa colored with food coloring. It’s optional but traditional for celebrations.
Moisture Control
All fillings should be relatively dry before wrapping. Excess moisture makes tamales fall apart.
Cool fillings completely before assembly. Hot fillings melt the masa and create messy tamales.
Taste and adjust seasonings before filling tamales. You can’t fix bland filling after wrapping.
Assembly Techniques for Perfect Tamales

Preparing Corn Husks
Soak corn husks in warm water for at least 30 minutes until pliable. They should bend without cracking or tearing.
Shake off excess water before using. Wet husks create soggy tamales during pressure cooking.
Select the largest, most intact husks for wrapping. Save smaller pieces for tying or patching tears.
Selecting Quality Husks
Look for husks without holes or major tears. Mexican grocery stores typically stock better quality options than regular supermarkets.
Avoid husks that feel brittle or overly dry. These often crack during the wrapping process.
Keep a bowl of warm water nearby for re-soaking stubborn husks during assembly.
Spreading and Filling Methods
Spread masa dough in a thin, even layer leaving borders on all sides. Too thick makes tamales heavy and dense.
Use about 2 tablespoons of masa per tamale for standard size. Larger tamales need proportionally more filling.
Create a small well in the masa center for filling placement. This prevents filling from leaking out during wrapping.
Proper Masa Thickness
The masa layer should be about 1/4 inch thick maximum. Thicker layers don’t cook evenly in the pressure cooker.
Leave a 1-inch border at the bottom and 2-inch border at the top of the husk. This prevents overflow during cooking.
Spread masa with the back of a spoon or offset spatula for even coverage.
Filling Placement Techniques
Place 1-2 tablespoons of filling in the masa center depending on tamale size. Less is often more with tamale fillings.
Keep filling away from the edges to prevent leaking. Centered placement makes wrapping much easier.
Don’t overfill tamales – they’ll burst open during pressure cooking and create a mess.
Folding and Tying Methods
Fold the long sides of the husk over the filling first. The masa should completely enclose the filling.
Bring the pointed end of the husk up and over the seam. This creates the traditional tamale shape.
Tie with strips of corn husk or kitchen twine about 1/3 down from the top. Secure but don’t overtighten.
Step-by-Step Folding Process
- Fold left side over filling first
- Fold right side overlapping the left
- Bring bottom point up over the seam
- Tie securely with husk strips
Tying Techniques
Use torn husk strips for traditional tying methods. Kitchen twine works but isn’t as authentic.
Tie firmly enough to hold the tamale together but not so tight that it cuts into the husk. The masa expands during cooking.
Stand tied tamales upright in a bowl while preparing the remaining batch. This prevents unraveling.
Instant Pot Cooking Process
Setting Up Your Instant Pot
Add 1.5 cups of water to the Instant Pot bottom. This creates sufficient steam without touching the tamales.
Place the trivet or steamer basket inside to elevate tamales above the cooking liquid. Proper elevation prevents soggy bottoms.
Check that your steamer basket sits securely and won’t tip during cooking.
Water Requirements
Too little water creates insufficient steam and uneven cooking. Too much water can seep into tamales.
Use chicken broth instead of water for added flavor if desired. The steam carries subtle taste into the tamales.
Never let water touch the tamales directly. They should steam, not boil.
Arranging Tamales
Stand tamales upright with open ends facing up in the steamer basket. This prevents filling from falling out.
Pack them snugly but not tightly – they need space for steam circulation. Overcrowding leads to uneven cooking.
Layer larger tamales on the bottom and smaller ones on top if making mixed sizes.
Optimal Placement Patterns
Arrange tamales in a circular pattern around the steamer basket perimeter first. Fill the center last for even heat distribution.
Lean tamales against the Instant Pot walls for stability. They should support each other naturally.
Leave small gaps between tamales for proper steam flow throughout the cooking chamber.
Pressure Cooking Settings
Set the Instant Pot to high pressure for 20-25 minutes depending on tamale size. Fresh masa cooks faster than day-old preparation.
Larger tamales need closer to 25 minutes while smaller ones finish in 20 minutes. When in doubt, check early.
Don’t use low pressure settings – they won’t cook the masa properly.
Timing Guidelines
- Small tamales: 18-20 minutes
- Medium tamales: 22-25 minutes
- Large tamales: 25-28 minutes
- Frozen tamales: Add 5-10 extra minutes
Release Methods
Allow natural pressure release for 10 minutes minimum. This prevents tamales from falling apart from sudden pressure changes.
Quick release the remaining pressure slowly to avoid splattering. Steam will be very hot.
Wait 5 minutes after pressure release before opening the lid completely.
Testing for Doneness
Carefully remove one tamale with tongs for testing. The masa should pull away from the corn husk cleanly.
If the masa sticks or feels gummy, cook for 5 more minutes under pressure. Don’t guess – test properly.
Internal temperature should reach 165°F for food safety, especially with meat fillings.
Troubleshooting Common Problems
Preventing Mushy Tamales
Mushy tamales usually result from too much liquid in the masa mixture. Use less chicken broth next time.
Overcooking also creates mushy texture. Start checking doneness at minimum cook times rather than maximum.
Poor masa preparation leads to dense, gummy results. Beat the fat properly before adding masa harina.
Masa Consistency Fixes
If masa feels too wet during mixing, add small amounts of masa harina gradually. Don’t dump it all at once.
Too-dry masa cracks during spreading. Add warm broth one tablespoon at a time until workable.
The float test never lies – properly prepared masa floats in warm water. Keep beating if it sinks.
Fixing Wrapping Issues
Tamales that fall apart usually have inadequate tying or overfilling problems. Use more husk strips and less filling.
Torn husks can be patched with smaller husk pieces. Overlap the patch generously for security.
If husks keep tearing, they may be too dry. Re-soak them in warm water for better flexibility.
Structural Problem Solutions
Uneven cooking often means poor tamale arrangement in the steamer basket. Ensure adequate spacing for steam circulation.
Tamales that burst during cooking were overfilled or tied too loosely. Less filling and firmer tying prevent this.
If tamales stick to husks, the masa wasn’t beaten enough initially or cooked too long.
Dealing with Cooking Failures
Undercooked tamales feel dense and stick to husks. Return them to pressure cooking for 5-10 more minutes.
Burnt bottom flavors indicate insufficient water in the pot. Always check water levels before starting.
If tamales taste bland, the problem was underseasoned masa or filling. Season more heavily next time.
Prevention Strategies
Test your masa consistency thoroughly before assembly. The float test prevents most texture problems.
Don’t rush the fat-beating step. Properly aerated fat creates lighter, fluffier tamales.
Keep detailed notes about cooking times and water amounts. Every Instant Pot behaves slightly differently.
When to Start Over
Sometimes tamales fail beyond repair. If the masa never firms up properly, it’s better to start fresh.
Extremely oversalted tamales can’t be fixed. Learn from the mistake and measure more carefully next time.
If tamales completely fall apart during cooking, check your masa recipe and tying technique for next batch.
Serving and Storage Tips

Best Ways to Serve Fresh Tamales
Let tamales rest for 5 minutes after cooking before unwrapping. This prevents burns and allows the masa to firm up slightly.
Use kitchen tongs to remove hot tamales from the Instant Pot. The corn husks will be extremely hot and steamy.
Unwrapping Techniques
Peel back the corn husk from the top, rolling it down like a banana peel. Don’t try to slide the tamale out sideways.
Traditional presentation keeps the husk partially attached as a natural handle. This makes eating easier and looks more authentic.
Cut the tie carefully with kitchen shears rather than trying to untie hot, wet knots.
Safe Handling Methods
Hold tamales by the bottom husk while unwrapping from the top. The masa stays intact better this way.
If the masa sticks slightly to the husk, it needs a few more minutes of cooling. Don’t force it.
Use a fork to gently separate stubborn spots where masa clings to the corn husk.
Traditional Accompaniments
Serve tamales with Mexican rice and refried beans for a complete meal. These sides complement the rich masa perfectly.
Fresh salsa verde or red sauce enhances the flavors without overwhelming them. Many families have signature sauce recipes.
Mexican crema or sour cream cools down spicy fillings. A dollop on top adds richness and visual appeal.
Classic Side Combinations
- Mexican rice with cilantro and lime
- Refried beans with queso fresco
- Fresh guacamole and salsa
- Pickled jalapeños and radishes
Presentation Ideas
Arrange unwrapped tamales on a platter with husks folded back artfully. This showcases the filling while maintaining tradition.
Garnish with fresh cilantro, diced onions, and lime wedges. Simple garnishes let the tamale flavors shine through.
Warm plates in a low oven before serving. Hot tamales on cold plates cool down too quickly.
Special Occasion Serving
For parties, set up a tamale bar with various sauces and toppings. Let guests customize their own servings.
Keep tamales warm in a slow cooker on the warm setting if serving over several hours. Add a damp paper towel to prevent drying.
Sweet tamales work beautifully as dessert when served with vanilla ice cream or whipped cream.
Storage and Reheating Methods
Cool tamales completely before refrigerating to prevent condensation. Moisture creates soggy, unappetizing results.
Store in airtight containers with corn husks still attached. The husks help maintain moisture and flavor.
Refrigerated tamales stay fresh for up to 5 days when stored properly.
Refrigerator Storage Best Practices
Layer tamales in containers without overcrowding. Squished tamales lose their shape and texture.
Place parchment paper between layers if stacking multiple tamales. This prevents them from sticking together.
Label containers with the date and filling type. Different fillings have varying storage lives.
Freezing Guidelines
Wrap individual tamales in plastic wrap before freezing for longer storage. This prevents freezer burn and maintains quality.
Frozen tamales keep for up to 3 months without significant quality loss. Label with contents and freeze date.
Freeze tamales in single layers first, then transfer to freezer bags. This prevents them from freezing together.
Freezing Process Steps
- Cool tamales completely to room temperature
- Wrap individually in plastic wrap
- Place in freezer bags with labels
- Freeze flat for best shape retention
Reheating in the Instant Pot
Add 1 cup of water to the Instant Pot with the steamer basket. This creates fresh steam for reheating.
Arrange refrigerated tamales standing upright just like during initial cooking. Don’t overcrowd the basket.
Pressure cook on high for 8 minutes for refrigerated tamales. Frozen tamales need 15-18 minutes from frozen.
Alternative Reheating Methods
Microwave reheating works for single servings but changes the texture slightly. Wrap in damp paper towels first.
Steam reheating in a regular pot takes 15-20 minutes but maintains the best texture. Use a steamer basket over simmering water.
Oven reheating at 350°F wrapped in foil takes 20-25 minutes. This method works well for multiple tamales.
Microwave Tips
Pierce the husk in several places before microwaving to prevent bursting. Steam needs an escape route.
Heat for 1-2 minutes per tamale depending on size. Check frequently to avoid overcooking.
Let microwaved tamales rest for 1 minute before unwrapping. The filling will be extremely hot.
Quality Maintenance
Properly reheated tamales should taste nearly as good as fresh ones. Poor reheating ruins the texture permanently.
Add a tablespoon of water to containers when reheating multiple tamales. This creates steam for even heating.
Never refreeze previously frozen tamales. The texture degrades significantly with multiple freeze-thaw cycles.
Signs of Spoilage
Discard tamales that smell sour or off. Fresh tamales have a mild, pleasant corn aroma.
Slimy or moldy husks indicate spoilage. When in doubt, throw them out for safety.
Frozen tamales with ice crystals throughout have been stored too long and won’t taste good.
FAQ on How To Make Tamales In An Instant Pot
How much water do I need for the Instant Pot?
Add 1.5 cups of water to the bottom of your Instant Pot. This creates enough steam without touching the tamales. Place the steamer basket or trivet above the water level to keep tamales elevated during pressure cooking.
How long do I pressure cook tamales?
Set your pressure cooker to high pressure for 20-25 minutes depending on tamale size. Allow natural pressure release for 10 minutes, then quick release remaining pressure. Fresh masa tamales cook faster than frozen ones.
Can I stack tamales in the Instant Pot?
Yes, arrange tamales standing upright with the open end facing up. Stack them carefully in the steamer basket without overcrowding. Leave space between each bundle for proper steam circulation and even cooking.
Do I need to wrap tamales differently for pressure cooking?
No special wrapping required. Use traditional corn husks soaked until pliable. Tie securely with husk strips or kitchen twine. The pressure cooking method works with standard tamale assembly techniques perfectly.
How do I know when Instant Pot tamales are done?
Test doneness by unwrapping one tamale. The masa dough should pull away from the corn husk easily without sticking. If still gummy or wet, pressure cook for 5 more minutes.
Can I cook frozen tamales in the Instant Pot?
Absolutely. Add 5-10 extra minutes to the cooking time for frozen tamales. No need to thaw first. The steam pressure cooks them evenly from frozen, maintaining texture and preventing sogginess.
What’s the best filling for Instant Pot tamales?
Pork shoulder and chicken work beautifully because pressure cooking keeps meat moist. Pre-cook your filling with Mexican seasonings. Cheese and pepper combinations also steam perfectly using this pressure cooking method.
Why are my Instant Pot tamales mushy?
Usually caused by too much liquid in the masa mixture or overcooking. Use less chicken broth when mixing masa. Check tamales after minimum cook time rather than automatically cooking for maximum time.
Can I use aluminum foil instead of corn husks?
Yes, but corn husks add authentic flavor. If using foil, create small packets and ensure they’re sealed tightly. The steaming process works similarly, though you’ll miss the traditional husk aroma.
How do I store leftover Instant Pot tamales?
Refrigerate cooked tamales for up to 5 days. Freeze for up to 3 months. Reheat in the Instant Pot with 1 cup water for 8 minutes on high pressure, or steam traditionally for best texture.
Conclusion
Mastering how to make tamales in an Instant Pot transforms this traditional Mexican dish from a day-long project into an achievable weeknight meal. Your electric pressure cooker delivers consistent results every time.
The key lies in proper masa preparation and understanding steam circulation. Get your fat-to-masa ratios right, and the rest follows naturally.
Don’t worry if your first batch isn’t perfect. Even experienced cooks adjust their cooking liquid amounts based on altitude and masa consistency.
Your steamer basket setup matters more than you think. Proper tamale placement ensures even heat distribution and prevents soggy bottoms.
The beauty of this pressure cooking method extends beyond speed. You’ll discover better moisture retention and more tender results than traditional stovetop steaming often produces.
Start with simple pork or cheese fillings before experimenting with complex flavor combinations. Master the basics first, then get creative with your homemade tamale variations.
Soon you’ll be confidently serving authentic Mexican comfort food that rivals any restaurant version.


