

Summarize this article with:
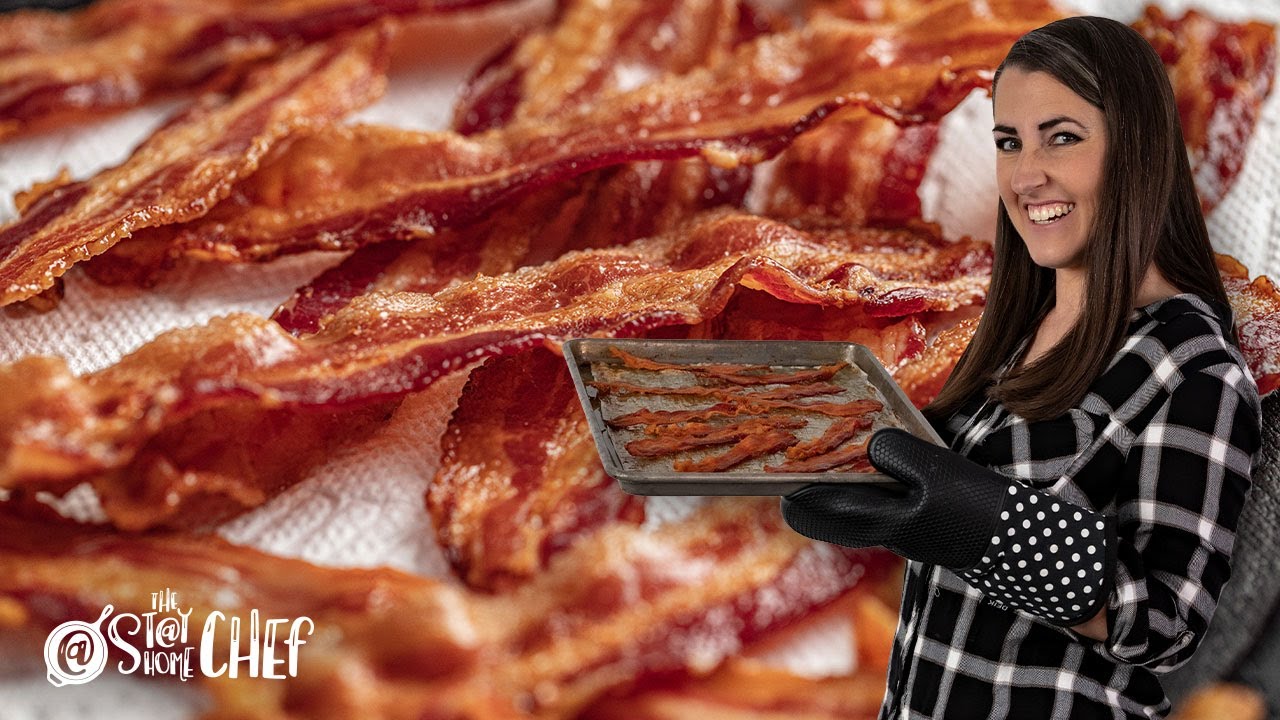
Kirkland Signature Thick Sliced Bacon from Costco is a hickory smoked pork belly product sold in a 3-pound value pack. Each package contains two 1.5-pound pouches with 9 to 11 slices per pound.
Most people cook this bacon for weekend breakfasts, BLT sandwiches, or meal prep. The thick cut means you get meatier strips compared to regular sliced bacon.
This guide covers four cooking methods: oven, air fryer, stovetop, and microwave. Cooking times range from 4 minutes (microwave) to 25 minutes (oven baked).
Product Details

Product: Kirkland Signature Thick Sliced Bacon
Type: Raw, cured, hickory smoked
Package Size: 3 lb (2 x 1.5 lb pouches), approximately 27 to 33 strips total
Price: $12.99 at Costco Wholesale (Updated December 2025)
Storage: Keep refrigerated at 40F or below
Calories per Serving: 70 to 90 calories (2 cooked slices)
Main Ingredients: Pork, Water, Salt, Brown Sugar, Sodium Phosphate, Sodium Erythorbate, Sodium Nitrite
Item Number: 905061
Cooking Methods Comparison
| Method | Time | Equipment | Result | Best For |
| Oven | 18–25 min | Baking sheet, parchment | Evenly crispy, flat strips | Large batches, hands-off |
| Air Fryer | 10–12 min | Air fryer basket | Very crispy, less grease | Small batches, speed |
| Stovetop | 8–15 min | Cast iron or frying pan | Classic texture, more control | Saving bacon grease |
| Microwave | 4–6 min | Plate, paper towels | Quick, slightly chewier | 1–4 slices, fast breakfast |
Recommended Method: Oven baked bacon at 400F produces the most consistent results for thick cut bacon strips.
Method 1: Oven (Recommended)
Oven baked bacon takes 18 to 25 minutes at 400F and produces evenly cooked, flat strips. This works well for cooking an entire 1.5-pound package at once. The baking sheet catches all the rendered bacon fat for easy cleanup.
Step 1: How Do You Prepare the Bacon?
Line a rimmed baking sheet with parchment paper or aluminum foil. The lining catches grease and makes cleanup simple.
Instructions:
- Remove bacon from refrigerator 15 minutes before cooking
- Arrange strips in a single layer without overlapping
Equipment: Rimmed baking sheet, parchment paper or foil, optional wire rack
Step 2: What Temperature and Time Do You Use?
Set your oven to 400F. Place the bacon in a cold oven, then turn on the heat. This gradual warming helps the fat render evenly and prevents curling.
Instructions:
- Place baking sheet in cold oven, then set to 400F
- Bake for 18 to 25 minutes until edges turn golden brown
Temperature: 400F
Time: 18-25 minutes for thick cut bacon
Step 3: When Do You Check the Bacon?
Start checking at the 15-minute mark. Thick sliced bacon takes longer than regular cuts. The bacon fat will bubble and the strips will shrink as they cook.
Instructions:
- Check at 15 minutes for doneness
- Look for golden brown color and sizzling fat
Checkpoint: At 15-minute mark
Step 4: How Do You Know When It’s Done?
The bacon is done when it turns deep golden brown with crispy edges. Remove it slightly before your ideal crispness because it continues cooking for a few seconds after leaving the oven.
Instructions:
- Check for deep golden brown color
- Transfer to paper towels immediately using tongs
- Let rest 1-2 minutes to finish crisping
Visual Indicator: Deep golden brown with bubbling fat
Method 2: Air Fryer

Air fryer bacon cooks in 10 to 12 minutes at 350F. The circulating hot air produces very crispy bacon with less grease. You can fit about 4 to 5 thick slices per batch in most air fryers.
Step 1: How Do You Prepare the Bacon?
Cut strips in half if they are too long for your air fryer basket. No preheating is necessary for most models.
Instructions:
- Cut bacon strips in half if needed to fit
- Arrange in single layer without overlapping
Equipment: Air fryer, tongs, paper towels
Step 2: What Temperature and Time Do You Use?
Set your air fryer to 350F. Higher temperatures can cause the bacon grease to smoke. The lower temperature also gives you more control over the final crispiness.
Instructions:
- Set air fryer to 350F
- Cook thick cut bacon for 10 to 12 minutes
Temperature: 350F
Time: 10-12 minutes for thick cut, 7-9 minutes for regular
Step 3: When Do You Flip the Bacon?
Flip the bacon halfway through cooking. This helps both sides get evenly crispy. The air circulation does most of the work, but flipping gives better results.
Instructions:
- Flip at the 5-minute mark
- Check for even browning
Checkpoint: At 5-minute mark
Step 4: How Do You Know When It’s Done?
The bacon should be deep brown and crispy. Pour out grease from the drip pan between batches to prevent smoking.
Instructions:
- Remove when deep brown and crispy
- Drain on paper towels
- Empty grease before cooking next batch
Visual Indicator: Deep brown color, crispy texture
Method 3: Stovetop

Cooking bacon in a cast iron skillet or frying pan takes 8 to 15 minutes over medium heat. This method gives you the most control and lets you save the rendered bacon fat for other cooking.
Step 1: How Do You Prepare the Bacon?
Start with a cold pan. Placing cold bacon into a cold skillet prevents the strips from curling and shrinking unevenly.
Instructions:
- Arrange bacon in cold skillet without overlapping
- Cook 4 to 5 slices at a time maximum
Equipment: Cast iron skillet or large frying pan, tongs, paper towels
Step 2: What Temperature and Time Do You Use?
Use medium to medium-low heat for the best results. Higher heat burns the edges before the rest cooks through.
Instructions:
- Turn heat to medium or medium-low
- Cook for 8 to 15 minutes total, depending on thickness
Temperature: Medium heat (setting 5 out of 10)
Time: 8-15 minutes total
Step 3: When Do You Flip the Bacon?
Flip every 60 to 90 seconds once the fat starts rendering. Frequent flipping promotes even browning and prevents burning.
Instructions:
- Let cook 2-3 minutes before first flip
- Flip every 60-90 seconds after that
Checkpoint: Every 60-90 seconds after fat begins rendering
Step 4: How Do You Know When It’s Done?
Watch for golden brown color and reduced shrinkage. The bacon will stop sizzling as aggressively when most of the fat has rendered.
Instructions:
- Look for golden brown color throughout
- Transfer to paper towels to drain
- Pour off bacon grease before next batch
Visual Indicator: Golden brown, minimal sizzling
Method 4: Microwave
Microwave bacon takes about 1 minute per slice on high power. This method works best for cooking 1 to 4 slices when you need breakfast meat fast.
Step 1: How Do You Prepare the Bacon?
Layer paper towels above and below the bacon to absorb grease and prevent splatter.
Instructions:
- Place 2-3 paper towels on microwave-safe plate
- Arrange bacon in single layer without touching
- Cover with 2 more paper towels
Equipment: Microwave-safe plate, paper towels (4-5 sheets)
Step 2: What Power Level and Time Do You Use?
Use high power (100%) for about 1 minute per slice. Thick cut bacon needs a bit more time than regular sliced.
Instructions:
- Microwave on high power
- Start with 4 minutes for 4 slices of thick bacon
Power Level: High (100%)
Time: Approximately 1 minute per slice, add 30 seconds for thick cut
Step 3: When Do You Check the Bacon?
Check at the halfway point. Microwaves vary in power, so adjust timing based on your results.
Instructions:
- Check at 2-minute mark for 4 slices
- Continue in 30-second intervals until done
Checkpoint: Halfway through estimated time
Step 4: How Do You Know When It’s Done?
Remove the bacon slightly before it looks fully done. It continues crisping as it cools. Remove strips from paper towels quickly or they will stick.
Instructions:
- Stop when slightly underdone (it will crisp more)
- Transfer to clean plate immediately
- Let cool 30 seconds before eating
Visual Indicator: Reduced size, slightly translucent fat turning opaque
Safety and Quality Indicators
Food Safety:
- Internal Temperature: USDA recommends cooking pork to 145F minimum
- Visual Check: No pink raw areas remaining
- Handling: Wash hands after handling raw bacon
Quality Indicators (Done Properly):
- Color: Deep golden brown to reddish-brown
- Texture: Crispy edges with slightly chewy center (for thick cut)
- Appearance: Rendered fat, reduced shrinkage
Signs of Overcooking:
- Dark brown or black edges
- Bitter taste
- Brittle texture that crumbles apart
Serving Suggestions
Portion Size: 2-3 slices per person (approximately 3 servings per 1.5-pound package)
Serving Ideas:
- Classic breakfast plate with Costco eggs and toast
- BLT sandwiches with fresh tomatoes and lettuce
- Crumbled over salads or baked potatoes
- Bacon-wrapped dishes and appetizers
Pairing Recommendations:
- Serve alongside Costco breakfast sandwiches or Belgian waffles
- Pair with Costco fried rice for a savory brunch
- Add to Costco mac and cheese as a topping
Storage and Reheating
Leftover Storage:
- Refrigerate within 2 hours of cooking
- Store in airtight container or resealable bag
- Consume within 4-5 days
Reheating Instructions:
- Microwave: 20-30 seconds per slice on high
- Stovetop: 1-2 minutes over medium heat
- Oven: 350F for 5-8 minutes on baking sheet
Uncooked Bacon Storage:
- Keep refrigerated until use-by date on package
- Freeze for up to 1 month if not using soon
- Thaw in refrigerator overnight before cooking
Troubleshooting Common Issues
Issue: Bacon not crispy enough
Cause: Cooking time too short or temperature too low
Solution: Add 2-3 more minutes to cooking time. For oven method, check that your oven reaches 400F accurately.
Issue: Bacon curling and cooking unevenly
Cause: Starting with hot pan or strips overlapping
Solution: Always start with cold pan and cold bacon. Arrange strips in single layer without touching.
Issue: Bacon burning on edges but raw in middle
Cause: Heat too high
Solution: Reduce temperature. For stovetop, use medium-low heat. For oven, try 375F instead of 400F.
Issue: Air fryer smoking during cooking
Cause: Excess bacon grease getting too hot
Solution: Use 350F instead of higher temperatures. Empty grease from drip pan between batches. Place a slice of bread under the basket to absorb grease.
Issue: Bacon sticking to paper towels in microwave
Cause: Left too long on paper towels after cooking
Solution: Remove bacon from paper towels immediately after cooking while still warm.
Product Variations and Related Items
Similar Costco Products:
- Costco turkey bacon – Lower fat option, cooks faster
- Kirkland Signature Fully Cooked Bacon – Already cooked, just heat and serve
- Costco breakfast sausage – Alternative breakfast meat option
- Kirkland ham – Another cured pork product
Cooking Time Adjustments:
- Regular sliced bacon cooks 3-5 minutes faster than thick cut
- Center cut bacon has less fat and cooks slightly faster
- Turkey bacon needs 20% less cooking time
Complete Your Breakfast:
- Add hash browns for a full plate
- Try Costco croissants as a side
- Make a breakfast burrito with Costco tortillas
FAQ on How To Cook Kirkland Bacon
How long do you cook Kirkland bacon in the oven?
Bake thick cut bacon at 400F for 18 to 25 minutes. Regular sliced bacon takes about 14 to 18 minutes.
Start checking at the 15-minute mark. Every oven runs differently, so watch for golden brown edges.
What temperature is best for baking Kirkland bacon?
Set your oven to 400F for crispy bacon. This temperature renders the fat properly without burning the edges.
Some people prefer 375F for a slower cook. Either works fine for hickory smoked bacon strips.
Can you cook Kirkland bacon in an air fryer?
Yes. Air fryer bacon cooks at 350F for 10 to 12 minutes. The circulating hot air makes it extra crispy.
Cut strips in half if needed. Empty the bacon grease between batches to prevent smoking.
How do you keep Kirkland bacon from curling?
Start with a cold pan and cold bacon. Place strips in the skillet before turning on the heat.
For oven baked bacon, use a wire rack on your baking sheet. This keeps strips flat during cooking.
How many slices are in a package of Kirkland bacon?
Each 1.5-pound pouch contains 9 to 11 slices. The full Costco value pack includes two pouches, giving you 18 to 22 thick cut strips total.
That is roughly 6 to 7 servings.
Should you flip bacon when baking in the oven?
No flipping required. The oven heat surrounds the bacon strips and cooks both sides evenly.
This hands-off method is why many people prefer oven baked bacon over stovetop cooking.
How do you store cooked Kirkland bacon?
Refrigerate cooked bacon in an airtight container within 2 hours. It stays good for 4 to 5 days.
Reheat in the microwave for 20 to 30 seconds per slice. The crispy texture returns quickly.
Why is my Kirkland bacon not getting crispy?
The cooking time is probably too short. Thick sliced bacon needs more time than regular cuts.
Add 3 to 5 more minutes. Also check that your oven temperature is accurate with a thermometer.
Can you microwave Kirkland thick cut bacon?
Yes, but it takes longer than regular bacon. Cook on high for about 1.5 minutes per slice.
Use plenty of paper towels above and below the strips. Check frequently to avoid overcooking.
What is the best way to cook a large batch of Kirkland bacon?
Use the oven method. Line a rimmed baking sheet with parchment paper and arrange strips without overlapping.
You can cook an entire 1.5-pound package at once. No splatter, no flipping, easy cleanup.
Conclusion
Learning how to cook Kirkland bacon comes down to picking the right method for your situation. The oven works best for batch cooking and meal prep.
Air fryers deliver the crispiest results with minimal cleanup. A cast iron skillet gives you more control and lets you save the rendered fat for other recipes.
Whatever method you choose, start checking a few minutes early. Thick sliced bacon goes from perfect to burnt fast.
Line your baking sheet with parchment paper, watch your cooking temperature, and you will get evenly cooked strips every time.


