

Sushi without rolling, without raw fish, and ready in under 45 minutes. That’s the short version of what sushi bake actually is.
This deconstructed sushi casserole layers seasoned short-grain rice, a creamy seafood topping, and furikake into a baking dish, then goes straight into the oven.
No bamboo mat. No knife skills. No sushi-grade salmon required.
Learning how to make sushi bake is easier than most people expect, but a few details matter: the rice base, the Kewpie mayo ratio, and knowing when to pull it from the oven.
This guide covers everything from ingredients and equipment to assembly, baking, serving, and storage.
What is Sushi Bake
Sushi bake is a deconstructed, oven-baked version of sushi served casserole-style in a baking dish. Instead of rolling individual pieces, all the classic sushi components get layered and baked together, then scooped onto nori sheets at the table.
It looks like a casserole. It tastes like a California roll. Warm.
The dish sits somewhere between Japanese cuisine and Filipino-American home cooking. Most food historians credit the concept to Hawaii, where Japanese culinary influence has shaped local food culture for over a century. But it was Filipino celebrity nail artist Mimi Qiu Reyes who pushed it into the spotlight when she started selling her version around 2015, according to Food52.
The real surge came during the 2020 pandemic lockdowns in the Philippines. Home cooks flooded Instagram with sushi bake content, small businesses popped up overnight, and delivery orders for the dish spread across Manila within weeks.
By early 2022, TikTok user Lizzy Wong uploaded her version of the recipe. It hit 18 million views in under two months, according to Food52’s coverage of the trend. That second wave of attention brought sushi bake to kitchens well beyond Southeast Asia.
The format stuck. It remains a TikTok staple in 2024 and 2025, praised specifically for its affordability and how easily it scales for a crowd.
How Sushi Bake Differs from Traditional Sushi
The differences go beyond just baking.
| Feature | Traditional Sushi | Sushi Bake |
| Serving Temperature | Room temp or chilled | Warm, straight from oven |
| Raw Fish | Often required | Not needed (uses cooked proteins) |
| Assembly | Individual rolls | One pan, scooped to order |
| Skill Level | Technique-heavy rolling | Layer, bake, done |
No bamboo mat. No knife skills. No worrying about roll tension.
The creamy topping (cream cheese, Kewpie mayo, sriracha) is also unique to sushi bake and doesn’t appear in standard sushi rolls. That richness, combined with the warm rice base and furikake, creates a completely different eating experience from the original.
—
Ingredients for Sushi Bake

The ingredient list is short. What matters is getting the right versions of each item, not just the closest substitute.
The Rice Layer
Short-grain sushi rice is non-negotiable here. Brands like Nishiki, Tamaki Gold, and Kokuho Rose all work well. Long-grain rice won’t hold together, and the casserole will fall apart when you try to scoop it.
For the sushi vinegar seasoning, you need three things:
- Rice vinegar (not white vinegar, not apple cider)
- Sugar
- Salt
Standard ratio: 3 tablespoons rice vinegar, 2 tablespoons sugar, 1 teaspoon salt per 2 cups of dry rice. Dissolve everything together before adding it to the cooked rice.
The Creamy Seafood Topping
Kewpie mayo is the one ingredient worth tracking down. It’s richer and more umami-forward than regular mayonnaise because it uses only egg yolks and a touch of MSG. Regular mayo works in a pinch, but the flavor difference is real.
Core topping ingredients:
- Imitation crab (surimi) or cooked salmon
- Cream cheese, softened
- Kewpie mayonnaise
- Sriracha
- Optional: soy sauce, lemon juice, garlic powder
The mix should be spreadable but not runny. If it looks too loose, add a bit more cream cheese.
Toppings and Serving Components
Furikake is the other must-have. It’s a dry Japanese seasoning blend (usually sesame seeds, dried seaweed, salt, and sometimes dried fish) that gets layered over the rice before baking and again on top after. It carries a lot of the dish’s flavor. Skimping here is one of the most common mistakes.
You also need nori sheets for serving, cut into hand-sized pieces. Everything else is optional:
- Masago or tobiko (fish roe) for garnish
- Green onions, sliced thin
- Sesame seeds
- Eel sauce (unagi sauce) for drizzling
- Extra Kewpie mayo on top after baking
If you’re thinking about what wine goes with sushi, the same pairing logic applies here. Crisp whites work well alongside the creamy, umami-rich topping.
—
Equipment You Need

Nothing specialized. Most of it is already in a standard kitchen.
The Baking Dish
An 8×8-inch dish feeds about 4 people. A 9×13 works better for 6-8 and gives you a thinner rice layer, which some people prefer for a better crust-to-topping ratio.
Glass or ceramic both work. Metal pans run slightly hotter, so watch the bottom layer of rice if you go that route.
Rice Cooker vs. Stovetop
A rice cooker makes this easier. Short-grain sushi rice on the standard white rice setting, 1:1 rice-to-water ratio, done. Stovetop works too, but requires more attention during the steam phase.
Zojirushi cookers are the gold standard if you cook rice regularly. Budget models like the Aroma brand also do a solid job. The difference shows up in texture consistency, not flavor.
Nice-to-Have (Not Required)
- Kitchen torch for finishing the top with extra char
- Rice paddle or flat spatula for folding the vinegar seasoning
- Small saucepan for dissolving the sushi vinegar mix
That’s it. No bamboo mat. No sushi knife.
—
How to Cook and Season Sushi Rice

This is the step most home cooks underestimate. The rice base is everything in a sushi bake. Get it wrong and no amount of good topping will save it.
Washing and the Water Ratio
Rinse the rice under cold water, repeating until the runoff is nearly clear, typically 3-4 passes. This removes excess surface starch that causes gummy, clumped-together grains.
Some sources argue against rinsing (Nishiki’s packaging actually says to skip it). Honestly, it depends on your brand. When in doubt, rinse.
For the water ratio: 1:1 by volume for short-grain rice in a rice cooker. Stovetop needs slightly more, closer to 1:1.25. These small differences matter more than most people expect, according to cooking guides from Hungry Huy and Fifteen Spatulas.
Seasoning the Rice Correctly
The vinegar mixture must go in while the rice is still hot. Hot grains absorb the seasoning. Cold grains don’t.
How to fold it in:
- Spread the cooked rice in a wide, shallow bowl or baking pan
- Drizzle the sushi vinegar evenly across the surface
- Use a rice paddle to cut and lift the rice (never stir in circles)
- Fan the rice gently while folding to cool it down faster
The goal is separate, glossy grains that smell faintly of vinegar. If the rice looks wet right after seasoning, that’s fine. It will absorb as it cools.
Common Rice Mistakes
Using the wrong rice variety is the biggest one. Jasmine, basmati, and any long-grain rice are too dry and don’t hold together when layered.
Other issues that show up regularly:
- Stirring in circles instead of folding (breaks the grains, creates mush)
- Seasoning cold rice (vinegar sits on top instead of absorbing)
- Over-rinsing until the water is completely clear and starch-free (leaves the rice too dry to stick)
- Skipping the 5-minute rest after the rice cooker finishes
The resting step matters. It lets moisture distribute evenly through the grains before you season them.
—
How to Make the Creamy Seafood Topping
The topping is where the flavor lives. The rice base is the foundation, but this layer is what people remember.
Salmon Sushi Bake Variation
Salmon is the most popular protein choice for good reason. The fat content holds up beautifully to the oven’s heat and creates a richer, more satisfying bite than imitation crab alone.
Use cooked salmon, not raw. Bake two filets seasoned with salt, pepper, and a little garlic powder at 400F for about 12 minutes, then flake into chunks. Some people use canned salmon in a pinch. It works, but the texture is noticeably softer.
Topping ratio for salmon version (per 9×13 pan):
- 2 cups flaked cooked salmon
- 8 oz cream cheese, softened
- 1/3 cup Kewpie mayo
- 2 tablespoons sriracha
Mix until smooth and spreadable. Taste before spreading. Adjust sriracha and add a splash of soy sauce if it needs more depth.
Imitation Crab Sushi Bake Variation
The classic. More affordable, more accessible, and closer to the California roll flavor profile that made sushi bake famous.
Imitation crab (surimi) shreds easily with your fingers or two forks. Don’t chop it too fine. Larger chunks give better texture in the final bake.
Key difference from the salmon version: imitation crab is already seasoned and softer, so the topping mix can handle a little more mayo without becoming too loose. Some cooks add masago directly into the mixture here rather than using it only as a garnish, which adds a slight brininess throughout.
Both versions follow the same baking process. The choice comes down to budget and preference.
If you enjoy wine with seafood dishes, a chilled Sauvignon Blanc or unoaked Chardonnay pairs cleanly with the creamy topping without fighting the Kewpie and sriracha flavors.
—
How to Assemble and Bake
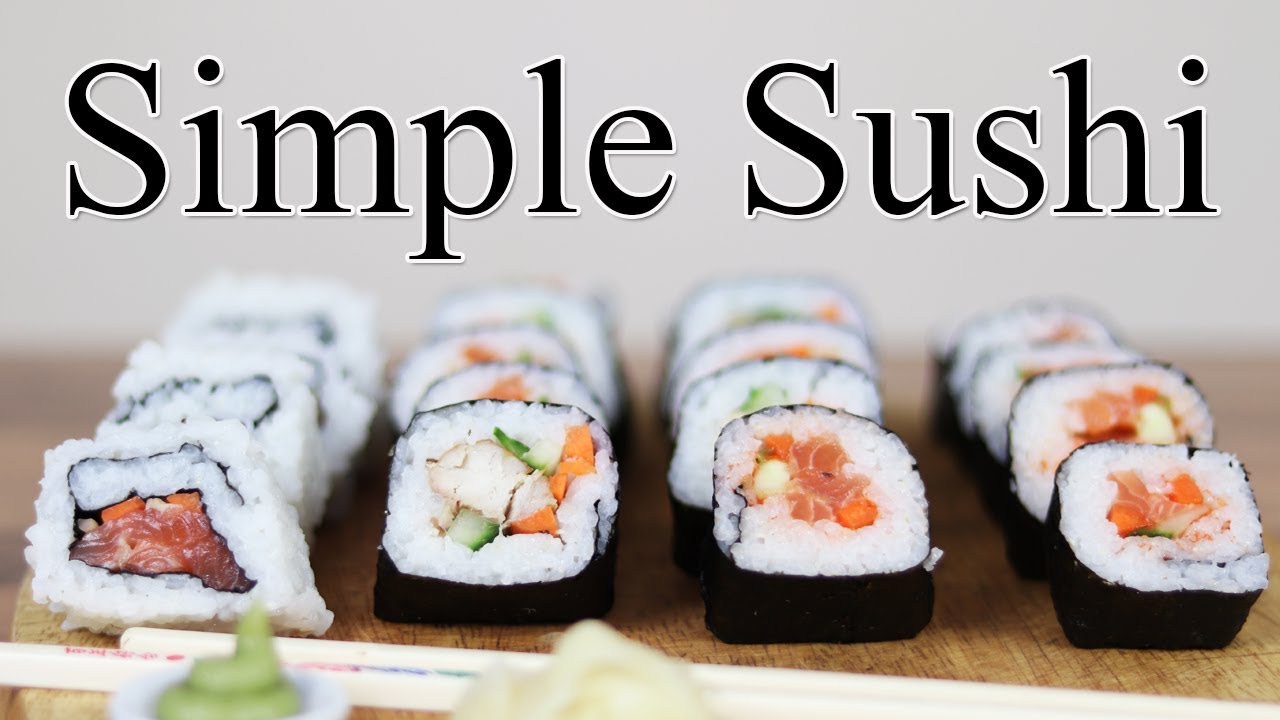
Assembly order matters. The layers aren’t interchangeable.
Layer Order and Ratios
Build it in this sequence:
- Rice layer: Press the seasoned sushi rice into an even layer, about 1 to 1.5 inches deep. Use the back of a wet spoon to press it down without compressing it too hard.
- First furikake layer: Sprinkle generously over the rice. This is the step most people under-do. You want visible coverage, not a light dusting.
- Seafood topping: Spread the creamy mixture evenly across the furikake layer. Use an offset spatula or the back of a spoon.
- Final furikake layer: Another layer on top of the seafood mixture before it goes into the oven.
Baking Temperature and Timing
Oven at 375-400F. Bake for 15-20 minutes, until the topping is heated through and the edges start to bubble.
The color won’t change much during the bake. That comes in the next step.
Broil for the last 2-3 minutes to get a golden, slightly charred top. Watch it closely. The mayo content means it goes from golden to burnt faster than you’d expect. Move the rack closer to the broiler if your oven runs weak.
Visual Cues for Doneness
A properly done sushi bake looks like this:
- Top layer is golden with some darker spots from the furikake
- Edges are bubbling
- A spoon inserted in the center comes out warm throughout
Optional: run a kitchen torch across the top after broiling for extra char and a slightly smoky finish. Restaurants sometimes do this for presentation. At home it’s a nice touch, not a requirement.
Serve immediately. The texture at the table is best within the first 15-20 minutes out of the oven. After that, the rice starts to firm up and the topping loses some of its creaminess.
For the full picture on how to make sushi rice as a standalone component, including seasoning ratios and rice cooker tips, that guide covers it in more detail.
Toppings and Finishing
What goes on after the dish comes out of the oven matters as much as the bake itself.
Some toppings survive heat. Others don’t. Mixing them up is one of the fastest ways to ruin texture.
| Topping | Add Before Baking | Add After Baking |
| Furikake (first layer) | Yes, over rice | No |
| Furikake (second layer) | Yes, over seafood mix | Optional extra sprinkle |
| Kewpie Mayo Drizzle | Optional | Yes, for finish |
| Green Onions / Avocado | No | Always post-bake |
| Masago / Tobiko | No | Yes, right before serving |
Drizzle Options After Baking
Eel sauce (unagi sauce) is the finishing drizzle that separates a basic sushi bake from a great one. It’s sweet, sticky, and adds caramel depth that cuts through the richness of the creamy seafood topping.
Apply it in a zigzag pattern right after the dish comes out of the oven, while the surface is still hot.
Other post-bake drizzle choices:
- Extra Kewpie mayo, thinned slightly with a drop of water
- Sriracha in a cross-hatch pattern
- Spicy mayo (Kewpie plus sriracha, 3:1 ratio)
Skip ponzu here. The citrus fights the richness instead of complementing it.
Finishing with a Torch
Running a kitchen torch across the top for 20-30 seconds after broiling adds a smoky char that restaurants use as a visual and flavor boost.
Key rule: torch after all the sauce drizzles are on, not before. The sugars in the eel sauce caramelize fast under direct heat and create a lacquered finish that looks and tastes noticeably better.
Green onions, masago, and sesame seeds go on last. Right before the dish hits the table.
—
How to Serve Sushi Bake

The dish is built to be shared from the pan. Family-style, set it in the middle of the table with a stack of nori sheets on the side.
The Nori Method
Cut full nori sheets into quarters. That’s roughly the right size for a generous single scoop.
Some people prefer the smaller, pre-seasoned Korean roasted seaweed snack sheets sold in foil packs. Those are crunchier and hold their texture longer than standard nori. Worth having both on the table if you can.
The scooping technique:
- Use a large spoon to scoop equal parts rice and topping (roughly 1:1 by volume)
- Place the scoop on the center of a nori sheet
- Fold the two long sides up, like a taco
- Eat immediately before the nori softens
The nori goes soft fast once it contacts the warm, moist filling. Scoop and eat one at a time rather than pre-loading a plate.
Side Dishes That Pair Well
Sushi bake is a full meal. But if you’re feeding a crowd and want to stretch it, these work well alongside it:
Light and refreshing: miso soup, cucumber salad with a sesame-soy dressing, edamame with sea salt.
Heartier additions: tamagoyaki (Japanese rolled egg omelet), garlic bok choy, crispy rice salad.
For drinks, wine with Japanese food follows the same logic as pairing with sushi. A crisp Pinot Grigio or dry Riesling cuts through the Kewpie mayo richness without overwhelming the fish. Both work better here than a full-bodied white.
Sushi bake is best eaten within the first 15-20 minutes out of the oven. The rice firms up as it cools and the creamy topping loses some of its texture, so don’t let it sit too long before calling people to the table.
—
Storage and Reheating
Sushi bake stores well for a cooked seafood casserole. The cooked proteins and rice-based structure are more stable than raw sushi.
How Long It Lasts
According to multiple food safety guides including data from Sushi Bake Meal Prep guides, sushi bake keeps for 3-4 days in the fridge when stored in an airtight container at or below 40F (4C).
Do not leave it at room temperature for more than two hours before refrigerating.
Storage tips:
- Store the baked base (rice plus seafood layer) separately from fresh toppings
- Keep avocado, green onions, and masago out of storage entirely, adding fresh when reheating
- Use a container with a tight lid, not just plastic wrap over the pan
Reheating Without Drying It Out
The rice is the most vulnerable component during reheating. It dries out fast and gets hard if you’re not careful.
Oven method (best results): Cover with foil, reheat at 350F for 10-15 minutes. The foil traps steam and keeps the rice from hardening.
Microwave method (faster): Place a damp paper towel directly over the surface before microwaving in 30-second intervals. The moisture from the towel steams the rice back to a softer texture.
Skipping the damp towel in the microwave is the single most common reheating mistake. The rice goes from soft to chalky in under a minute without it.
Does Sushi Bake Freeze Well?
Technically yes. Practically, not really.
You can freeze sushi bake for up to 2-3 months in a tightly sealed container, according to storage guides on Alibaba Wellness. But the mayo-based topping tends to separate on thawing, and the rice texture changes noticeably.
If you want to prepare ahead, a better approach is freezing the unbaked assembled dish rather than leftovers. Thaw overnight in the fridge, then bake fresh.
—
Common Mistakes to Avoid
Most sushi bake failures come down to a handful of fixable errors. None of them are complicated once you know what to watch for.
Rice Problems
Wrong rice variety is the most common mistake by a wide margin. Long-grain rice (jasmine, basmati, American long-grain) doesn’t have enough amylopectin to create the sticky texture the dish needs. The layers won’t hold, and the scoop falls apart on the nori.
Short-grain or medium-grain rice only. Brands like Nishiki, Tamaki Gold, or Kokuho Rose are reliable choices at most Asian grocery stores.
The second most common rice error: skipping the vinegar seasoning. Unseasoned rice makes the whole dish taste flat, and there’s no fixing it after baking. Season while hot, every time.
Topping and Baking Errors
Not enough furikake. This one shows up constantly in recipe feedback. The furikake between the rice and seafood layers isn’t just garnish. It delivers most of the umami in the dish. A light dusting isn’t enough. You want visible, full coverage on both layers.
Overbaking is the other culprit. The topping dries out fast once it passes the bubbling stage. Pull the dish at the first signs of a golden top. The broil adds the char. You don’t need extra oven time.
Cold cream cheese in the topping mix causes lumps that won’t smooth out, even after baking. Take it out of the fridge at least 30 minutes before mixing.
Serving Mistakes
Pre-loading nori sheets before everyone sits down. The moment nori contacts warm, moist filling it starts to soften. By the time guests eat, the texture is gone. Set the pan on the table and let people scoop their own as they go.
The other one: adding avocado before baking. It oxidizes, browns, and turns mushy under heat. Always a post-bake addition. Same with cucumber slices, fresh green onions, and masago. Keep them off the pan until the dish is out of the oven and on the table.
For a complete guide on how to make spicy mayo for sushi, the method applies directly here. The ratio of Kewpie to sriracha matters more than most people expect. Too much sriracha and it dominates; too little and you lose the heat entirely.
If you’re building a full spread and wondering what to eat with sushi alongside your sushi bake, the same sides that work for traditional rolls work here.
FAQ on How To Make Sushi Bake
What type of rice should I use for sushi bake?
Use short-grain sushi rice only. Brands like Nishiki or Tamaki Gold work well. Long-grain rice lacks the starch needed for sticky, cohesive layers. The rice won’t hold together when scooped, and the whole casserole falls apart.
Can I make sushi bake without cream cheese?
Yes. Skip it and increase the Kewpie mayo slightly to keep the topping spreadable. The result is lighter and less rich. Some versions use Japanese mayo alone with sriracha and still taste great. Texture changes, flavor mostly holds.
What is furikake and can I substitute it?
Furikake is a dry Japanese seasoning blend of sesame seeds, nori flakes, salt, and sometimes dried fish. If you can’t find it, mix toasted sesame seeds with crumbled nori and a pinch of salt. It won’t be identical, but it works.
What temperature should I bake sushi bake at?
Bake at 375-400F for 15-20 minutes until the topping is heated through and edges bubble. Finish with a 2-3 minute broil for a golden top. Watch closely during broiling since the mayo content browns fast.
Can I use regular mayonnaise instead of Kewpie?
You can, but the flavor difference is real. Kewpie mayo uses only egg yolks and includes a touch of MSG, making it richer and more umami-forward than standard mayo. Add a pinch of sugar to regular mayo to get closer to the original taste.
How do I serve sushi bake?
Set the pan on the table family-style. Cut nori sheets into quarters and let everyone scoop their own portions. Place the filling onto a nori sheet, fold it like a taco, and eat immediately before the nori softens.
Can I prepare sushi bake ahead of time?
Yes. Assemble the full dish up to 24 hours in advance, cover tightly, and refrigerate unbaked. Add 5-10 minutes to the bake time when cooking from cold. Keep fresh toppings like avocado and green onions separate until serving.
How long does sushi bake last in the fridge?
Stored in an airtight container at or below 40F, sushi bake keeps for 3-4 days. Store the baked base separately from fresh garnishes. Avocado, masago, and cucumber should always be added fresh when reheating, not stored with the casserole.
What proteins work best in sushi bake?
Imitation crab and cooked salmon are the most popular choices. Imitation crab gives a classic California roll flavor at a lower cost. Cooked shrimp and canned tuna both work too. Avoid raw fish since the baking process and cream cheese mixture aren’t suited to it.
Why does my sushi bake taste bland?
Almost always a rice issue. Unseasoned rice makes the whole dish fall flat. Make sure the sushi vinegar mixture of rice vinegar, sugar, and salt is added while the rice is still hot. Cold rice won’t absorb the seasoning properly.
Conclusion
This conclusion is for an article presenting how to make sushi bake, a dish that delivers every flavor of a California roll without the rolling, the raw fish, or the skill requirement.
Get the sushi rice seasoning right and the rest follows. Imitation crab or cooked salmon, a generous layer of furikake, Kewpie mayo, and a proper broil at the end.
Serve it straight from the baking dish with nori sheets on the side. Let people scoop their own.
It scales easily for a crowd, stores for up to four days, and reheats without much effort.
For a deconstructed sushi casserole that actually delivers, this is the one worth making.


