

Summarize this article with:
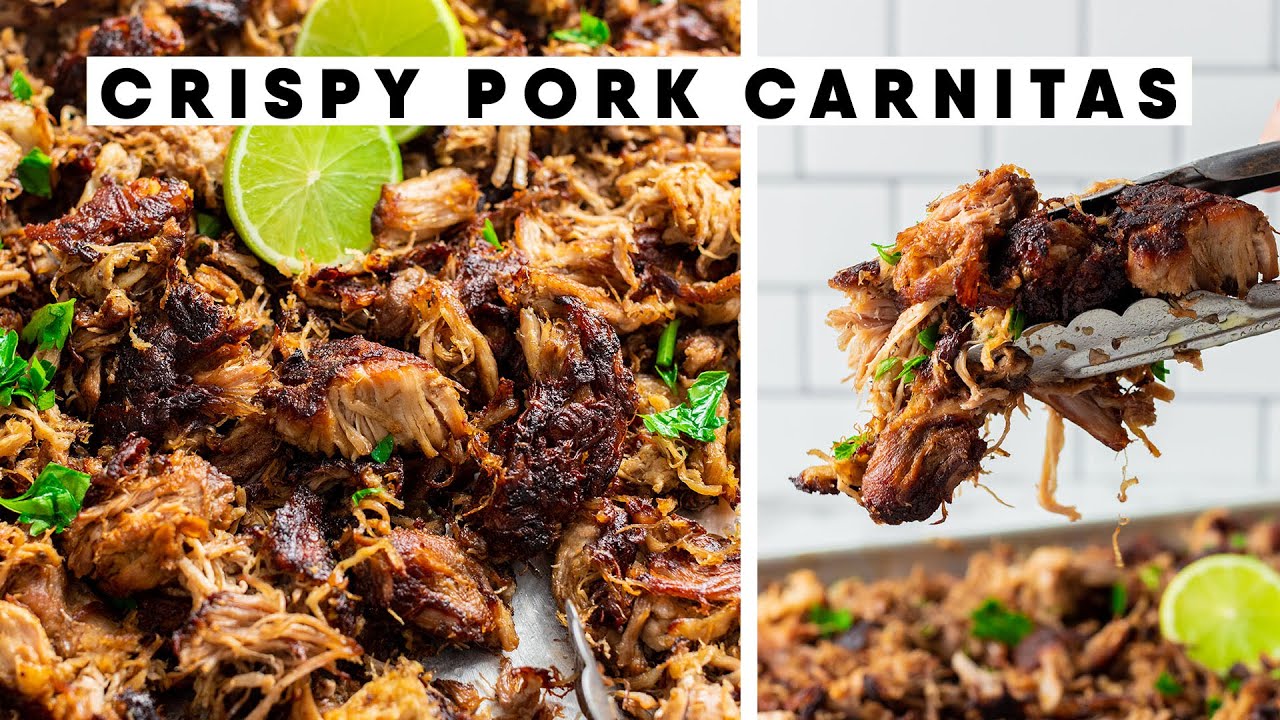
Nothing ruins carnitas faster than soggy, limp pork that should be crackling with crispy edges. You’ve spent hours braising **pork shoulder** to tender perfection, but without that final crisping step, you’re missing what makes carnitas actually special.
The difference between good carnitas and great carnitas is texture.
Most people stop after the slow cooker or Dutch oven phase. The meat is tender and flavorful, sure, but it lacks the caramelized golden brown edges that define authentic carnitas. That contrast between crispy exterior and juicy interior is what keeps you reaching for another taco.
Learning how to make carnitas crispy isn’t complicated, but it requires understanding moisture management, heat control, and timing. This guide walks you through everything from choosing the right cut to the exact crisping methods that deliver restaurant-quality results every time.
You’ll discover why your carnitas stay soggy, which equipment actually matters, and how to fix common problems like burning before browning or drying out the meat.
Understanding What Makes Carnitas Crispy
The Science Behind Crispy Pork
Getting that perfect crunch on carnitas isn’t magic. It’s about understanding how moisture, fat, and heat work together.
Water is the enemy of crispiness. When pork sits in braising liquid, it absorbs moisture deep into the meat fibers.
The crisping process needs dry surfaces to work. Think of it like trying to toast wet bread, it just steams instead of browning.
Fat plays a double role here. The rendered pork fat helps conduct heat evenly across the meat surface. But too much fat sitting on the surface creates a barrier that prevents proper browning.
Surface area matters more than most people realize. Smaller, shredded pieces of pork shoulder have more exposed edges that can crisp up. Larger chunks take forever to get that golden exterior.
The Maillard reaction is what creates those crispy, caramelized bits everyone loves. This chemical reaction between amino acids and sugars happens around 300°F. Below that temperature, you’re just drying the meat without getting the crunch.
Traditional vs. Modern Approaches
Mexican cooking methods have always prioritized texture. The original carnitas technique involves cooking pork in lard, then letting pieces fry in their own fat at the end.
That final frying step is what separates soggy carnitas from restaurant-quality ones. Traditional cooks know to increase the heat once the braising liquid evaporates.
Modern oven-based techniques try to replicate this using the broiler. High heat from above mimics the effect of frying without needing a vat of lard.
Some people swear by the stovetop method. You pull the braised pork from the slow cooker, then crisp it in a cast iron skillet with some of the cooking fat.
Air fryers have changed the game recently. The circulating hot air dries surfaces quickly while browning them evenly.
Each method has trade-offs. Broiling is hands-off but can burn quickly. Pan-frying gives you control but requires more attention. Deep-frying delivers the crispiest results but feels excessive for weeknight cooking.
Common Mistakes That Lead to Soggy Carnitas
Too much liquid during cooking is mistake number one. You need enough to braise the pork tender, but drowning it in liquid makes drying nearly impossible.
Skipping the crisping step entirely is surprisingly common. People pull perfectly cooked pork from the slow cooker and serve it directly. Sure, it tastes good, but you’re missing the textural contrast that makes carnitas special.
Overcrowding the pan kills your chances at crispy edges. When pieces touch, they steam each other instead of browning. Steam = moisture = no crisp.
Not drying the meat properly after braising leaves excess liquid clinging to every surface. That moisture has to evaporate before browning can start, which wastes time and heat.
Some folks make the mistake of adding sauce or citrus juice right before crisping. Save those flavor additions for after the browning is done.
Using the wrong pan temperature is another issue. Too low and you’re just warming the meat. Too high and the outside burns before the inside heats through.
Choosing and Preparing the Right Cut of Pork
Best Pork Cuts for Crispy Carnitas

Pork shoulder is the only cut that makes sense for carnitas. The Boston butt portion (which isn’t actually from the butt) sits higher on the shoulder and has the best fat-to-meat ratio.
Picnic shoulder works too, but it has more connective tissue and a trickier bone structure. You’ll spend more time trimming and dealing with odd-shaped pieces.
Fat distribution matters for getting crispy results. You want marbling throughout, not just a thick cap on one side. That internal fat renders during cooking and keeps the meat moist while the exterior crisps.
Look for a roast with at least 20% fat content. Leaner cuts dry out before they get crispy. The fat melts away during braising anyway, so don’t worry about it being too rich.
Bone-in versus boneless is mostly about convenience. The bone adds some flavor during braising but makes shredding more annoying. For crisping purposes, it doesn’t matter much.
A 4-5 pound roast is the sweet spot for most recipes. Smaller roasts cook too fast and dry out. Larger ones take forever and create too many leftovers unless you’re feeding a crowd.
Preparing the Meat Before Cooking
Trimming excess fat is controversial. Some people remove the thick outer layer, others leave it all on.
Here’s the thing: that outer fat cap won’t render completely during braising. It ends up as a greasy layer that prevents crisping. I trim it down to about ¼ inch thickness.
Cutting into optimal sizes affects your final texture. Two-inch chunks are perfect because they break down into shredded pieces that crisp easily. Too small and they disintegrate. Too large and they stay in chunks that don’t crisp well.
Room temperature meat cooks more evenly than cold meat straight from the fridge. Pull your pork shoulder out 30-45 minutes before cooking starts.
Some recipes call for scoring the fat in a crosshatch pattern. This helps rendering but isn’t necessary if you’re shredding the meat anyway.
Pat the meat dry before seasoning. Moisture on the surface dilutes your spices and creates steam instead of a proper sear if you’re browning first.
Seasoning Strategies
Dry rubs work better than wet marinades for crispy carnitas. Wet ingredients add moisture that has to cook off later.
Salt timing is crucial. Salt the meat at least 4 hours ahead (or even overnight) so it penetrates deep into the muscle fibers. This isn’t just for flavor, salt helps proteins retain moisture during cooking.
Cumin, oregano, and garlic powder create a traditional flavor base. But don’t go overboard. You want to taste the pork, not just the spices.
Some people add a bit of baking powder to their dry rub. It raises the pH of the meat surface, which speeds up the Maillard reaction during crisping. Just ¼ teaspoon per pound is enough.
Liquid seasonings like orange juice, lime juice, and beer should go in the braising liquid, not directly on the meat. They add flavor during cooking but don’t interfere with the crisping process later.
Bay leaves and onions in the braising liquid create depth without adding moisture to the meat surface. Save the cilantro and other fresh herbs for garnish after crisping.
Cooking Methods That Set Up Crispiness
Slow Cooker Carnitas

The slow cooker makes tender carnitas but creates a major moisture problem. All that liquid has nowhere to go, so it just cycles through the pot.
Keep liquid levels low. You need just enough to cover the bottom and create steam. About 1 cup of liquid for a 4-pound roast works.
Cook times matter for texture. Six hours on low renders the fat properly without turning the meat to mush. Eight hours might seem safe, but you risk meat that falls apart too much and won’t crisp well later.
Add aromatics like onions and garlic in chunks. They break down during cooking and add flavor to the meat. Whole cloves and bay leaves can be fished out before shredding.
The key is removing the meat while it still has some structure. You want it tender enough to shred, but not so soft it turns into paste.
Dutch Oven Carnitas
A Dutch oven gives you more control than a slow cooker. You can sear the meat first, which adds flavor layers.
Braising liquid ratios are different here. Use just enough to come halfway up the sides of the meat. The covered pot traps moisture, so you don’t need much.
Oven temperature should be around 300-325°F. Lower than that takes forever. Higher risks drying the meat before the fat renders completely.
Cook for about 3 hours, checking at the 2.5-hour mark. The meat should shred easily but still hold together in chunks.
The lid situation is important. Keep it on for the first 2.5 hours, then remove it for the last 30 minutes. This lets some moisture evaporate and concentrates the flavors.
Instant Pot Carnitas
Pressure cooking is the fastest method, but it creates the wettest carnitas. The Instant Pot traps every bit of moisture inside.
Pressure cooking times are shorter than you’d think. About 50-60 minutes on high pressure renders a 4-pound roast perfectly. Much longer and it turns mushy.
Natural release versus quick release affects texture. Natural release lets the meat relax and reabsorb some juices. Quick release is fine if you’re in a hurry, but expect slightly drier meat.
The sauté function is your secret weapon. After pressure cooking, remove the meat and use sauté mode to reduce the cooking liquid. Then add the meat back and let it fry in the concentrated juices.
Less is more with liquid here. Just ½ cup is enough when cooking under pressure. The meat releases its own juices anyway.
Stovetop-Only Method

This traditional approach requires the most attention but gives you complete control. Start by searing chunks of pork shoulder in a heavy pot with a bit of lard or oil.
Brown all sides before adding any liquid. Those caramelized bits add serious flavor to the final dish.
Managing heat levels is tricky on the stovetop. You want a gentle simmer, not a rolling boil. Too much heat toughens the meat.
Add your braising liquid (beer, stock, orange juice) and reduce heat to low. Partially cover the pot to let some steam escape.
Liquid reduction timing is different with this method. After about 2 hours, when the meat is tender, remove the lid completely. Let the liquid bubble away until only fat remains. Then increase heat and let the meat fry in its own fat.
This is how traditional carnitas gets made in Mexico. The pork literally fries itself once the water cooks off. Just watch it carefully because the transition from moist to crispy happens fast.
The Critical Crisping Step

Oven Broiling Technique
The broiler is the easiest way to get crispy carnitas without standing over a stove. But it’s also the easiest way to burn everything if you’re not paying attention.
Rack positioning makes or breaks this method. Put your sheet pan on the second rack from the top, about 6-8 inches from the heating element.
Too close and the outside chars before the inside warms through. Too far and you’re just slowly drying the meat without getting any color.
Temperature settings vary by oven. Most broilers run between 500-550°F, but some have high and low settings. Start with high if your broiler has options.
Timing depends on how much meat you’re crisping. A single layer of shredded carnitas takes about 5-7 minutes for the first side.
Don’t walk away during this step. Things go from perfectly crispy to burnt in about 90 seconds under the broiler.
Rotation is necessary unless you want half-crispy carnitas. Flip or stir the meat halfway through, then give it another 3-5 minutes.
Look for golden brown edges with some darker caramelized bits. Those nearly-burnt pieces are actually the best parts.
Stovetop Pan-Frying Method
A cast iron skillet holds heat better than any other pan type. Stainless steel works too, but you’ll get more sticking.
Non-stick pans are the worst choice here. They can’t handle the high heat needed for proper browning, and the coating breaks down above 400°F.
Fat choices matter for flavor and smoke point. The rendered fat from braising is ideal because it’s already full of pork flavor. Lard is traditional and has a high smoke point. Vegetable oil works but adds nothing to the taste.
Heat levels should be medium-high to start. Let the pan get properly hot before adding meat, otherwise it’ll steam instead of sear.
Add just enough fat to coat the bottom of the pan, maybe 2-3 tablespoons. The meat will release more as it cooks.
Batch cooking is the only way to avoid overcrowding. Spread the carnitas in a single layer with space between pieces.
Each batch takes about 4-5 minutes without stirring. Let the bottom get crispy before you even think about touching it.
Flip once, then let the other side crisp for another 3-4 minutes. Resist the urge to constantly stir or the meat will never develop a crust.
Air Fryer Approach

The air fryer basically acts like a countertop convection oven on steroids. Hot air circulates fast enough to crisp surfaces without deep-frying.
Temperature guidelines are straightforward. Set it to 400°F for carnitas. Lower temps don’t crisp well, higher temps burn the edges.
Time varies based on your air fryer size and how much meat you’re cooking. Start with 8 minutes for a single layer.
Basket arrangement matters more than people realize. Don’t pile the meat high. Spread it out so air can flow around each piece.
Shake or flip the basket at the 4-minute mark. This ensures even browning on all sides.
Some air fryers have hot spots. If certain pieces are browning faster, move them to cooler areas of the basket.
The carnitas won’t get quite as crispy as pan-frying, but it’s close enough and way less messy.
Deep-Frying for Extra Crunch
This is overkill for most situations, but it delivers the crispiest results possible. Deep-frying is how street vendors in Mexico get that incredible texture.
Oil temperature should be 350-375°F. Use a thermometer because guessing leads to greasy or burnt meat.
Peanut oil or vegetable oil work best. They have neutral flavors and high smoke points.
Frying time is short, just 2-3 minutes per batch. The meat is already cooked, you’re just crisping the exterior.
Lower small batches into the hot oil carefully. Too much at once drops the temperature and you end up with soggy carnitas.
Drain on paper towels or a wire rack immediately after frying. Don’t let them sit in their own grease.
The texture is unmatched. Every surface gets crispy and golden. But honestly, for home cooking, the effort rarely justifies the results.
Moisture Management Techniques
Drying the Meat After Braising

Straining is the first step once your pork is tender. Pull the chunks from the braising liquid with a slotted spoon or spider.
Let the meat sit in a colander for 5-10 minutes. Gravity pulls excess liquid down and away from the pork.
Shred the meat while it’s still hot. Use two forks or just your hands (if you can handle the heat). Break it into pieces roughly the size of your thumb.
Paper towel techniques might seem fussy, but they make a real difference. Spread the shredded carnitas on a sheet pan lined with paper towels.
Pat the top with more paper towels. You’re not trying to make it bone-dry, just remove surface moisture.
Some people skip this step and wonder why their carnitas won’t crisp. That thin layer of moisture has to evaporate before browning starts, which wastes time and heat.
Resting time before crisping helps too. Let the meat sit uncovered at room temperature for 10-15 minutes. Air circulation helps dry the surface naturally.
Using Reserved Fat Strategically
The liquid left after braising contains concentrated pork flavor. Don’t throw it away.
Pour the braising liquid into a fat separator or a clear container. Let it sit for 10 minutes and the fat rises to the top.
Skim off the fat layer and save it. This is liquid gold for crisping carnitas.
The liquid underneath can be reduced into a sauce or discarded. It’s already given its flavor to the meat during cooking.
When to add fat back depends on your crisping method. For pan-frying, add 2-3 tablespoons before the meat goes in.
For broiling, toss the shredded carnitas with just a tablespoon of the reserved fat. This helps with browning without making things greasy.
How much fat to use is a judgment call. Too little and you get dry spots. Too much and the meat fries instead of roasting.
A light coating is all you need. The meat already has fat marbled through it from the pork shoulder.
Steam Management
Steam is the silent killer of crispy carnitas. It keeps surfaces wet, which prevents the Maillard reaction from happening.
Never cover the pan during crisping. A lid traps moisture and turns your oven or skillet into a steamer.
Proper ventilation matters more than most people think. Turn on your exhaust fan or crack a window.
All that moisture evaporating from the meat has to go somewhere. If it just hangs in the air around the pan, it settles back on the food.
Overcrowding creates steam problems too. When pieces touch, moisture can’t escape and they end up steaming each other.
Some recipes suggest adding liquid or sauce during the crisping step. Don’t. Save wet ingredients for serving.
Even a splash of lime juice or beer at the wrong time can undo all your drying work.
Temperature Control for Perfect Texture
Internal Meat Temperature
Doneness before crisping is straightforward. The pork should already be fully cooked from braising, reaching at least 190-200°F internally.
At this temperature, the collagen has broken down and the meat shreds easily. Lower temps leave tough, chewy bits.
Temperature during crisping matters less because the meat is already done. You’re just working on surface texture now.
The goal is to reheat the interior while crisping the exterior. Most methods bring the meat back up to 160-180°F.
Carryover cooking is minimal with shredded meat. Unlike a roast, there’s not enough mass to retain and transfer heat.
This means you can pull carnitas right when they look perfect. They won’t continue cooking and drying out as they rest.
A meat thermometer isn’t really necessary for the crisping step. Use your eyes and nose instead. Golden brown color and a toasty smell mean you’re done.
Pan and Oven Temperature
Preheating is non-negotiable for crispy results. A cold pan or oven just steams the meat.
Give your cast iron skillet a solid 5 minutes over medium-high heat before adding anything. It should be hot enough that a drop of water sizzles and evaporates immediately.
For oven methods, let the broiler preheat for at least 10 minutes. Most ovens take longer than you’d think to reach full temperature.
Hot spots exist in every oven. The back usually runs hotter than the front, and the center might cook differently than the edges.
Rotation helps even things out. Turn your sheet pan 180 degrees halfway through broiling.
Temperature adjustments mid-process are sometimes necessary. If edges are browning too fast, move the pan to a lower rack or reduce heat slightly.
If nothing’s browning after 5 minutes, your oven probably wasn’t hot enough to start. Crank up the heat and give it more time.
Don’t keep opening the oven door to check. Every time you do, the temperature drops by 25-50°F and takes several minutes to recover.
Serving Temperature Considerations
Keeping carnitas crispy while warm is tricky. The longer they sit, the more moisture they release and the softer they get.
Serve within 15-20 minutes of crisping for best results. After that, the texture starts declining noticeably.
If you need to hold them longer, keep carnitas on a wire rack over a sheet pan in a 200°F oven. The rack lets air circulate and prevents the bottom from getting soggy.
Don’t pile them in a serving bowl right away. That traps steam and turns everything soft.
Reheating without losing texture is possible but requires the same high-heat methods as the original crisping. A quick pass under the broiler or a few minutes in a hot skillet brings back most of the crunch.
Microwaving is the worst option. It steams the meat from the inside out and guarantees soggy carnitas.
Room temperature carnitas can be crisped up again before serving. Just spread them on a sheet pan and hit them with high heat for 3-4 minutes.
Batch Size and Spacing

Why Crowding Kills Crispiness
Steam buildup is inevitable when pieces of meat touch each other. Moisture escapes during crisping and has nowhere to go.
That trapped steam keeps surfaces wet. Wet surfaces can’t brown or crisp properly no matter how high your heat goes.
Uneven browning happens when some pieces block heat from reaching others. The pieces on top might look perfect while the ones underneath stay pale and soft.
You end up stirring constantly to compensate, which just makes everything worse. The meat never stays in contact with the hot pan long enough to develop a crust.
Temperature drops are another problem with overcrowding. Adding too much cold or room-temperature meat to a pan lowers the cooking surface temperature by 50°F or more.
The pan struggles to recover that heat while you’re trying to cook. Everything just sits there steaming instead of searing.
Physics doesn’t lie. A single layer with space between pieces gets crispy. A pile of meat gets mushy.
Optimal Batch Sizes
For different cooking vessels, the rules change slightly. A standard sheet pan (13×18 inches) can handle about 2 pounds of shredded carnitas in a single layer.
More than that and you’re stacking pieces on top of each other. Split it into two pans or do two batches.
Cast iron skillets work best with 1-1.5 pounds at a time. A 12-inch skillet has plenty of surface area, but you need space between pieces.
Air fryer baskets vary wildly in size. Most standard models handle about 1 pound of carnitas without crowding.
Check your specific model’s capacity. If meat is piled more than one layer deep, you’re doing too much at once.
Surface area calculations are simple. Spread your shredded carnitas on the pan before heating. Can you see the pan between most pieces? Good. Is it all touching or overlapping? Split it up.
Multiple batch strategies require patience but deliver better results. Keep the first batch warm in a 200°F oven while you crisp the second.
Or serve the first batch immediately while the second one cooks. Fresh from the pan is always crispiest anyway.
Layering vs. Single Layer
Single layers matter most during the actual crisping step. You want every piece in direct contact with the hot surface or exposed to the broiler.
Exceptions exist for the initial braising. Stacking chunks of pork shoulder in a Dutch oven or slow cooker is fine because you’re not trying to crisp anything yet.
But once you drain that braised pork and move to the crisping phase, spread it out. No compromises.
Some people try to cheat by stirring frequently. This doesn’t work as well as you’d think. Pieces need sustained contact with heat to develop a proper crust.
Constant stirring means constant interruption of the browning process. You get some color eventually, but not the deep golden crispy edges that make carnitas special.
The bottom line? One layer for crisping, no exceptions unless you’re okay with mediocre texture.
Timing Your Crisp

Fresh vs. Make-Ahead Carnitas
Crisping right before serving gives you the best possible texture. The meat is hot, the edges are crackling, and everything tastes incredible.
But life doesn’t always allow for perfect timing. Sometimes you need to cook ahead.
Refrigerating between steps actually has an advantage. Cold meat holds its shape better during the final crisping. The exterior gets crusty while the interior stays tender.
Pull braised carnitas from the fridge 20 minutes before crisping. You want them cool but not ice-cold, otherwise the outside burns before the inside warms through.
Freezing is totally viable for make-ahead situations. Portion the braised (but not yet crisped) pork into freezer bags and freeze flat.
Thaw overnight in the fridge, then proceed with your chosen crisping method. The texture comes out nearly identical to fresh.
Never freeze already-crisped carnitas. Those crispy bits turn soggy and limp when thawed. Always crisp after thawing, not before freezing.
How Long Carnitas Stay Crispy
Holding time is limited. Peak crispiness lasts maybe 15-20 minutes after you pull them from heat.
After 30 minutes, you’ll notice the texture softening. The meat releases moisture as it sits, which rehydrates those crispy surfaces.
By the hour mark, they’re still good but definitely not crispy anymore. More like pleasantly textured.
Holding temperature guidelines help extend that window slightly. Keep finished carnitas in a 200°F oven on a wire rack.
The low heat prevents further cooking while the rack allows air circulation underneath. This setup can maintain decent texture for up to 45 minutes.
Warming drawers work too if you have one. Set it to the lowest setting. Anything too hot continues cooking the meat and dries it out.
Don’t pile crispy carnitas in a bowl and cover them. That’s basically creating a steam chamber that destroys all your hard work.
Last-Minute Crisping
Quick methods exist when you’re short on time. The broiler is fastest at about 6-8 minutes total.
Shortcuts that still work include using a very hot cast iron skillet. Preheat it for 5 minutes, add meat, don’t touch it for 3 minutes, flip, done.
An air fryer at 400°F for 6 minutes gets you about 80% of the way there with almost zero effort.
What to skip when rushed? Skip the paper towel drying if you must. The meat will take a bit longer to crisp but it still works.
Skip the fancy fat rendering and separation. Just use a little oil or lard from your pantry.
Never skip the single-layer rule though. Crowding wastes more time than it saves because nothing crisps properly.
If you’re truly desperate, serve the carnitas without crisping at all. They’re still delicious, just missing that textural element. Pair them with something crunchy on the side like tortilla chips or crispy taco shells.
Equipment That Makes a Difference
Essential Tools
Sheet pans that promote browning need to be light-colored aluminum. Dark pans absorb too much heat and burn the bottom before the top crisps.
Rimmed half-sheet pans (13×18 inches) are the standard. The rim keeps rendered fat from dripping into your oven.
Splatter screens save your stovetop when pan-frying carnitas. The fat pops and splatters like crazy during the final crisping stage.
A fine-mesh screen lets steam escape while catching the grease. Worth every penny if you crisp carnitas regularly on the stovetop.
Kitchen thermometers help during braising to ensure the pork reaches that ideal 190-200°F internal temperature. An instant-read thermometer works fine.
You don’t really need it for the crisping step. Visual cues tell you everything you need to know about doneness.
Pan Materials
Cast iron benefits are real, not just hype. It holds heat incredibly well, which means temperature doesn’t drop when you add meat.
The rough surface helps develop a better crust too. Tiny ridges give the meat something to grab onto during browning.
Stainless steel performance is solid if you have a thick, heavy-bottomed pan. Thin stainless steel creates hot spots and burns easily.
The smooth surface can cause sticking, especially if the pan isn’t hot enough before you add the carnitas. Use enough fat and don’t touch the meat until it releases naturally.
Non-stick limitations are significant for this application. Most non-stick coatings break down above 400°F and release toxic fumes.
You can’t get proper high-heat searing in a non-stick pan. The meat browns eventually but never gets that deep crust. Save these pans for eggs.
Optional But Helpful Equipment
Wire cooling racks elevate carnitas so air circulates underneath during oven crisping. This prevents the bottom from sitting in rendered fat and getting soggy.
Set the rack inside your sheet pan to catch drippings. The meat crisps more evenly on all sides this way.
Kitchen torches seem gimmicky but they’re actually pretty useful for spot-fixing. Got a few pale spots after broiling? Hit them with the torch for 10 seconds.
This is overkill for most people. But if you already own one for crème brûlée, it works great for carnitas too.
Convection oven advantages are substantial. The fan circulates hot air constantly, which dries surfaces faster and browns more evenly.
If your oven has a convection setting, use it. Reduce the temperature by 25°F from what the recipe calls for since convection cooks more efficiently.
Standard ovens work fine too. You just need to rotate the pan once or twice for even browning. Convection makes it slightly more foolproof, but it’s not necessary.
A good fat separator speeds up the process of saving that flavorful rendered fat. Pour in the braising liquid, wait 5 minutes, pour out pure fat.
Or just use a clear container and skim with a spoon. Takes longer but costs nothing.
Troubleshooting Crispy Carnitas
When Carnitas Won’t Crisp
Too much moisture remaining is the most common culprit. If you skipped the draining and drying steps, the meat is probably still waterlogged.
Spread it on paper towels and press firmly to absorb excess liquid. Let it sit uncovered for 15 minutes, then try crisping again.
Wrong temperature is another frequent issue. A 350°F oven won’t crisp carnitas no matter how long you wait. You need intense heat above 400°F.
Check your oven with a separate thermometer. Many ovens run 25-50°F cooler than the display shows.
For stovetop methods, the pan might not be hot enough before you add the meat. Wait until a drop of water sizzles and evaporates instantly.
Fat distribution problems can prevent even browning. If all the fat rendered out during braising and you’re left with lean meat, it’ll dry out before it crisps.
Toss the shredded pork with a tablespoon or two of lard or the reserved cooking fat. This gives it something to fry in.
Sometimes the meat is just too finely shredded. Tiny pieces turn into jerky before they crisp. Aim for thumbnail-sized chunks next time.
Burning Before Crisping
Heat too high is the obvious answer but also the most common mistake. People think hotter equals crispier.
Not true. Above 450°F on the stovetop or too close to the broiler, you get carbon instead of caramelization.
Back the heat down to medium-high for pan-frying. Move the oven rack one position lower for broiling.
Sugar in marinades causes rapid burning. Orange juice, beer with residual sugars, or sweet rubs all contain sugars that caramelize fast.
These sugars burn at lower temperatures than the meat browns. If you used a sweet marinade, expect some darker spots.
Recovery methods depend on how bad the burning is. Light charring on some edges? That’s actually desirable and adds flavor.
Seriously burnt? Pick out the blackest pieces and discard them. The rest are probably still salvageable.
For future batches, reduce the sugar in your seasoning or cook at a lower temperature for longer.
Crispy Outside, Dry Inside
Overcooking causes are usually linked to the initial braising step, not the crisping. If you braised too long, the meat dried out before you even started crisping.
Pork shoulder should reach 190-200°F internal temperature during braising, then stop. Higher temps turn it to sawdust.
Size adjustment solutions are simple. Larger chunks retain more moisture than small shredded bits.
Next time, leave the pork in 2-3 inch pieces after braising. Shred it coarsely rather than pulling it into fine threads.
Moisture retention tricks include not over-draining the meat. You want it damp, not bone-dry, before crisping.
A light coating of the braising liquid (about 2 tablespoons per pound of meat) keeps the interior moist while the exterior crisps.
Some people add a splash of beer or stock right before serving to reintroduce moisture. This works if you do it after crisping, not before.
Serving and Storing Crispy Carnitas

Best Ways to Serve
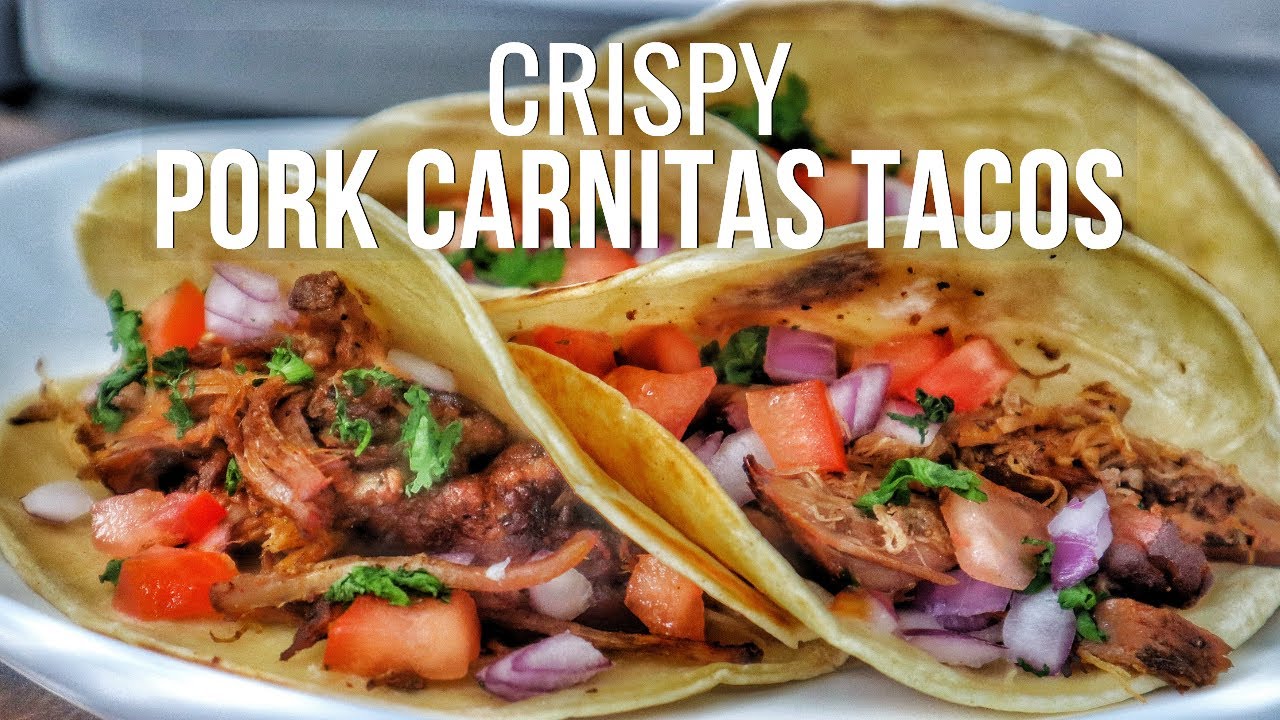
Tacos that maintain texture require some strategy. Build them right before eating, not in advance.
Warm corn tortillas in a dry skillet until pliable. Cold tortillas absorb moisture from the filling and get soggy fast.
Place the crispy carnitas on the tortilla first while they’re still hot. Add cold toppings like cilantro, onions, and lime last.
The temperature contrast keeps the meat from releasing too much steam. Hot meat plus cold toppings equals longer-lasting crispy texture.
Burrito considerations are different because everything gets wrapped together. The carnitas will soften no matter what you do.
Accept this and focus on other textures. Add shredded lettuce or crispy tortilla strips for crunch.
Or serve the carnitas on the side and let people add them to their burrito as they eat. Not traditional, but it preserves the texture.
Bowl and plate presentations work better for showcasing crispy carnitas. Spread them over rice or beans so steam from the hot base rises around the meat instead of into it.
Pile toppings around the carnitas rather than on top. This keeps the crispy bits exposed to air.
Toppings That Complement Crispy Texture
Fresh versus wet toppings make a huge difference. Diced white onion, cilantro, and radish slices add crunch without moisture.
Salsa is tricky. A thick chunky salsa works better than a watery one. Let people add their own rather than pre-saucing the meat.
Wet toppings like sour cream, guacamole, and liquid salsas should go on the side. They’re delicious but they destroy crispiness on contact.
Placement strategies matter for preserving texture as long as possible. Think of crispy carnitas as the star and keep wet ingredients away from direct contact.
Create sections on the plate. Carnitas in one area, beans in another, rice in a third. This prevents everything from melding into mush.
Sauce application methods are critical. Drizzle sauces around the carnitas, not over them. Or serve sauce on the side for dipping.
If you must sauce the meat, do it right before serving. The brief contact won’t ruin the texture immediately, but it starts the softening process.
Storage Without Losing Texture
Cooling before storage prevents condensation. Let the carnitas cool to room temperature before refrigerating.
Hot food in a sealed container creates steam, which condenses on the lid and drips back onto the food. Recipe for soggy carnitas.
Container choices affect how well texture holds. Use shallow, wide containers rather than deep ones.
This spreads the meat in a thinner layer so it cools faster and reheats more evenly later.
Avoid airtight containers for the first few hours. Leave the lid slightly ajar so moisture can escape. Once fully cooled, seal it up.
Refrigerator storage is fine for 3-4 days. The carnitas won’t stay crispy, obviously. But they reheat well.
Freezer storage works for up to 3 months. Portion into meal-sized amounts in freezer bags, press out all the air, and freeze flat.
Frozen carnitas thaw overnight in the fridge. Never microwave to thaw or you’ll cook them unevenly.
Reheating for Crispiness
Oven reheating is the best method for bringing back that crispy texture. Spread cold carnitas on a sheet pan in a single layer.
Bake at 375°F for 10-12 minutes until heated through and edges start crisping again. Bump it to broil for the last 2-3 minutes if needed.
Stovetop touch-ups work great for smaller portions. Heat a cast iron skillet over medium-high, add carnitas, don’t stir for 3-4 minutes.
The bottom gets crispy while the top warms. Flip once and give it another 2 minutes.
Microwave alternatives barely exist. If you absolutely must microwave, use 50% power in short bursts.
Better yet, microwave just until warm, then transfer to a hot skillet or under the broiler for 2 minutes to crisp the surface.
The microwave steams the meat from the inside out. It’s fundamentally incompatible with crispy texture unless you finish it with dry heat.
Room temperature carnitas from the fridge actually crisp better than hot ones. The cold meat doesn’t release as much moisture during the initial heating phase.
Pull them out 20 minutes before reheating. Cool meat going into a screaming hot pan develops better crust than warm meat.
Similar to how what you serve with carnitas can enhance the meal, reheating properly brings the dish back to life. The texture won’t be quite as perfect as fresh-crisped, but it comes close enough that most people won’t notice the difference.
FAQ on How To Make Carnitas Crispy
Why won’t my carnitas get crispy?
Excess moisture is the main culprit. After braising, the pork shoulder is saturated with liquid that must evaporate before browning starts. Drain thoroughly, pat with paper towels, and spread in a single layer. Overcrowding also prevents crisping because pieces steam each other instead of browning.
What’s the best method to crisp carnitas?
Broiling delivers fast, even results with minimal effort. Spread carnitas on a sheet pan, position 6-8 inches from the heating element, and broil 5-7 minutes per side. Pan-frying in cast iron gives more control but requires watching closely. Both methods work equally well when done properly.
Can I make carnitas crispy in a slow cooker?
The slow cooker only handles the braising step. It creates too much moisture for crisping. After cooking, drain the meat well, then transfer to a hot skillet, sheet pan under the broiler, or air fryer. The slow cooker gets you tender pork; high dry heat makes it crispy.
How do I keep carnitas crispy after cooking?
Serve within 15-20 minutes for peak texture. For longer holding, keep them on a wire rack over a sheet pan in a 200°F oven. The rack allows air circulation underneath, preventing soggy bottoms. Never pile them in a covered bowl, which traps steam and destroys crispiness completely.
What temperature should I use to crisp carnitas?
High heat is non-negotiable. Use 400-450°F for oven methods or medium-high on the stovetop. The broiler runs around 500-550°F, which is perfect. Lower temperatures just dry the meat without developing that caramelized crust. Surface temperature needs to exceed 300°F for proper browning reactions.
Should I add oil when crisping carnitas?
Use reserved fat from the braising liquid for best flavor. About 1-2 tablespoons per pound of meat provides enough for browning without making things greasy. Lard works great too. The pork already contains fat, so you don’t need much additional. Avoid adding liquid or wet ingredients during crisping.
How long does it take to make carnitas crispy?
The crisping step takes 10-15 minutes total depending on your method. Broiling needs 5-7 minutes per side. Pan-frying takes 4-5 minutes per side without stirring. Air frying at 400°F takes about 8 minutes with one flip halfway through. Rushing causes uneven browning; patience delivers better results.
Can I reheat carnitas and keep them crispy?
Yes, but skip the microwave. Spread cold carnitas on a sheet pan and bake at 375°F for 10-12 minutes, finishing under the broiler for 2-3 minutes. Or use a hot cast iron skillet for 3-4 minutes per side. Reheated carnitas won’t match fresh-crisped texture but come very close.
What’s the best cut of pork for crispy carnitas?
Pork shoulder (Boston butt) is the only cut that works properly. It has enough marbled fat to stay moist during braising while providing surface area for crisping. Leaner cuts like loin dry out before they crisp. Look for a roast with at least 20% fat content for optimal results.
Why do my carnitas burn before getting crispy?
Heat is too high or the meat contains residual sugars from marinades. Orange juice and sweet rubs caramelize rapidly and burn. Move the oven rack lower, reduce stovetop heat to medium-high, or reduce sugar in your seasoning. Also check that surfaces are relatively dry before applying high heat.
Conclusion
Mastering how to make carnitas crispy comes down to controlling moisture, managing heat, and respecting the single-layer rule. The braising step gets you tender meat, but that final high-heat blast transforms ordinary pork into something worth making again and again.
Your choice of crisping method matters less than the fundamentals. Whether you prefer the broiler, a hot cast iron skillet, or an air fryer, they all work when you drain the meat properly and give pieces enough space.
Temperature control separates soggy carnitas from crispy ones. High heat above 400°F triggers the browning reactions that create that caramelized exterior. Lower temps just dry things out without developing texture.
Timing is everything. Crisp right before serving for peak results, or use the holding techniques to maintain texture for 30-45 minutes. Reheating works surprisingly well when you use dry heat methods instead of the microwave.
The difference between acceptable carnitas and exceptional ones isn’t complicated cooking technique. It’s understanding these principles and applying them consistently. Get the moisture out, spread pieces in one layer, hit them with serious heat, and serve immediately.
Perfect carnitas tacos start with perfectly crisped meat.


