
Ever feel the sensation of a delectable, perfectly seasoned garlic chicken enticing your taste buds, but you’re short on time? Welcome to the solution.
In this segment, we’re diving into how to cook Costco garlic chicken—a favorite pantry staple, renowned for its convenience and robust flavor.
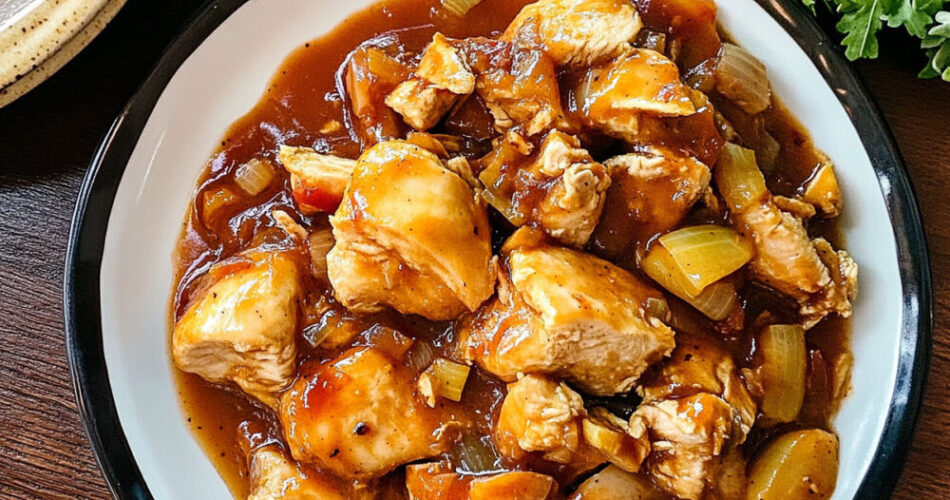
Imagine a kitchen bustling with the aroma of garlic herb seasoning and succulent chicken breast; that’s what we’re aiming to recreate here.
I bring 15 years of culinary prowess to the table, fine-tuning pre-cooked, frozen wonders into gourmet-level dinners. You’re about to unlock a step-by-step guide on transforming Costco’s garlic chicken into a quick, hearty meal your family will love.
We’ll explore the best techniques for oven-baking, microwaving, and even skillet-prepping this Costco favorite. By the end of this article, you’ll be prepped to serve a mouth-watering garlic chicken dinner, turning a pre-packaged meal into a household classic.
Stay tuned to ensure your next culinary adventure with Costco garlic chicken is a resounding success.
How To Cook Costco Garlic Chicken: The Quick Version
To cook Costco garlic chicken, you can follow these general steps, which can vary slightly depending on the specific product (like drumsticks or wings) you have purchased.
Cooking Instructions
- Preparation:
- Remove the chicken from its packaging and pat it dry with paper towels to remove excess moisture. This helps the seasoning adhere better and promotes crispiness.
- Oven Cooking:
- Preheat your oven to 375°F (190°C).
- Place the chicken on a baking sheet lined with parchment paper or in a baking dish. If you have a wet rub, consider letting the chicken dry in the fridge for a bit to achieve better texture.
- Bake the chicken for about 45-50 minutes, flipping halfway through to ensure even cooking. The internal temperature should reach 165°F (74°C) when done.
- Grilling Option:
- If you prefer grilling, set up your grill for indirect heat at about 350°F (175°C).
- Cook the chicken for approximately 45-50 minutes, flipping it halfway through. This method works well for wings and drumsticks, especially if they have a wet rub that may burn at higher temperatures.
- Serving:
- Once cooked, let the chicken rest for a few minutes before serving. This allows the juices to redistribute, ensuring moist and flavorful meat.
Additional Tips
- If using a marinade or rub, consider marinating the chicken for a few hours or overnight for enhanced flavor.
- Experiment with different sides such as roasted vegetables, rice, or a fresh salad to complement the garlic chicken.
By following these steps, you can enjoy a delicious garlic chicken meal from Costco.
Understanding the Product
Ingredients and Nutritional Information
Breakdown of ingredients

Costco garlic chicken typically includes chicken breast, garlic herb seasoning, and a touch of butter. Each ingredient adds layers of flavor, creating a delicious and convenient meal option.
Nutritional benefits and considerations
High in protein, this dish offers a nutritious meal. However, be mindful of sodium content. Pairing it with fresh vegetables or grains can build a balanced meal.
Packaging and Storage
Packaging details
Costco garlic chicken comes in a frozen, vacuum-sealed package, preserving freshness and flavor. The detailed packaging ensures ease of storage.
Storage instructions
Keep the chicken frozen until you’re ready to cook. For best results, store at or below 0°F. Follow the expiration date and storage guidelines provided on the packaging.
Preparation Requirements
Tools and equipment needed
You’ll need a baking sheet, skillet, or air fryer depending on your cooking method. A meat thermometer helps ensure proper doneness.
- Baking sheet
- Skillet
- Air fryer
- Meat thermometer
Additional ingredients or items to prepare
While the chicken is pre-seasoned, adding fresh herbs or a squeeze of lemon juice can enhance the flavor. Consider having olive oil and garnishing options ready for the final touch.
Step-by-Step Cooking Instructions
Oven Cooking Method
Preheating the oven
Set your oven to 375°F for optimal cooking.
Arranging the chicken on a baking sheet
Place the chicken on a baking sheet, ensuring pieces are evenly spaced.
Cooking times and temperature settings
Bake for 25-30 minutes. Ensure even cooking by flipping halfway through.
Checking for doneness
Use a meat thermometer to check if the internal temperature reaches 165°F. This confirms it’s safely cooked.
Stovetop Cooking Method
Preparing the skillet
Heat a skillet over medium heat with a drizzle of olive oil.
Cooking the chicken pieces evenly
Cook the chicken, turning frequently to ensure even browning.
Managing heat and timing
Maintain a consistent medium heat. Each piece typically requires 6-8 minutes per side.
Tips for achieving a crispy exterior
Press slightly against the skillet for a crispy texture. Avoid excessive flipping.
Air Fryer Cooking Method
Preheating the air fryer
Preheat your air fryer to 375°F.
Arranging chicken pieces in the basket
Arrange the chicken in a single layer in the air fryer basket.
Cooking time and temperature settings
Cook at 375°F for about 15-20 minutes, shaking halfway through to ensure crispiness.
Ensuring even cooking and crispiness
Check visually and use a meat thermometer. The pieces should be golden and the internal temperature should reach 165°F.
Tips for Enhancing Flavor
Marination Techniques
Marinating before cooking
If you have time, marinate the chicken with additional garlic and herbs to amplify flavor.
Enhancing flavor with additional herbs and spices
Consider incorporating rosemary, thyme, or a touch of paprika.
Serving Suggestions
Pairing with complementary sides
Serve the garlic chicken with roasted vegetables, quinoa, or brown rice for a complete meal.
Creating balanced meals with vegetables and grains
Mix up sides like steamed broccoli or whole grains for a nutritious balance.
Garnishing Ideas
Fresh herbs and citrus
Top with fresh parsley or a squeeze of lemon juice for added zest.
Sauces and dips to accompany the chicken
Pair the dish with garlic aioli or a touch of sriracha for some heat.
Common Mistakes and How to Avoid Them
Overcooking or Undercooking
Signs of overcooked chicken
Overcooked chicken becomes dry and loses its tenderness.
Ensuring the chicken is properly cooked through
Use a meat thermometer to ensure it reaches 165°F at the thickest part.
Uneven Cooking
Tips for uniform cooking
Ensure even spacing between pieces on your baking sheet or skillet.
The importance of spacing and arrangement
Proper spacing ensures heat circulates evenly, preventing undercooked spots.
Flavor Issues
Avoiding blandness
Don’t skip additional seasoning or marination for extra depth.
Balancing seasoning and spices
Taste and adjust seasoning gradually, focusing on enhancing natural flavors.
Health Considerations
Nutritional Benefits
Protein content and health benefits
Costco garlic chicken is an excellent source of lean protein, essential for muscle repair and growth.
Low-fat cooking methods
Opt for baking or air frying to minimize added fat, preserving the dish’s healthfulness.
Dietary Restrictions and Modifications
Gluten-free and low-carb options
Ensure additional ingredients comply with dietary needs. Pair with gluten-free sides if needed.
Adjusting recipes for specific dietary needs
Customize seasonings and sides to match dietary restrictions without sacrificing flavor.
Caloric Content and Portion Control
Managing portion sizes
Divide chicken into appropriate portions to manage calorie intake.
Understanding caloric intake
Be mindful of the caloric content in sides and garnishes, balancing your meal effectively.
Expert Opinions and Reviews
Chef Insights
Professional cooking tips and techniques
Experts recommend using a meat thermometer and experimenting with herbs for enhanced flavor.
Recommendations from culinary experts
Consistency in heat management and seasoning ensures a delightful dish.
Consumer Reviews
Common feedback from Costco customers
Customers appreciate the convenience and rich garlic flavor of the product.
Personal experiences and testimonials
Many highlight how easy and versatile Costco garlic chicken is for weeknight meals.
Comparative Analysis
Comparison with similar products
Evaluate the unique garlic herb seasoning that sets this product apart.
Advantages and disadvantages
Consider the ease of preparation and rich flavor as primary benefits, with sodium content being a factor to monitor.
FAQ On How To Cook Costco Garlic Chicken
How do I cook Costco garlic chicken in the oven?
Oven-baking Costco garlic chicken is straightforward. Preheat your oven to 375°F. Place the chicken on a baking sheet. Bake for 25-30 minutes.
Check if it’s thoroughly heated. Serve hot, letting those garlic herb seasonings elevate your dish to perfection.
Can I microwave Costco garlic chicken?
Microwaving Costco garlic chicken is quick and easy. Place the chicken on a microwave-safe plate. Cover it loosely. Microwave on high for 4-6 minutes.
Ensure it’s evenly heated. Let it sit for a minute before serving. Enjoy your quick garlic-infused meal.
What’s the best way to cook Costco garlic chicken?
The best method to cook Costco garlic chicken depends on your preference. For a crispy texture, try oven-baking. For convenience, microwaving is ideal.
Skillet cooking brings out rich flavors. Choose based on your timing and desired texture for a delightful garlic chicken dinner.
Can I cook it straight from frozen?
Yes, cook Costco garlic chicken straight from frozen. Preheat your oven to 375°F. Place the frozen chicken on a baking sheet. Bake for around 30-35 minutes.
Ensure it’s thoroughly heated. This method retains the rich garlic herb seasoning, making meal prep a breeze.
How do I add extra flavor to Costco garlic chicken?
Enhance Costco garlic chicken’s flavor by adding fresh herbs like rosemary or thyme. Drizzle a bit of lemon juice before baking or sprinkle grated Parmesan cheese.
These small additions can intensify the already delicious garlic butter sauce, giving it a personalized gourmet touch.
Is Costco garlic chicken healthy?
Costco garlic chicken offers a nutritious meal option. It’s made with chicken breast, rich in protein and low in fat. However, mind the sodium content.
Pair it with a fresh salad or steamed vegetables to balance the meal. It’s a convenient and relatively healthy choice for busy nights.
How long do I cook Costco garlic chicken on the stove?
For stove-top cooking, heat a skillet over medium heat. Add a bit of olive oil. Place the chicken in the skillet.
Cook each side for about 6-8 minutes until heated through and slightly crispy. This method enhances the garlic butter flavor and delivers a satisfying texture.
Can I use Costco garlic chicken in recipes?
Certainly! Costco garlic chicken is versatile. Incorporate it into pasta dishes, stir-fries, or salads. It pairs well with roasted vegetables or stuffed inside wraps.
The garlic herb seasoning complements various recipes, making it an effortless addition to your cooking repertoire.
How do I know when Costco garlic chicken is fully cooked?
Ensure Costco garlic chicken is fully cooked by checking its internal temperature. Use a meat thermometer. It should read 165°F.
Alternatively, cut into the chicken. It should be hot and no longer pink inside. Following the cooking times closely helps achieve the perfect doneness.
Any tips for making Costco garlic chicken even better?
To elevate Costco garlic chicken, add a finishing touch. Try sprinkling fresh parsley or a dash of paprika right before serving.
Pair it with garlic bread or a zesty dipping sauce. These small enhancements can transform your meal into a memorable dining experience.
Conclusion
Cooking is an art form I’ve honed for over 15 years, and trust me, mastering how to cook Costco garlic chicken can be a game-changer in your culinary journey. This store-bought marvel is not just about convenience; it’s a treasure trove waiting to be unlocked with the right techniques.
By now, you’ve learned the various methods to elevate this pre-packaged delight into a gourmet experience. Whether oven-baking for that crispy, golden perfection, quick microwaving for a busy night, or skillet-prepping to infuse rich, deep flavors, you’ve got the blueprint for a versatile meal solution.
Remember, enhancing the taste with fresh herbs, a splash of citrus, or a sprinkle of Parmesan can transform the dish into a culinary masterpiece. Monitoring the internal temperature ensures safety and perfection every time.
With these insights, you’re well-equipped to make Costco garlic chicken not just a meal, but a gastronomic event. Embrace these tips and make every bite unforgettable.