
Cooking Costco chicken strips isn’t just a quick meal solution; it’s an art of transforming frozen convenience into a savory masterpiece. Trust me, after 15 years in the kitchen, I’ve perfected the technique to make these crispy chicken bites taste like gourmet.
The secret isn’t just in following cooking instructions, but also understanding the nuances—oven temperature, cooking time, and the perfect seasoning mix.
Whether you prefer them oven-baked, grilled, or from an air fryer, each method brings out a unique flavor and texture that can elevate your family’s dinner time.
In this article, you’ll discover easy cooking tips for these versatile strips, from choosing the right baking sheet to ensuring the perfect crispy coating with breadcrumb magic.
You’ll also learn about ideal side dishes and even some fun kitchen hacks to further enhance your meal.
By the end of this guide, you’ll be a pro at making Costco chicken strips, ready to impress anyone at the dinner table.
How To Cook Costco Chicken Strips: The Quick Version
To cook Costco chicken strips, you have a couple of options: baking in the oven or using an air fryer. Here are the detailed instructions for both methods:
Oven Cooking Instructions
- Preheat the Oven: Set your oven to 425°F (218°C).
- Prepare the Chicken Strips: Place the frozen chicken strips on a baking tray in a single layer.
- Bake: Cook for 18 to 22 minutes, turning the strips once halfway through the cooking time. If you prefer them crispier, you can bake them for a few additional minutes.
- Rest: Let the chicken strips stand for about 2 minutes before serving to allow them to finish cooking and to cool slightly.
Air Fryer Cooking Instructions
- Preheat the Air Fryer: Set your air fryer to 370°F (188°C).
- Arrange the Strips: Place the frozen chicken strips in the air fryer basket in a single layer.
- Cook: Air fry for 15 minutes, turning the strips halfway through the cooking time for even crispiness.
- Rest: Allow the strips to stand for 2 minutes before serving.
These cooking methods will yield crispy and delicious chicken strips, perfect for a quick meal or snack.
Preparing for Cooking
Necessary Kitchen Tools and Equipment
Cooking utensils
To master how to cook Costco chicken strips, you’ll need a few essentials. Grab a baking sheet, meat thermometer, and some parchment paper. A pair of tongs and a brush for olive oil or seasoning are your trusted companions.
Appropriate cookware
Equip yourself with a good-quality oven, air fryer, and a grill if possible. Deep frying pans with temperature control are crucial. A sturdy pan for pan-frying should also be in your repertoire.
Thawing Techniques
Refrigerator thawing
For maximum safety and flavor, place the frozen strips in the fridge. Aim for a slow, even thaw over 24 hours. This preserves texture and taste.
Cold water thawing
Short on time? Submerge the strips in a zip-lock bag and place them in cold water. Change the water every 30 minutes until thawed, typically 1-2 hours.
Safety tips during thawing
Avoid room temperature thawing; it can lead to bacterial growth. Always keep the chicken below 40°F during the thawing process.
Cooking Methods

Oven Baking
Preheating the oven: optimal temperature settings
Preheat your oven to 350°F. This is the sweet spot for ensuring your chicken strips cook evenly and remain juicy.
Preparation of chicken strips for baking
Lay the strips on a baking sheet lined with parchment paper. Lightly spray with cooking spray and season with your preferred spices.
Time and temperature guidelines
Bake for 20-25 minutes, making sure the internal temperature hits 165°F. Flip halfway through to maintain even cooking.
Tips for achieving crispy texture
Want extra crisp? Add a layer of breadcrumb coating before baking. A light drizzle of olive oil can also enhance crunchiness.
Air Frying
Benefits of using an air fryer
Air frying can cut down cooking time and oil usage without sacrificing taste. Achieve that fried texture in a fraction of the time.
Preparation steps specific to air frying
Preheat the air fryer to 400°F. Place the strips in a single layer for even cooking.
Cooking time and temperature settings
Cook for 8-10 minutes. Remember to flip halfway for uniform crispiness and golden results.
Achieving even cooking and crispiness
Don’t overload the basket. Air needs to circulate freely around the strips to ensure they’re crispy on all sides.
Pan Frying
Suitable oils and their smoke points
Opt for oils with high smoke points, like olive oil or canola oil. They withstand the high heat needed for frying.
Preparing the pan and oil
Heat the pan first, then add oil. Wait until the oil shimmers before adding the chicken strips.
Techniques for even browning
Place strips in the pan without crowding. Flip once a golden crust forms. About 3-4 minutes per side should suffice.
Drainage and keeping the strips crispy
After frying, place the strips on a wire rack over a baking sheet. This prevents them from sitting in oil and becoming soggy.
Deep Frying
Safety precautions for deep frying
Use a deep-sided pan and avoid overfilling with oil. Have a lid and baking soda nearby to tackle any flare-ups.
Choosing the right oil
Go for oils with high smoke points. Peanut oil is excellent for achieving that crisp, golden texture.
Temperature control and timing
Heat the oil to 375°F. Cook the strips for 3-5 minutes or until golden brown and crisp.
Tips for crunchy and golden strips
Double-dipping in flour and breadcrumbs enhances the crunch. Ensure oil temperature doesn’t drop by not overcrowding the pan.
Grilling (Indoor or Outdoor)
Preparing the grill for cooking
Preheat to moderate heat. Clean the grates and brush with cooking spray or oil.
Techniques for grilling chicken strips
Grill the strips for 5-7 minutes on each side. Keep the lid down for even heat distribution.
Marination ideas before grilling
Marinate with a mix of olive oil, garlic, and herbs for at least 30 minutes before grilling. This boosts flavor and keeps the meat juicy.
Monitoring and flipping for optimal results
Use tongs to flip the strips carefully. Cook until nicely charred and thoroughly done.
Flavor Enhancement and Side Dishes
Seasonings and Marinades
Popular seasoning blends
A mix of paprika, garlic powder, and black pepper works wonders. A premade seasoning mix can also speed up preparation.
Homemade vs. store-bought marinades
Go homemade for authenticity. Use simple ingredients like soy sauce, lemon juice, and herbs. Store-bought options are great for convenience.
Marination time and techniques
For best results, marinate for at least 30 minutes. Longer soaking time can further enhance flavor.
Dips and Sauces
Classic pairings with chicken strips
Think Frank’s RedHot for a spicy kick, or homemade honey mustard for sweetness.
Recipes for homemade dips
Blend yogurt, dill, and garlic for a refreshing sauce. Or try mixing ketchup with mayonnaise and a dash of paprika.
Store-bought sauces and their best uses
Frank’s RedHot and ranch dressing complement the crispy texture of the strips perfectly.
Recommended Side Dishes
Healthy options like salads and vegetables
A fresh garden salad or steamed broccoli pairs beautifully with chicken strips. Balance the crispy with something light and green.
Starchy sides like fries and mashed potatoes
Classic fries or buttery mashed potatoes round out the meal well. Consider sweet potato fries for a twist.
Creative pairing ideas for variety
Try serving strips over a bed of quinoa or in a wrap with lettuce and tomatoes for a meal full of flavor and texture.
Serving and Presentation
Tips for Plating
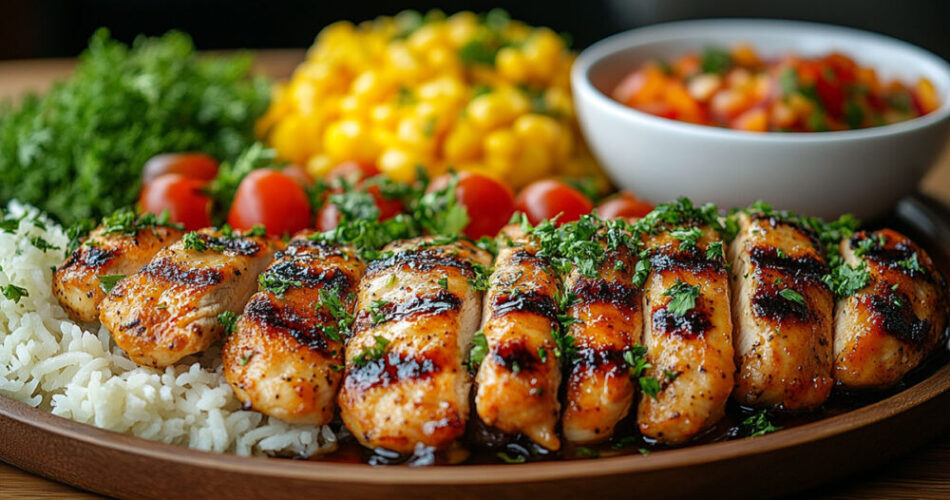
Arranging chicken strips for visual appeal
Stagger them in a fan shape on the plate. Garnish with fresh herbs and a wedge of lemon for that gourmet touch.
Using garnishes effectively
Sprinkle chopped parsley or cilantro. A drizzle of balsamic reduction adds both visual appeal and flavor.
Serving Temperatures
Ideal serving temperatures for taste and safety
Serve hot, between 140°F and 160°F. This ensures that the strips are both safe to eat and delicious.
Keeping chicken strips warm for gatherings
Place them in a warm oven set to 200°F if serving later. This keeps them toasty without drying out.
Portion Control and Dietary Considerations
Serving size recommendations
Typically, 4-5 strips per person is a good rule of thumb. Adjust based on the context, such as a meal versus an appetizer.
Adapting for dietary restrictions (e.g., gluten-free)
Opt for gluten-free breadcrumbs or coat in cornmeal. Dairy-free options like almond milk can replace eggs in the batter.
Storage and Reheating
Safe Storage Practices
Cooling down and refrigeration guidelines
Let the strips cool to room temperature before storing. Place in an airtight container and refrigerate promptly.
Maximum storage durations
Store in the fridge for up to 3 days. For longer storage, freeze them in a sealed bag for up to 2 months.
Reheating Techniques
Methods to retain crispiness when reheating
Reheat in the oven at 350°F for 10 minutes. This maintains their crispy texture without overcooking.
Avoiding common reheating mistakes
Avoid microwaving as it makes the strips soggy. Always reheat by baking or air frying for best texture.
FAQ On How To Cook Costco Chicken Strips
How long should I cook Costco chicken strips in the oven?
Cook them at 350°F (or 180°C) for about 20-25 minutes. Place the strips on a baking sheet lined with parchment paper and ensure they reach an internal temperature of 165°F using a meat thermometer for that perfect crispiness without compromising juiciness.
Can I use an air fryer?
Absolutely! Preheat your air fryer to 400°F. Arrange the strips in a single layer and cook for 8-10 minutes, flipping halfway. This method offers quicker results and a truly crispy texture, bringing out the best in these frozen chicken strips.
What other seasonings work best?
For additional flavor, a blend of olive oil, salt, pepper, and paprika does wonders. You can also try a seasoning mix with garlic powder and onion powder. Season before baking to ensure the spices infuse into the bread crumb coating.
Can I grill them?
Of course! Preheat your grill to medium-high heat. Brush the strips with olive oil and grill for 5-7 minutes on each side until golden brown and cooked through. This method adds a delightful smoky flavor to your crispy chicken.
Are there healthier cooking methods?
Yes, baking and air frying are healthier options compared to deep frying. Using methods like baking at 350°F and air frying at 400°F with minimal cooking spray can save on calories while still delivering that satisfying crunch.
How do I make them extra crispy?
For extra crispiness, double-dip the chicken strips. Coat them in flour, then beaten eggs, and finally breadcrumbs. You can use panko breadcrumbs for an even crunchier texture. Bake or air fry following the recommended times for mouthwatering results.
Can I cook them from frozen?
Yes, you can cook them directly from frozen. Just add a few extra minutes to the cooking time. In the oven, that would be about 25-30 minutes at 350°F. For the air fryer, cook for 10-12 minutes at 400°F. Always ensure they reach 165°F internally.
What are some good side dishes?
These strips pair well with a variety of side dishes. Try serving them with homemade dipping sauces, mashed potatoes, roasted vegetables, or a fresh green salad to create a balanced and delicious meal.
How do I store leftovers?
Store leftover chicken strips in an airtight container in the fridge for up to 3 days. Reheat them in the oven at 350°F for about 10 minutes or until they regain their crispiness. Avoid microwaving as it makes them soggy.
Can I use these strips in other recipes?
Definitely! Use them as a protein topping for salads, in wraps, or sliced in pasta. The versatility of these prepackaged meals makes them perfect for meal prep and a variety of creative recipes, ensuring they’re a staple in your kitchen.
Conclusion
From the consistent crunch achieved through oven-baking, to the expediency of air frying, knowing your methods is crucial. Across these techniques, maintaining an internal temperature of 165°F ensures both safety and perfect texture. Don’t overlook the power of a balanced seasoning mix; combining classic spices with olive oil on a lined baking sheet can elevate your dish. Also, using the grill or integrating bread crumbs can significantly enhance flavor and texture.
Whether you’re preheating your air fryer, utilizing parchment paper, or experimenting with extra dips, mastering the simple steps outlined can transform this staple into a culinary delight. Beyond standalone meals, these strips can uplift pastas, salads, and wraps.
In essence, the versatility and convenience of Costco chicken strips make them a kitchen favorite. With the right techniques and tools, you can polish these humble strips into a spectacular, crowd-pleasing dish.