


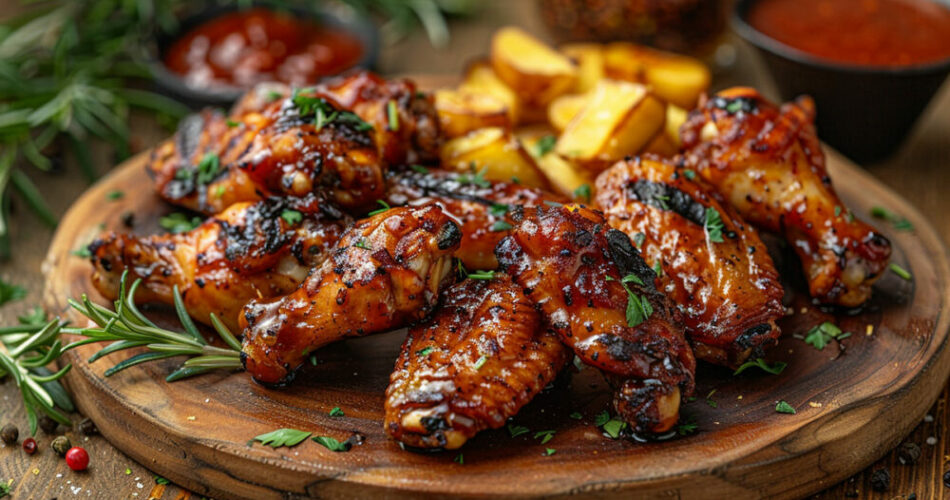
Imagine taking a bite of perfectly cooked chicken flats—juicy on the inside with a gloriously crisp exterior. It’s a bite-sized piece of heaven, isn’t it?
Now, what if I told you that you could replicate this gourmet experience in your own kitchen with a simple trip to Costco and your trusty oven or grill? It’s true!
As someone who has spent a solid fifteen years exploring the alchemy of cooking, I’ve found a special place in my heart for these delectably flat bites.
In this article, we’ll dive into the world of Costco chicken flats, exploring the culinary techniques that transform them from frozen to fabulous.
You’ll discover the secrets behind seasoning chicken, how to achieve that crispy chicken magic, and the safe internal temperature to ensure your poultry is cooked to perfection.
From kitchenware to marinades, every step is your stepping stone to snacking success.
Whether you’re gearing up for a tailgate party or searching for dinner ideas, by the end of this guide, you’ll be equipped with the know-how to cook chicken flats that will have everyone clamoring for seconds. Ready to take on the role of a home kitchen hero? Let’s get cooking!
How To Cook Costco Chicken Flats: The Quick Version
To cook Costco chicken flats, you can follow these steps:
- Preheat your oven to 425°F (218°C).
- Line a baking sheet with parchment paper.
- Place the frozen chicken flats in a single layer on the prepared baking sheet.
- Immediately place the baking sheet in the preheated oven. Do not wait for the oven to preheat.
- Bake for 50 minutes or until an instant-read thermometer registers 160°F (71°C) when inserted into the thickest part of the wing.
- Remove the pan from the oven and let the wings rest for 5 minutes.
- Toss the wings in your favorite sauce, such as barbecue or buffalo sauce, and serve.
This method will result in crispy and well-cooked chicken flats.
If you prefer to use an air fryer, you can follow the instructions provided by Cuisinart on the Costco website.
Set the air fryer to 205°C (400°F) for 25 minutes and cook until golden and crispy. When the chicken wings are done, toss them immediately in your preferred sauce or add the toppings of your choice.
Preparing Costco Chicken Flats

Selection and Buying Tips
When you’re strolling through the cold aisles, think about plumpness and color. Vibrant, creamy-hued chicken flats are the prize. Check for uniform size—this helps them cook evenly.
Understanding packaging and labels
Labels are your roadmap. “Organic,” “antibiotic-free,” and “non-GMO” might catch your eye. Each whispers a story of upbringing and what you’re putting into your body.
Necessary Preparations Before Cooking
Thawing safely
In the fridge overnight, or in cold water if pressed for time, thawing with care means planning ahead but ensures safety.
Cleaning and trimming
Rinse lightly under cold water, pat dry, trim off any excess skin. Minimal touch, maximum effect.
Marination strategies for enhanced flavor
Immerse them in a concoction of choice—citrus, herbs, spices. Overnight in the fridge and their taste deepens, gets richer.
Tools and Equipment Needed
Cooking utensils and their purposes
Tongs, baking sheet, grill brush—each a knight in the kitchen’s army, ready to battle for the perfect chicken flat.
Importance of a good thermometer
A trusty thermometer is your secret weapon. It signals the precise moment when how to cook Costco chicken flats transitions from a mere task to a triumphant success.
Cooking Techniques Explored
Grilling
Preparing your grill for chicken flats
Clean grate, medium heat, a touch of oil to keep the dance between metal and meat smooth.
Step-by-step grilling process
Lay them down, hear the sizzle, flip once. A simple dance.
Tips for achieving perfect char and juiciness
Char demands attention; juiciness requires restraint. Balance the two with watchful eyes and a controlled flame.
Baking
Oven settings and preparation
Preheat the oven—consistency is key. A steady 375°F will wrap each flat in warmth, cooking it through.
Marination and seasoning for baking
The arts of marination and seasoning come together here, offering a promise of flavor in every bite.
How to ensure even cooking
Rotate your baking sheet, switch positions. Each flat basks in the glow evenly.
Frying
Choosing the right oil
A high smoke point. Think canola, or vegetable—stable under the fire of the skillet.
Breading options and techniques
Dip in flour, eggs, then breadcrumbs. It’s a rhythm of coating that ends in crunch.
Temperature control and safety tips
Steady—350°F. No more, lest the oil makes a break for it; a splatter, a smoke.
Slow Cooking
Benefits of slow cooking chicken flats
Time unravels the muscle, softening each fiber to submission. Low and slow, the flats yield to tenderness.
Setting up your slow cooker
Cozy it in, set the dial, walk away. The cooker weaves its magic unwatched.
Recipes and ideas for slow-cooked dishes
Think beyond the flat—a slow-cooked chicken chili, or a savory flat soup. Flavors marry; time tells their tale.
Advanced Cooking Techniques
Sous Vide Cooking
The science behind sous vide
Temperature precision, water’s gentle cradle—it’s a lab in your kitchen, producing succulent results every time.
Equipment and setup for sous vide at home
Sealer, bags, and a water bath. The trinity of sous vide speaks a language of consistency.
Cooking times and temperatures
Exactness reigns, commanding a tempo, a stage set for the flats—usually around 149°F, give or take, an hour, maybe more.
Smoking
Selecting wood chips for flavor
Mesquite, hickory, applewood—each a whisper of earth, a different tune sung atop the coals.
Temperature control and monitoring
Low, like a hum, 225°F to 250°F. Linger there, let smoke weave into fibers.
Finishing touches post-smoking
A glaze, perhaps. Something that sticks, that glistens—adds a final touch of sweet to the savory.
Risks and Safety Measures
Food Safety Considerations
Importance of cooking to the right temperature
Internal temps don’t lie. At 165°F, safety raises its flag—you’re good to go.
Avoiding cross-contamination
Keep it segregated. Uncooked here, cooked there. Separate utensils, separate surfaces. A disciplined dance ensures safety.
Managing Common Cooking Mistakes
Overcooking and drying out
Keep vigilant, set timers, trust your thermometer. The flats forgive, but they do not forget.
Undercooking and potential health risks
Underdone is undone. It’s a risk not worth biting.
Allergen Awareness
Common allergens in marinades and coatings
Nuts, gluten, dairy. Hidden in the mix, lurking in labels. Read each word—dodge what doesn’t sit well.
Label reading and substitution tips
Substitute with precision. Almond flour for wheat, coconut milk for cow’s. A tweak here, a swap there, keeps all bellies content.
Complementary Sides and Pairings
Choosing the Right Sides
Healthy greens and vegetables
A foil to the crispy flat. Fresh, verdant, biting in its simplicity.
Starches and grains for balance
A supporting cast. Potatoes, rice, bread—each an anchor to the nimble flat.
Sauce and Seasoning Pairings
Homemade sauces to enhance flavors
Your craft, your creation. A dip that defines, uplifts, complements.
Seasoning blends and their best use cases
A sprinkle of this, a pinch of that. Blend a profile that elevates—does not overshadow.
Preserving Leftovers
Storage Tips
Cooling and packaging for freshness
Let them rest, seal them tight. A chill extends their encore until the morrow.
Refrigeration versus freezing
Chill extends life by days, freeze stretches it to weeks. Choose based on your craving’s timetable.
Reheating Without Losing Quality
Best practices for microwave, oven, and stovetop
Gentle heat revives the flat. A zap, a warm bath in the oven’s glow, or a quick sauté—each a kiss of life.
FAQ On How To Cook Costco Chicken Flats
What’s the best way to thaw Costco chicken flats?
Thawing must be patient to ensure safety and quality. I like to move them from the freezer to the refrigerator the night before. This slow process keeps the chicken flats at a cool, safe temperature, preventing unwanted bacteria from crashing your dinner party.
Can I cook Costco chicken flats from frozen?
Absolutely, you can go straight from freezer to oven. Just expect a bit longer in the kitchen – up to 50% more cooking time. Crank the heat a bit higher and keep an eye on that internal temperature. Patience meets convenience, and the payoff is scrumptious.
What’s the best temperature to cook chicken flats?
Hot enough to mean business, yet gentle to embrace the juices. A solid 375°F (190°C) does the trick – it’s the sweet spot for turning those flats from icy to crispy while locking in moisture. Oven-toasted or grill-charred, perfection calls for precision.
Do I need to flip the chicken flats while cooking?
Flip once, halfway through. This simple act ensures every bite is evenly crisped. Whether baking or grilling, showing both sides some heat means you’re crafting a golden shell while keeping the inside tender. It’s a small step for you, a giant leap for chicken flat deliciousness.
How long should I marinate the chicken flats before cooking?
Give them a marinade bath for at least 30 minutes, though I swear by an overnight soak. It’s a timeline that welcomes flavor deep into the meat. From herbs to spices, those extra hours craft a taste that lingers – in a good way.
Is it better to bake or grill Costco chicken flats?
It comes down to taste. Baking is low-fuss, yielding evenly cooked meat with less oversight. Grilling whispers of summer and imparts a smoky note. Both paths lead to satisfaction – choose based on mood or convenience. The end goal: party appetizers worthy of praise.
What are some good seasonings for chicken flats?
Seasonings are personal, like a signature. I reach for garlic powder, a pinch of paprika, and sometimes a brush of honey for a sticky sweet finish.
Experimenting with seasoning blends is where your creativity shines. Surprise yourself; the options in your pantry are waiting to mingle.
How do I avoid drying out the chicken flats while cooking?
Moisture is king. Ensure it by not skimping on cook time or heat – both should be just right. A cooking thermometer takes the guesswork out, hitting that safe internal temperature without crossing into parched territory.
Remember, it’s about preserving those precious juices.
Can I use an air fryer to cook Costco chicken flats?
An air fryer is a modern knight in shining armor for frozen chicken. It circulates heat like a mini tornado, leaving you with crispy chicken wings without a pool of oil. The result? A texture that crackles and a process that simplifies. Plus, cleanup’s a breeze.
How do I store leftovers of cooked chicken flats?
Store them like a treasure. Airtight containers are keys, and the refrigerator is the vault. They’ll sit nicely for a couple of days, ready for a reheating session that resurrects the joy.
For longer storage, freezing works, but remember, the journey back to the table may affect the crispiness.
Conclusion
Mastering how to cook Costco chicken flats can feel like you’ve conquered a culinary feat. Through the heat of an oven or the sizzle of a grill, you’ve transformed a simple frozen item into a show-stopping dish. Remember, the beauty lies in the journey—the seasoning’s waltz, the marinade’s embrace, and the final crunch.
So, as your kitchen cools and your plates empty, know that you have spiced, seared, and served a piece of art. These flats, humble yet so versatile, have brought smiles and satisfaction to your table.
Store those leftovers with care, and let your mind already dream of the next recipe twist. Maybe honey-glazed, spicy Buffalo, or garlic parmesan? The path is yours to flavor. Cooking is a rhythm, and with each beat, you become more attuned to the symphony of tastes. Until next time, may your meals be merry, and your cooking bold.